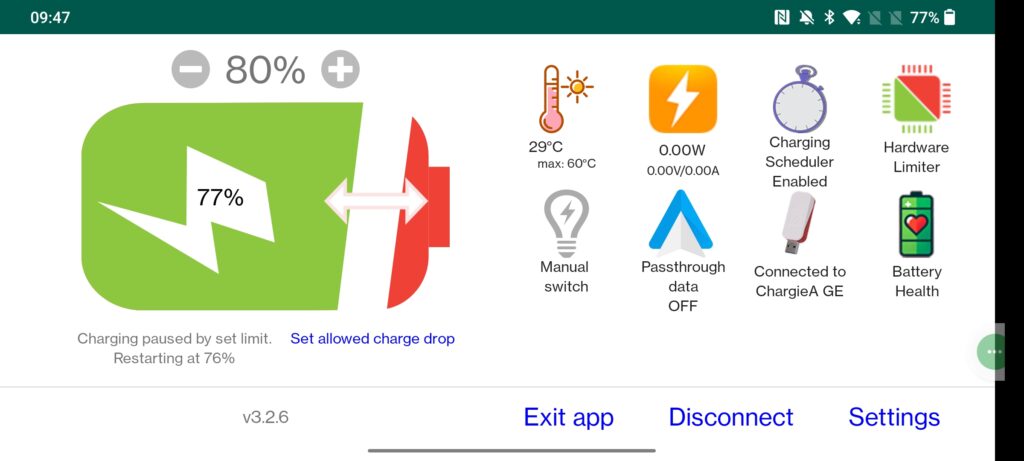
The Chargie Android app
The app turns the Chargie USB switch on or off, depending on the state of charge reported by the Android smartphone, following a hysteresis charge/discharge curve.
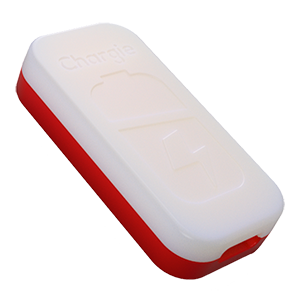
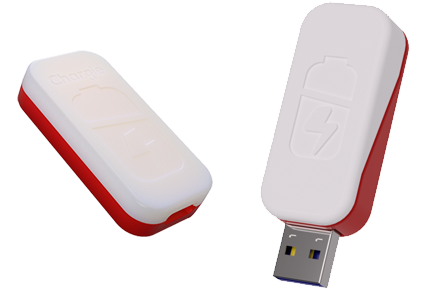
The Chargie USB device
The device acts as a Bluetooth-controlled switch for your charging sessions. That is because your phone manufacturer did not provide you with a way of turning charging off before 100%. It is possible to do it just with software, but only if you get low-level access to the Android system, which is very hard to do and not for all phone types.
On the other hand, Chargie works for all stock phones, out of the box.
How to set it up
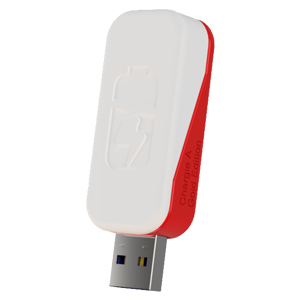
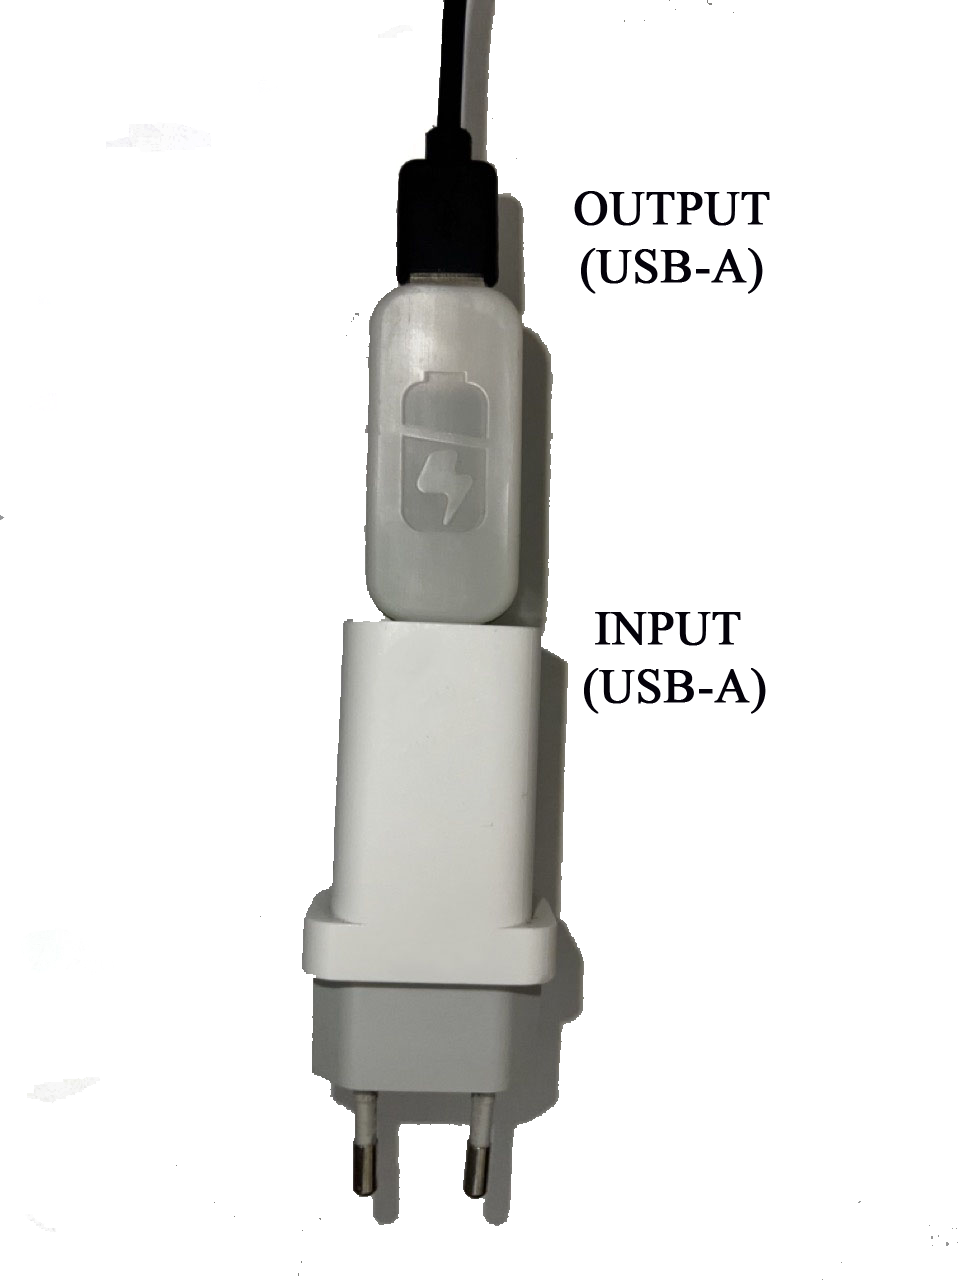
1. Install the Chargie dongle
2. Download the Chargie app from Google Play
You can download the Chargie app right from the standard Google Play on your phone by searching “Chargie”, or the link below:
https://play.google.com/store/apps/details?id=com.ble.chargie
The app will ask for the following permissions:
- Bluetooth – needed for telling the hardware switch when to shut off.
- Location Access – needed by Google to scan for BLE (Bluetooth Low Energy) devices.
Android 6 users, download the legacy Chargie app from here: https://drive.google.com/drive/folders/1AmC4R-6PHTb0rNvW0VmYtGoo-7bW6bpg?usp=drive_link
IMPORTANT PRIVACY NOTICE
The Chargie app does not use Location Services for its own inner workings other than for scanning BLE devices. As you may have noticed, it does not have internet access and does not transmit or store your location. The Location setting and permissions are needed for up to Android 11 to be able to scan. Android 12 and above have a special permissions called “Nearby Devices”. This is required by Google to scan for nearby devices.
3. Let it run in the background

The Chargie app and the Chargie USB device only work together. It is the app who turns the switch on or off, and the one providing feedback when the battery reaches the desired level.
If you kill the app, the Chargie USB device will act just like a regular power cable, because it won’t have feedback from the app anymore.
The system has been designed like this from the very beginning, to avoid your phone getting discharged should anything happen to the app.
The Android system can kill the app or put it to sleep at its own will for various unknown reasons. This happens rarely, but we considered it’s more important to have your phone charged in the morning, even if to 100%, than not having it charged at all.
3.A. Power saving settings
You should disable any power saving schemes your phone may apply to the Chargie app. The app needs to be permanently active and must not be put to sleep by Android or by 3rd party software or manufacturer firmware.
We will make a comprehensive guide on how to do that for each major phone type. However, as a rule of thumb, you can deactivate power saving on a specific app by holding its icon and accessing “App info” (Android 9 and 10) and then Battery Optimizations.
Update: apparently such a guide already exists. Go to https://dontkillmyapp.com and look for your phone type.
Please try these settings with your phone and see what works for you.
4. Plug in to connect automatically
When you start the app, it will scan for Bluetooth devices. Make sure you’ve accepted any dialogs when the app starts, as they grant the necessary rights for system to work properly. Take special care of Location Access – it needs to be on, so your Android device can scan other Bluetooth Low Energy devices (Google requirement, your location will not be used by the Chargie app).
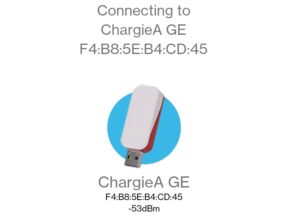
The app will then look for the nearest Chargie devices it finds and will automatically connect to them in this priority if the phone is charging:
1. if it’s in the list, the last device it’s been connected to
2. if it’s a QuickConnect device (Nov. 2023 – ) and power starting flowing through it in the past 10 seconds, it will prioritize that one.
3. the ones with the strongest signal (RSSI measured in dBm) in decreasing order.
If the phone is not charging, or if you prefer any other device than the one actively being tested, just tap the device in the scrollable list and it will connect manually. This is useful for when you want to configure a device that you’re using with the app-independent hardware limiter.
4.1 QuickConnect devices
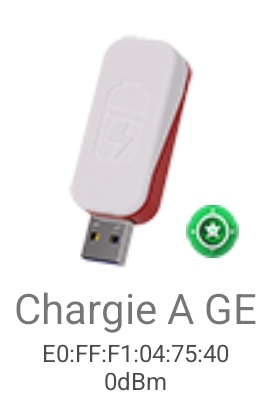
QuickConnect-enabled Chargie devices have been produced starting November 2023 and have firmware version 9. They help those users who have multiple Chargie devices around by letting the app select the last device that detected power flowing through in the past 10 seconds.
Therefore, if such a device is detected, it will be connected to with maximum priority. For example, if a user has 100 Chargie devices around and switches the app between them, connection time will dramatically change from almost 10-20 minutes to a few seconds.
You can recognize a QuickConnect Chargie by looking at its scanned icon (it should contain a green coloured dot with a star inside and 0dBm reported RSSI).
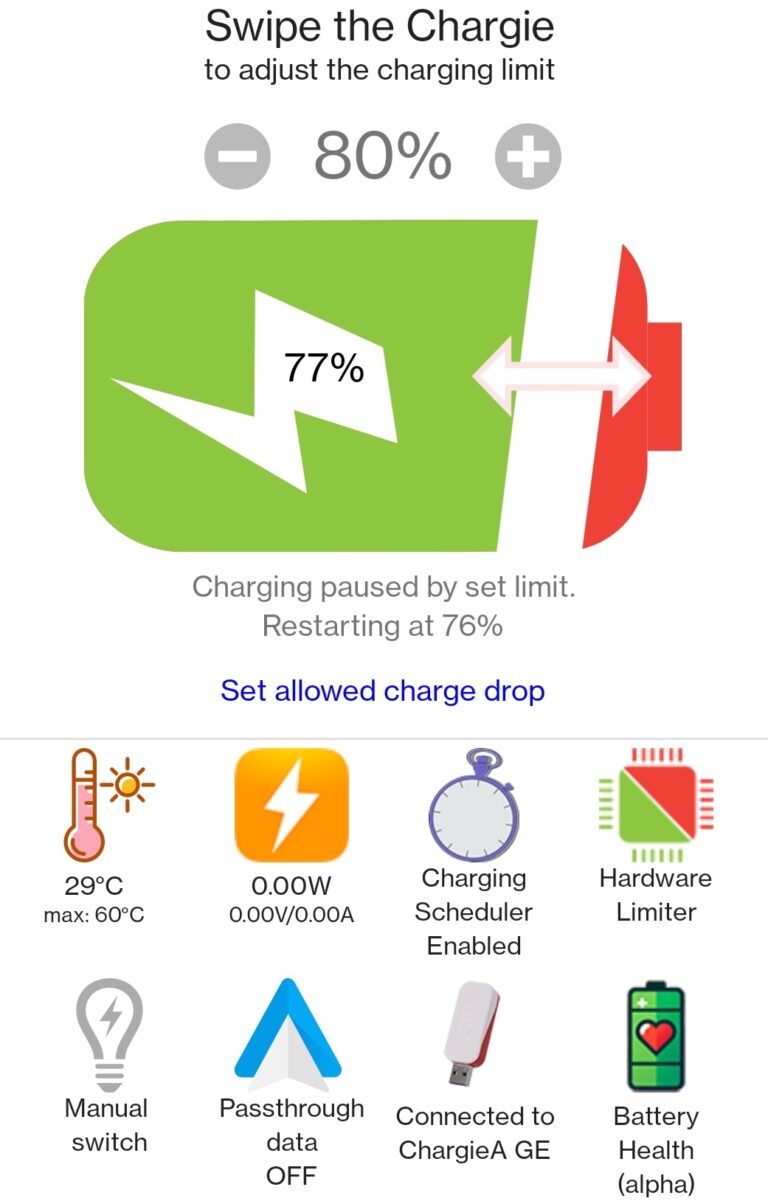
5. Set your desired charge limit (%)
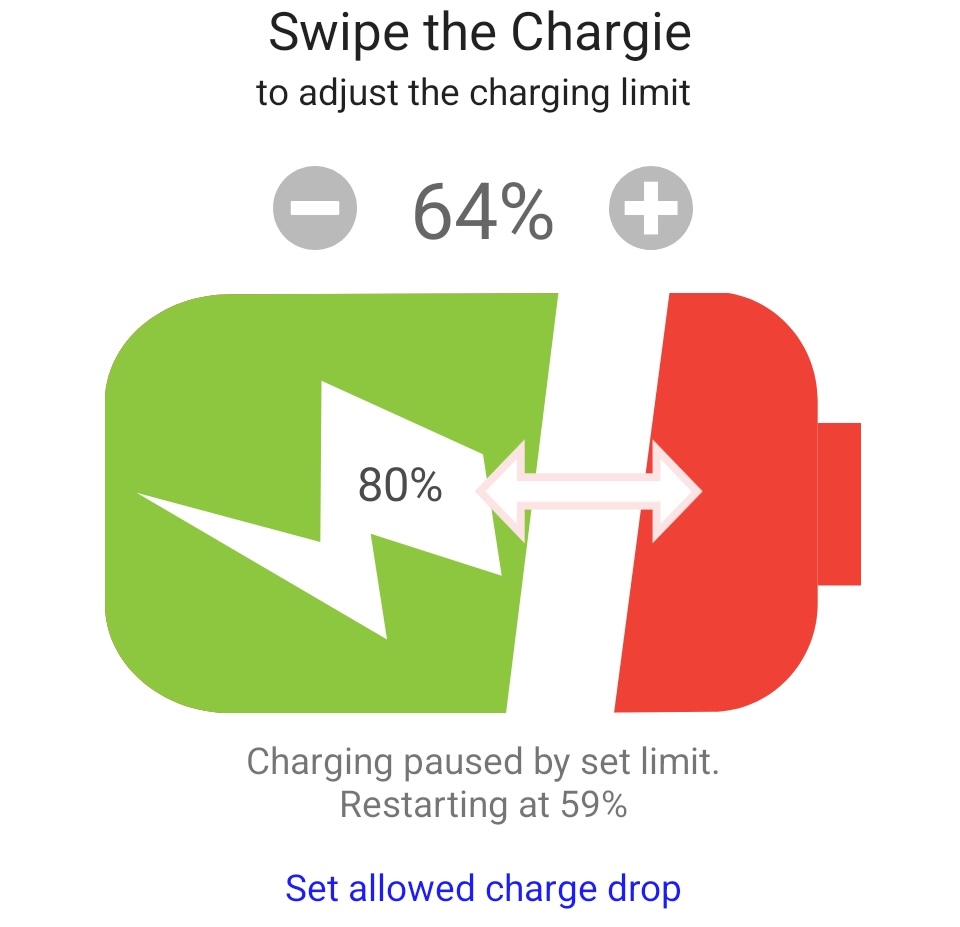
After you’ve connected the app to the Chargie USB device, drag the battery-shaped slider to your wish. You will notice that if the current charge percentage is higher than what you set, the red LED on Chargie will turn off, and so will power to your phone.
Allowed Charge Drop
Chargie lets your battery fill up to the percentage you choose, waits for it to drop a certain amount and then restarts charging.
The amount it lets to be discharged before recharging is defined by Allowed Charge Drop and configurable in the respective popup. Please pay attention, this is a delta value, ACD is not absolute. It’s just the amount the SoC will drop by. For example, if you set the charge limit to 90 and ACD to 3%, the charge will bounce between 90 and 90-3=87%.
You can charge up to whatever value you wish, and it’s best if you charge somewhere between 80 and 90%, depending on your daily needs.
There are days when you know you’ll need a full battery. Just set the threshold to 100% and Chargie will still do a better job than if you hadn’t used it, by going to 100% and then performing a hysteretic charge. What that means is it lets the phone discharge the Allowed Charge Drop amount and then starts to recharge again.
The discharge normally happens very slowly during the night, since it’s being done with the screen off. This lets the battery cool down to room temperature and doesn’t add stress to it, like a normal charger would by constantly topping it up to 100%.
All of this should keep the battery happy and less stressed than normal charging, which surely guarantees a longer lifespan and a more satisfying overall user experience.
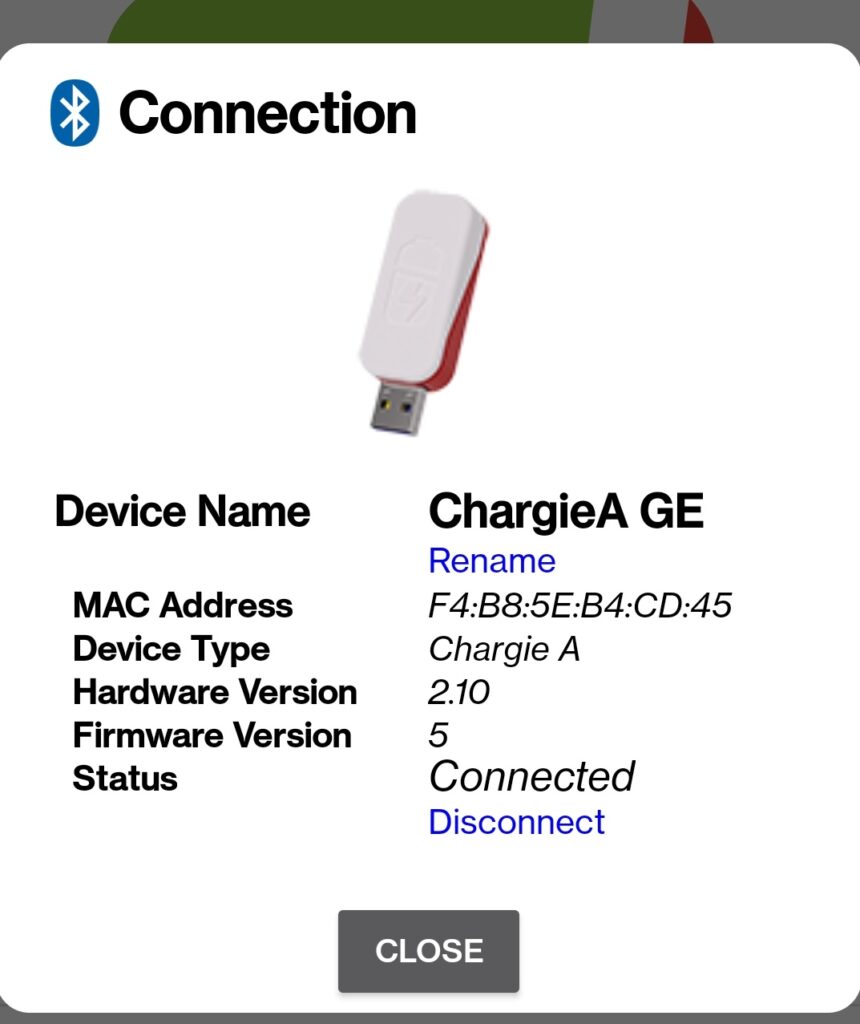
6. Device Information
Here, you’ll find important information about your Chargie device:
– “Device Name” indicates the name of your Chargie device, which you can customize by tapping “Rename.” The new name will be stored in the Chargie device’s flash memory and will be visible as such to other phones connecting to it in the future.
– “MAC Address” is the unique identifier for your Chargie device.
– “Device Type” confirms the model of your Chargie.
– “Hardware Version” and “Firmware Version” display the current versions installed on your device.
– “Status” shows whether the Chargie is currently connected to your phone.
You can tap “Disconnect” to stop charging or “CLOSE” to return to the main app screen.
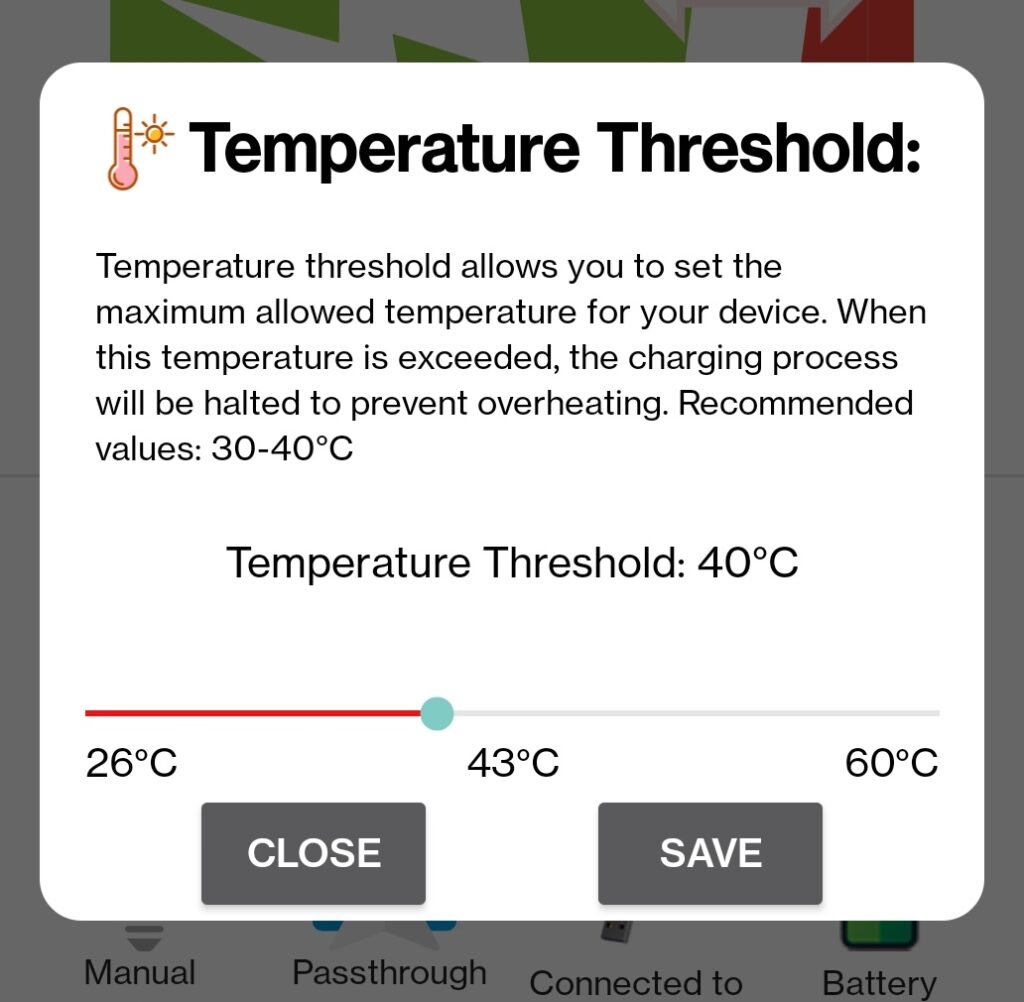
7. Overtemperature Cutoff Threshold
This screen is your Temperature Threshold control for Chargie.
It allows you to set a maximum temperature limit to prevent your device from overheating during charging. Slide the dot along the bar to your desired threshold, within the recommended range of 30-40°C.
The current temperature is indicated for reference. If your device exceeds the set threshold, charging will pause to cool down. After adjusting, tap ‘SAVE’ to apply changes or ‘CLOSE’ to exit without saving.
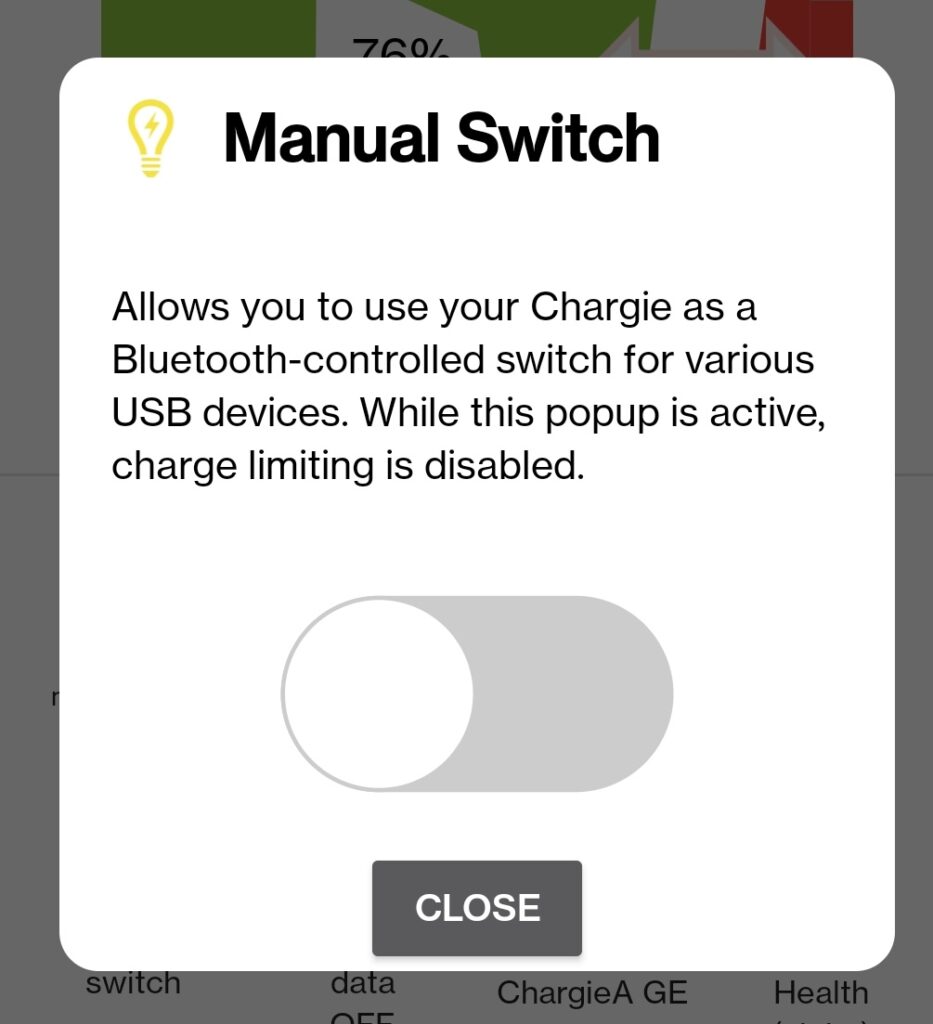
8. Manual Switch Mode
Attention: by enabling this mode, you will disable the Active Charge Limiting mode, which means your phone will charge to 100% or will not charge at all, depending on the state of the switch. To re-enable charge limiting, just close the popup.
By enabling this mode, your Chargie will act as a simple on/off switch for USB devices. You’ll be able to remotely control any type of USB-A device from the Chargie app and invent all sorts of use cases where Chargie saves the day.
9. Charging Scheduler
This is the Charging Scheduler feature of your Chargie app. It allows you to program a charging plan for each day of the week.
You can set specific times and desired battery charge levels for your phone to achieve by those times. This ensures that your device is charged to the set level by the time you need it, without overcharging overnight.
The scheduler is currently enabled, as indicated by the switch at the top.
To modify your schedule, tap on the day you want to change.
Once you’ve set your schedule, you can close this window or use the “TOP UP NOW” button for an immediate charge to the set level.
9. Passthrough Data Mode
* only available on Chargie A, Chargie C Basic and newer devices. Chargie Founder Edition does not have this function.
The Passthrough Data Mode is a significant feature of the Chargie device that maintains a data connection between your phone and another device, such as a car’s Android Auto system or a PC, even when the phone is not actively charging. This mode is essential because it allows your phone to communicate with connected systems without interrupting the data stream due to charging pauses set by Chargie’s smart charging schedules.
The value of the Passthrough Data Mode lies in its ability to:
1. Ensure Continuity: It ensures that functionalities reliant on a data connection, such as file transfers or synchronization with a PC, are not interrupted when the phone stops charging after reaching a set threshold.
2. Facilitate Seamless Integration: For car systems like Android Auto, it allows for uninterrupted navigation, music streaming, and hands-free communication, enhancing the driving experience even when the phone is conserving battery life through controlled charging.
3. Support Gaming Sessions: While gaming on a phone connected to a computer or a gaming accessory, Passthrough Data Mode ensures that the gaming session is not affected by charging controls, providing an uninterrupted gaming experience.
4. Streamline Development Work: Developers can continue to debug or run software on a connected computer without the phone’s charge state affecting the data connection, which is crucial for efficient development workflows.
5. Enhance Media Control: When connected to media systems or speakers, the phone can continue to stream or control media playback without interference from charging states, maintaining a stable connection for a better entertainment experience.
This feature, therefore, is not just a convenience; it’s a tool that expands the utility of your device by making sure that its connectivity is always available, regardless of charging status. It bridges the gap between power management and connectivity needs effectively.
Possible issues
Some phones, like the Pixel 3a (tested in our lab) don’t allow power to be resumed from a partial charging state (such as the one induced by the Android Auto mode). In that case, you need to go to Settings – Android Auto and enable “Blip power before charging”. This is the only workaround we could find, since the phones probably have this hardwired.
From our experience, we’ve tested Android Auto mode on a Xiaomi and a OnePlus 7T and they didn’t exhibit the abnormal behavior, so no blipping was necessary.
Shortly cutting off power completely before resuming it may interrupt Android Auto but it should restore connection immediately.
As there are a multitude of configuration possibilities for this mode, we DO NOT GUARANTEE that your Android Auto device will work with Chargie well. You are using this function at your own discretion and risk, as it is merely a workaround and not a scientifically-sound way of data transmission while the phone is not actively charged. But it does the trick for most phones we’ve tested.
10. Hardware Limiter
* only available on Chargie A devices. Chargie Founder Edition does not have this function.
There are some phones that can’t run the Chargie app, and there are people who would rather shut off their device when charging at night.
The Hardware Power Limiter function lets you set a power threshold (in Watts). This value will be sent to the Chargie A and newer device and stored into its non-volatile memory. *
When charging, the Chargie device constantly monitors power and, if it goes south of the threshold you set for more than 30 seconds, it stops the charging process.
It then waits for a configurable amount of time (you can set it in the Hardware Limiter menu) and briefly rechecks power until the power threshold condition (+1W) is met. You should configure this to a value you estimate as fit for your application.
Charge anything
The Hardware Limiter is a very powerful and useful function for all kinds of devices that can’t run Chargie, like lithium ion batteries, various devices like mobile projectors or even old phones.
Possible issues
While you may find it easy to use in some cases, if you set the recheck timeout very high, the phone will charge to the maximum after a few days, since the net power uptake will be higher than what the device actually consumes between the power checks. But this is generally not the case for one-night charging. We designed default values to work very well in 99.9% of the use cases.
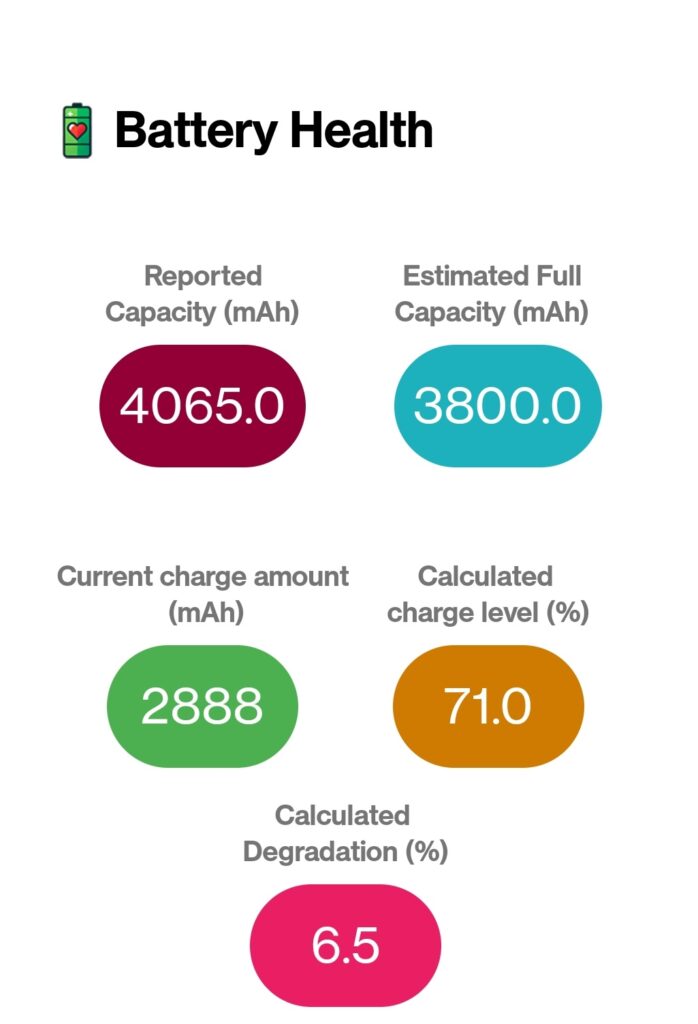
11. Battery Health
The “Battery Health” feature in your Chargie app provides an estimation of your phone’s battery condition. It displays:
– “Reported Capacity (mAh)”: This is the capacity the phone’s battery reports.
– “Estimated Full Capacity (mAh)”: This is the capacity your battery is estimated to have when fully charged.
– “Current Charge Amount (mAh)”: The amount of charge your battery currently holds.
– “Calculated Charge Level (%)”: The percentage of charge your battery currently has relative to the estimated full capacity.
– “Calculated Degradation (%)”: An estimate of how much your battery’s capacity has degraded over time.
It’s important to note that this is an approximate calculation and may not be perfectly accurate, as it can vary with each charge cycle. Manufacturers might state a higher capacity than what the battery actually has, affecting the degradation calculation.
For a more precise assessment, we recommend using the Manual Switch function to fully charge your phone to 100%, then revisiting this section for an updated reading. Future app updates will include the option to reset the degradation percentage to zero and track from that point forward.
The sample image is a screenshot taken from a 2019 OnePlus 7T device, whose degradation is barely 6.5% (in reality it’s more like 5%, but that can only be seen clearly at 100%). It has been used extensively with Chargie since it was new.
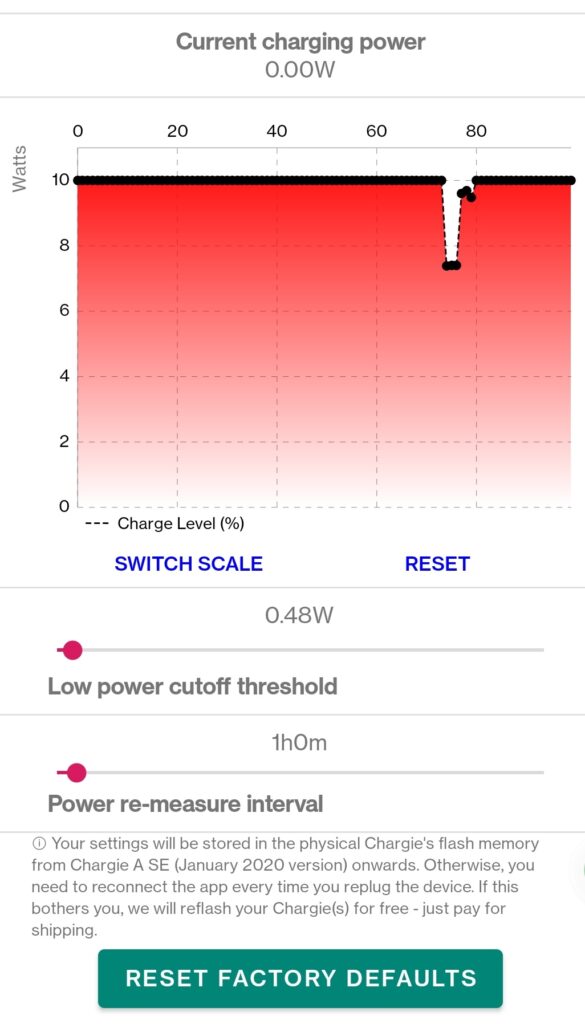
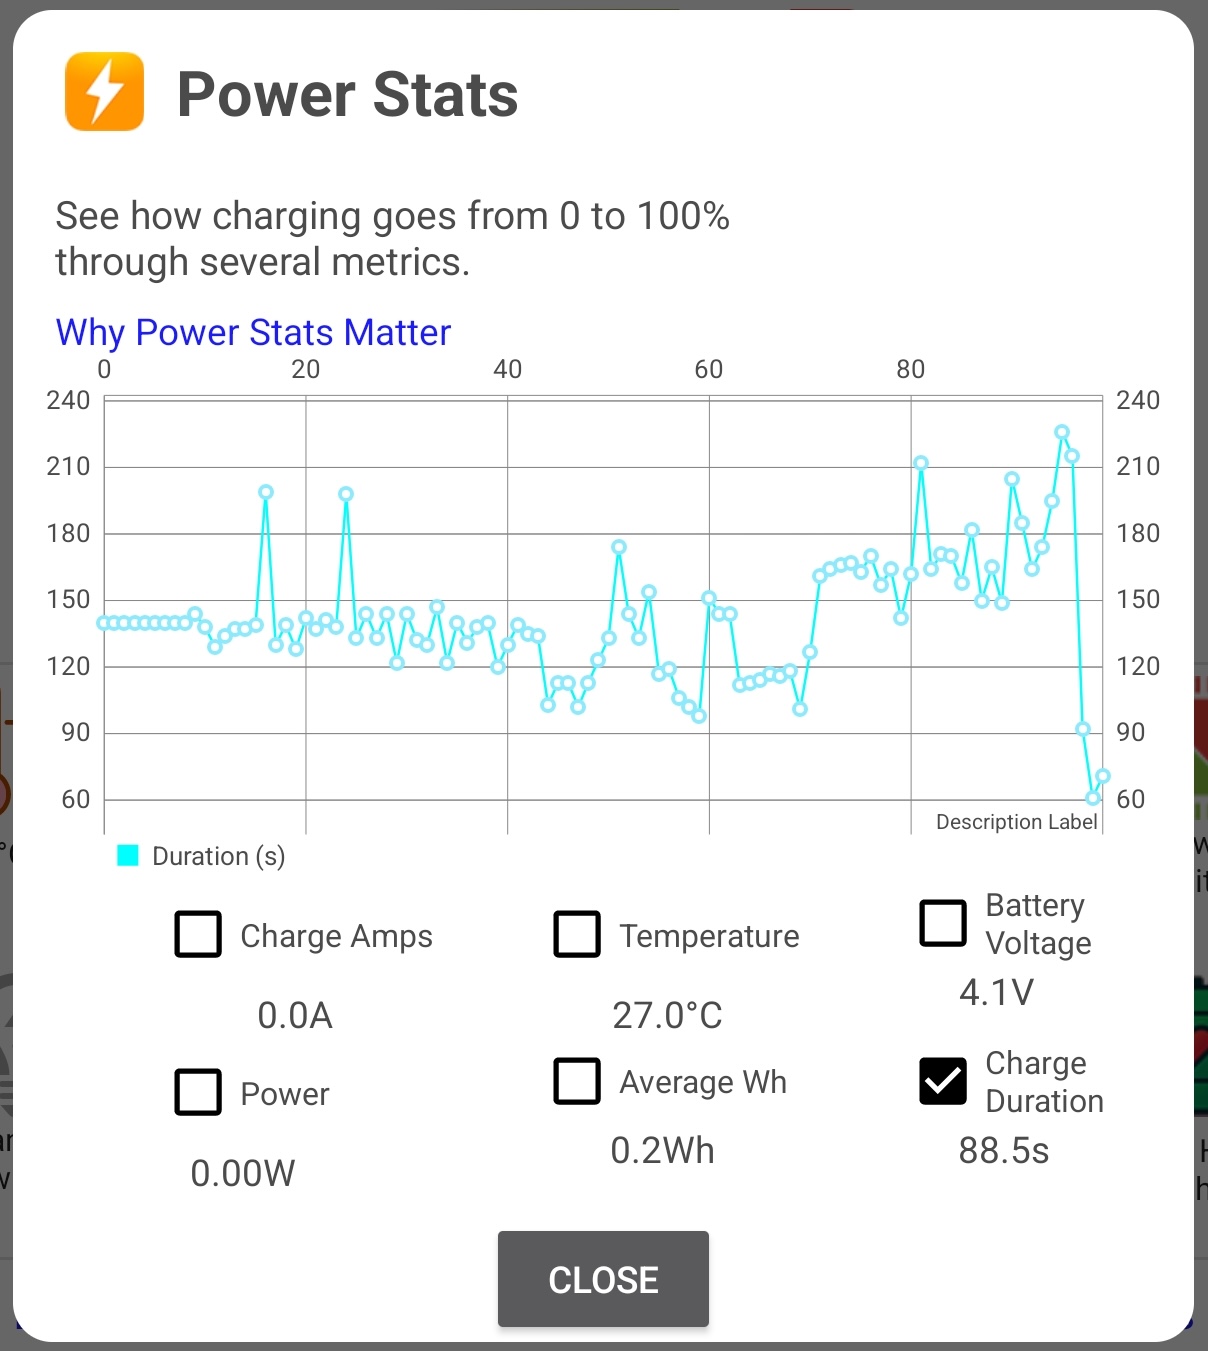
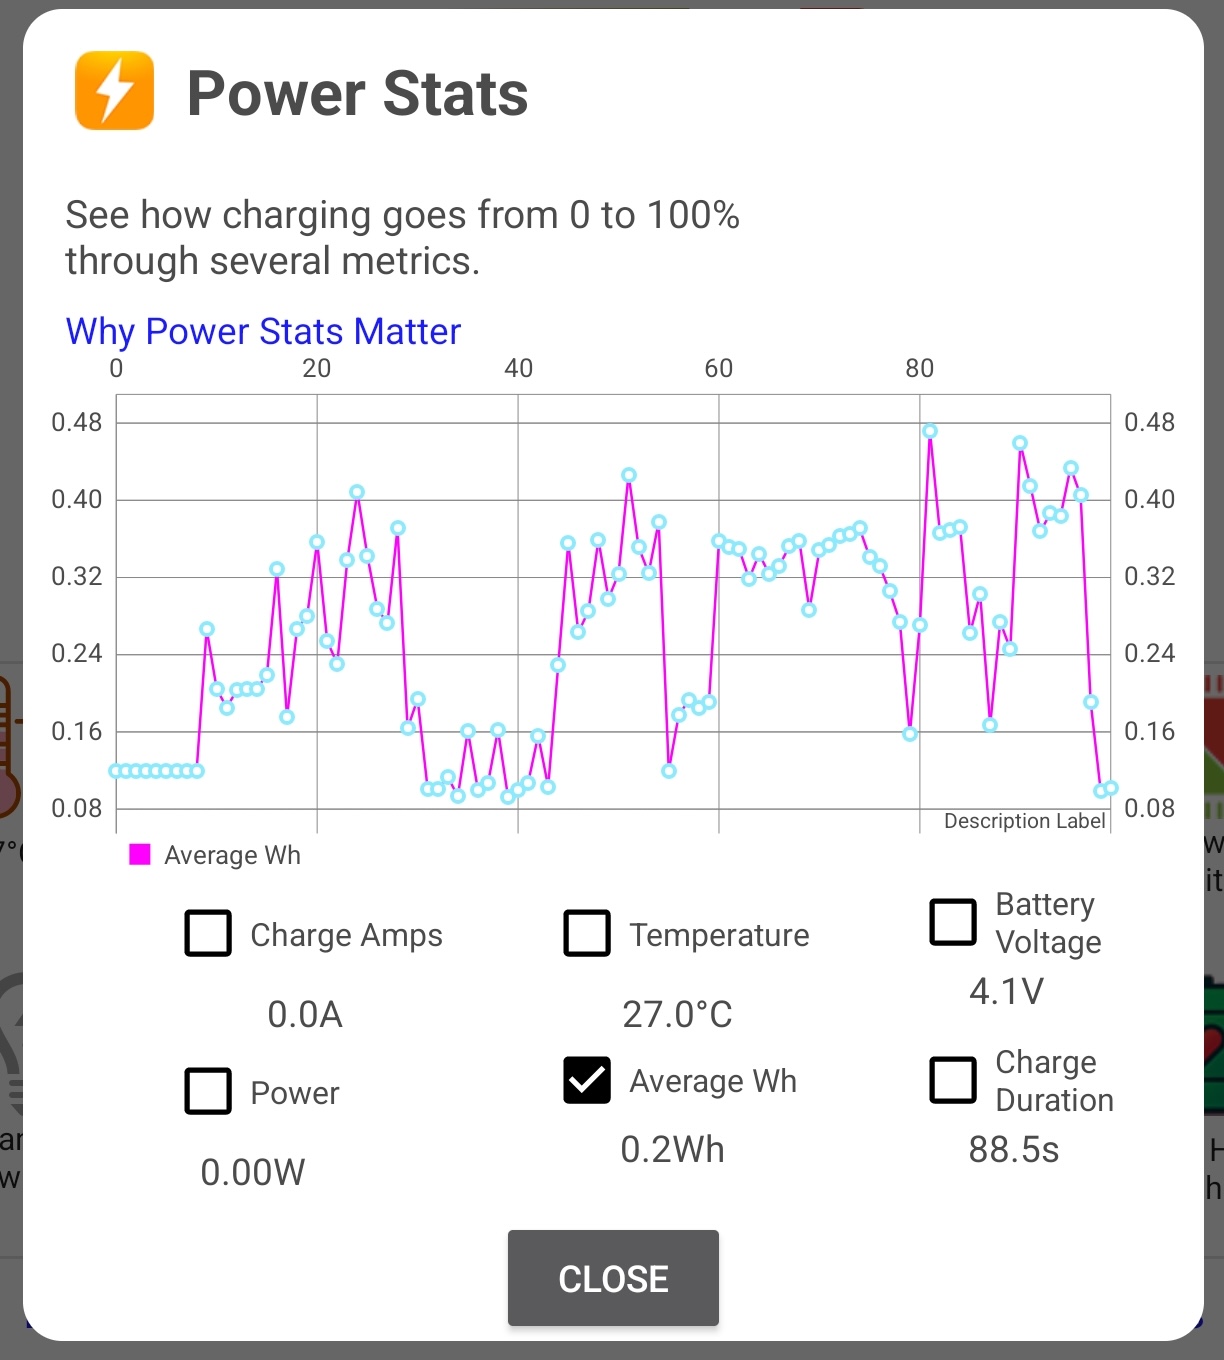
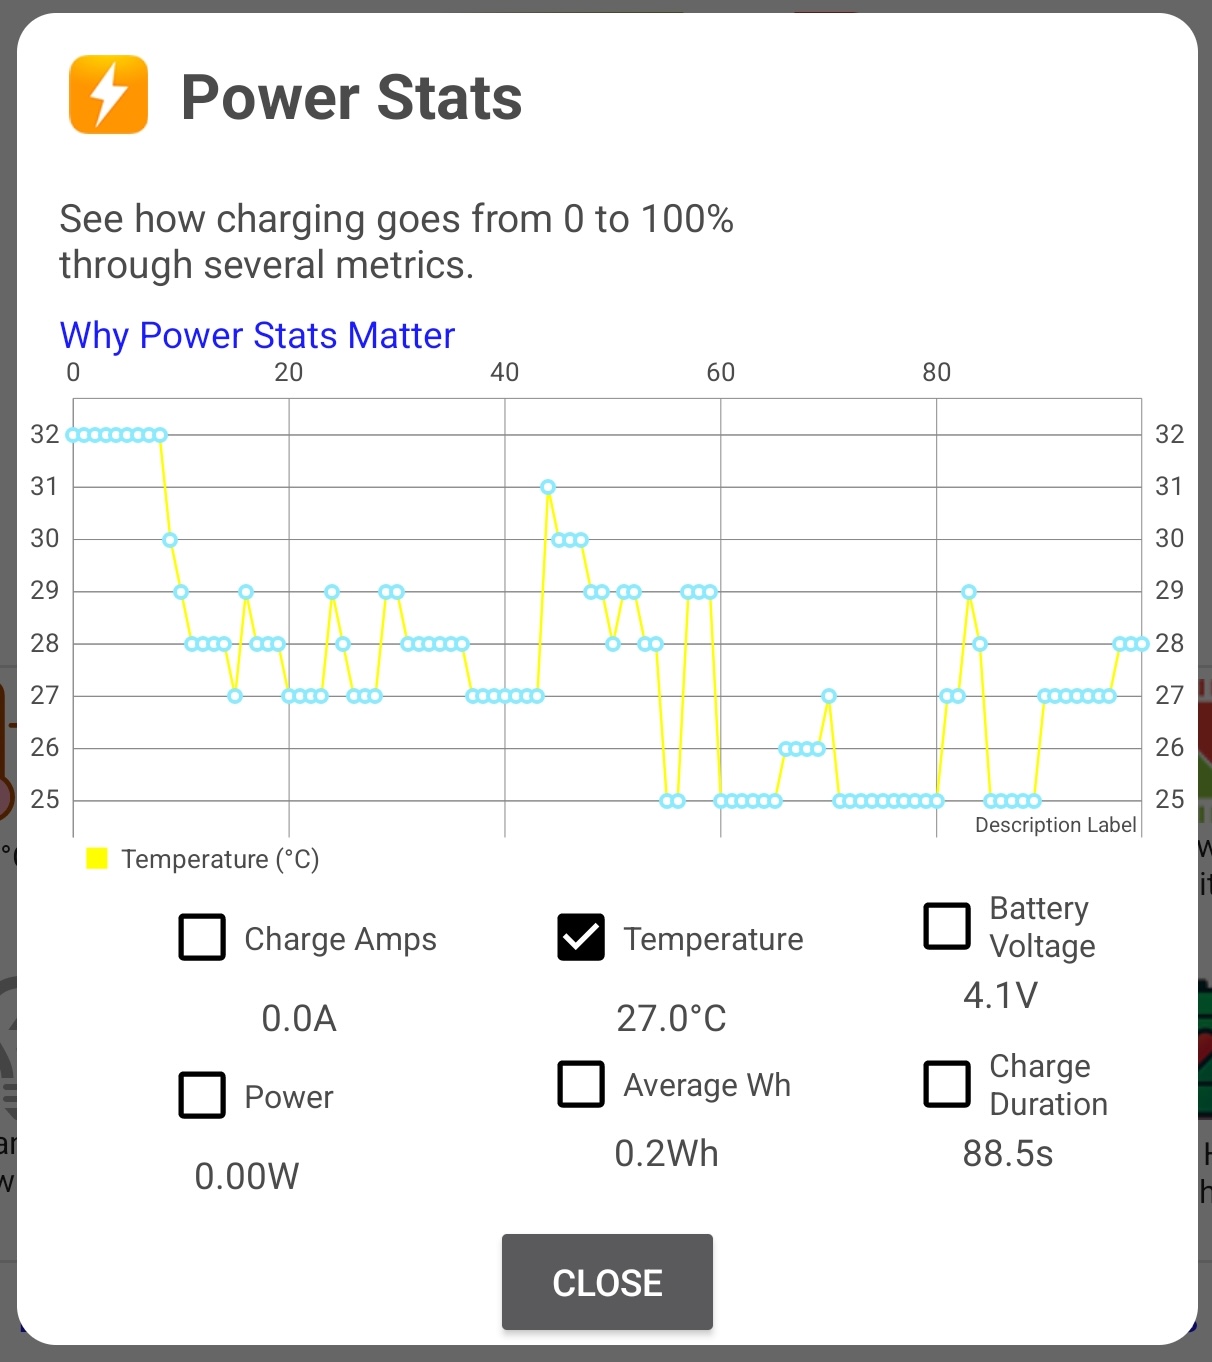
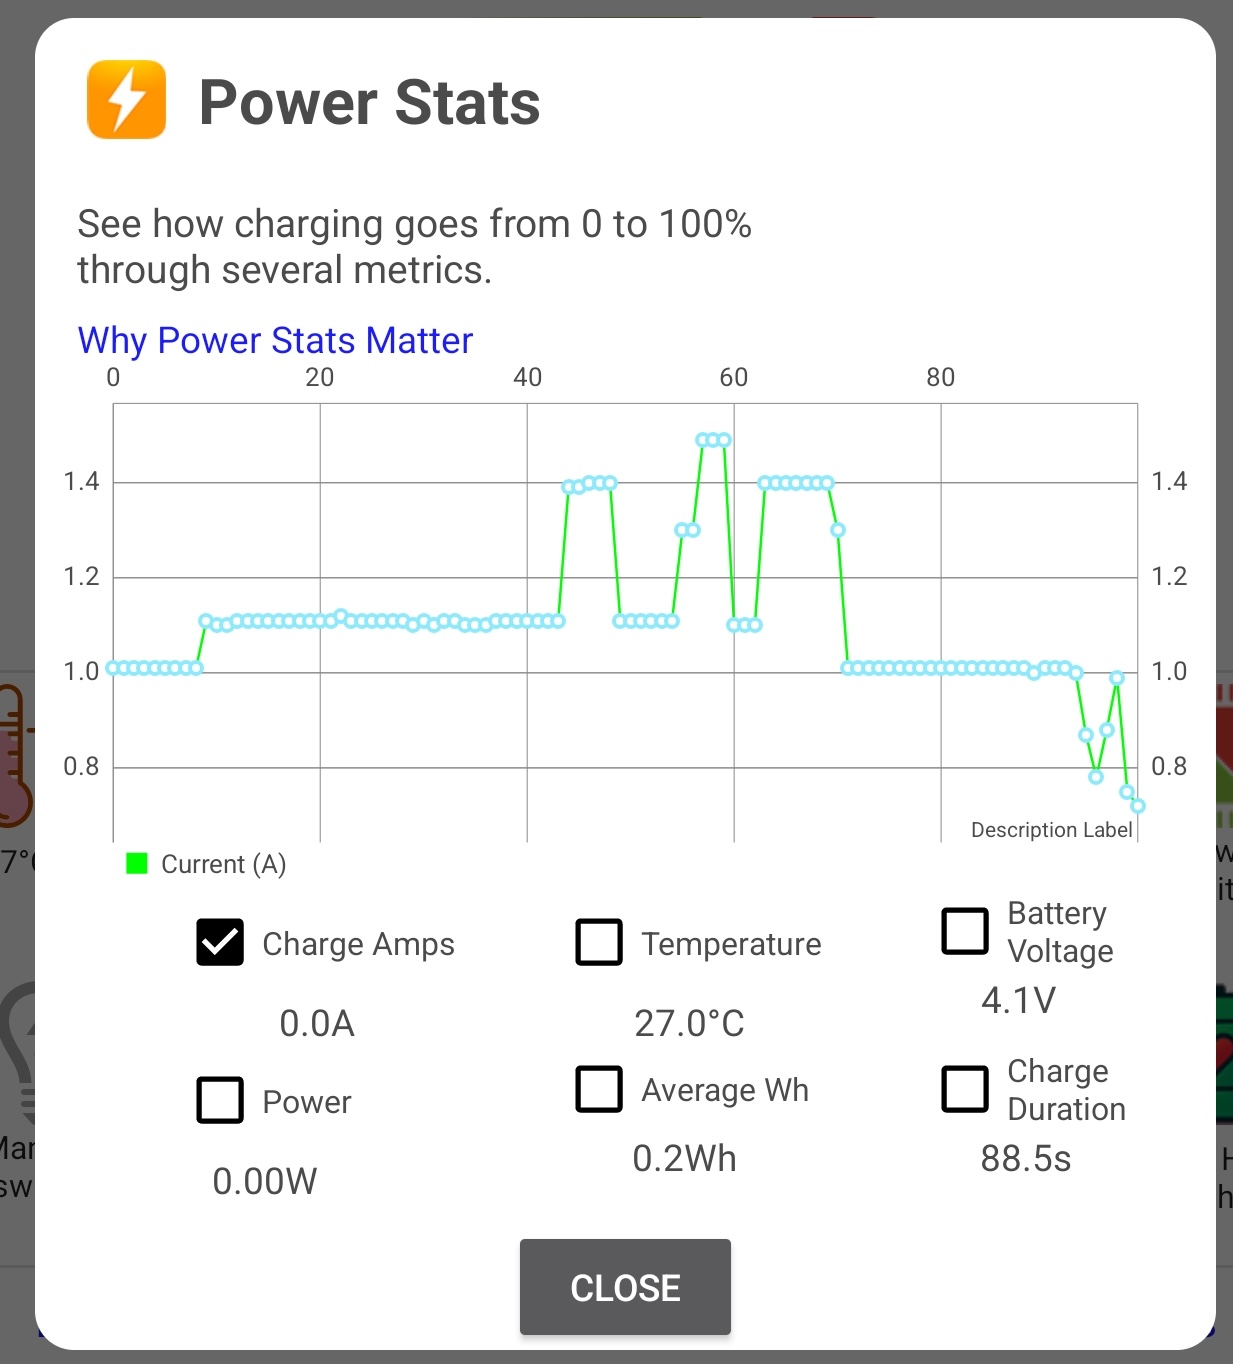
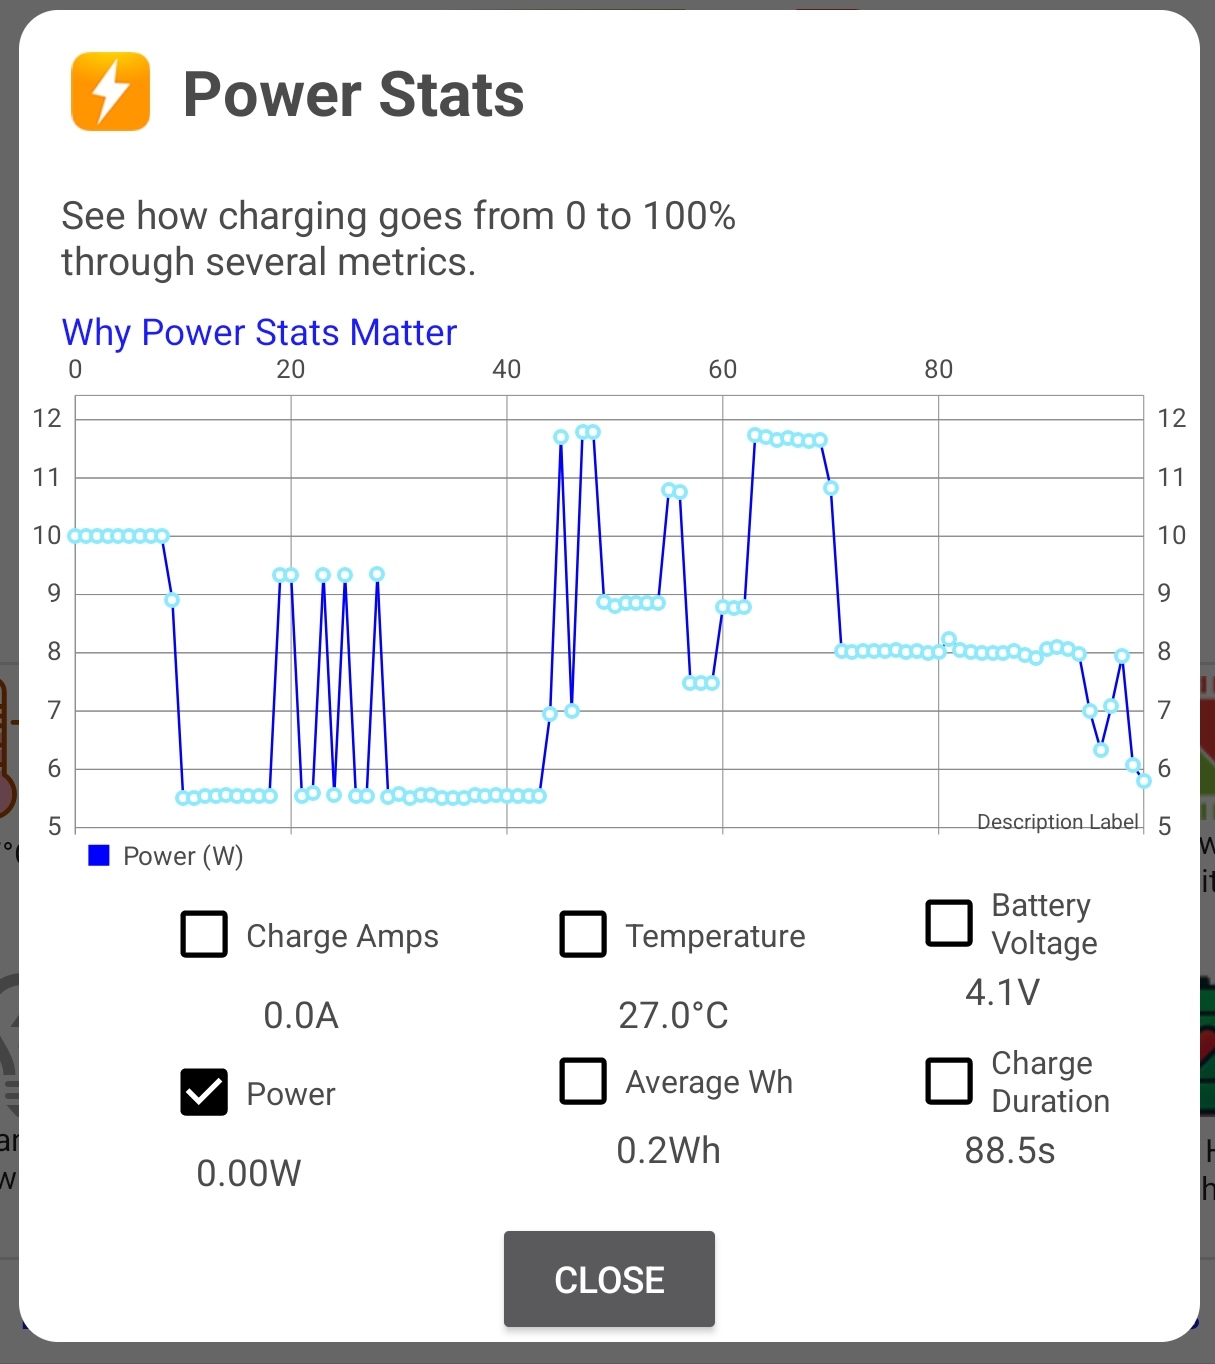
12. Power Stats
The Power Stats function in the Chargie app provides a comprehensive analysis of your device’s charging process. It graphs key metrics over time, giving you insights into how your device charges from 0 to 100%. These metrics include:
– Charge Amps: The current being supplied to your device.
– Voltage: The electrical potential difference applied to your device.
– Power: The rate at which your device is consuming energy.
– Temperature: The temperature of your device’s battery during charging.
– Average Wh: The average energy delivered to your device over time.
– Charge Duration: The time taken for a charging session.
By monitoring these statistics, you can understand your charging patterns, pinpoint any irregularities, and ensure your device is charging efficiently. This helps in prolonging the lifespan of your battery by avoiding practices that may lead to excessive wear, such as overheating or overcharging. The data presented by Power Stats can inform when to charge, how long to charge, and how to adjust settings for optimal battery health.

13. Autoconnect
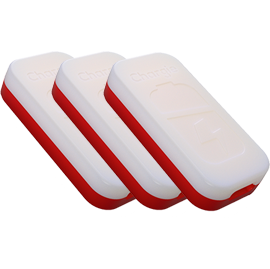
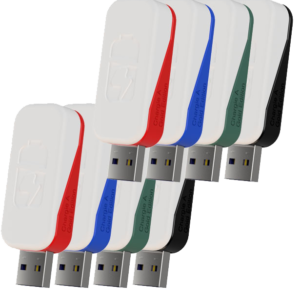
In the beginning, people would order only one Chargie to test it. Then, word spread out and most customers now want a Double or Family Pack, to protect all of their phone batteries.
That is why we have implemented an Autoconnect feature that allows you to switch the Chargie you’re using with another one, seamlessly.
This function doesn’t have its own menu and is activated by default.
Using it is simple: just pair the app with all of the Chargies you own. It will remember them and the next time it will prioritize the last one you used when doing the connection process.
However, if it’s not the same every time, the app will go through all of them and try to put the line down for a split second. When it detects the power change, it means it’s physically paired with the correct Chargie and will take control of it via Bluetooth.
Attention: do not rely entirely on the Autoconnect feature, especially when you have little experience using your Chargie. Due to interference or low Bluetooth signal between the physical Chargie device and your phone/tablet, Autoconnect may not manage to do its task properly and will require manual reconnection.