Clicky

How to Extend Battery Life on Phones, Tablets, and Laptops

If you want to know the real secret to making your device's battery last longer, it's pretty simple: change how you charge it. The two biggest things that wear down the batteries in our phones, tablets, and laptops are leaving them plugged in to charge to 100% and letting them get too hot.

Your Quick Guide to a Longer-Lasting Battery

A smartphone charging with 50% battery displayed on its screen, next to a coiled white cable on a wooden table.

Does your phone's battery life feel like a constant countdown? You start the day fully charged, but by lunchtime, you're already looking for a charger. It's a frustrating problem, and it's a sure sign your battery is getting old faster than it should.

The good news is you have more control over this than you might think. By making a few small changes to your daily routine, you can seriously improve how long your battery lasts each day and how healthy it stays over time. This isn't about digging into confusing settings; it's about building smarter habits for your devices.

Small Habits, Big Impact

You don't need to be a tech expert to see a real difference. The best tips are usually the simplest ones because they fix the main causes of battery wear and tear. Think of it like taking care of your car—a little care now prevents big problems later on.

Here are the main ideas to keep in mind:

  • Don't always charge to 100%. Constantly charging your battery to full or letting it die completely puts a lot of stress on it.
  • Keep your device cool. Heat is the number one enemy of a healthy battery. Leaving your phone in a hot car or in direct sunlight can cause lasting damage.
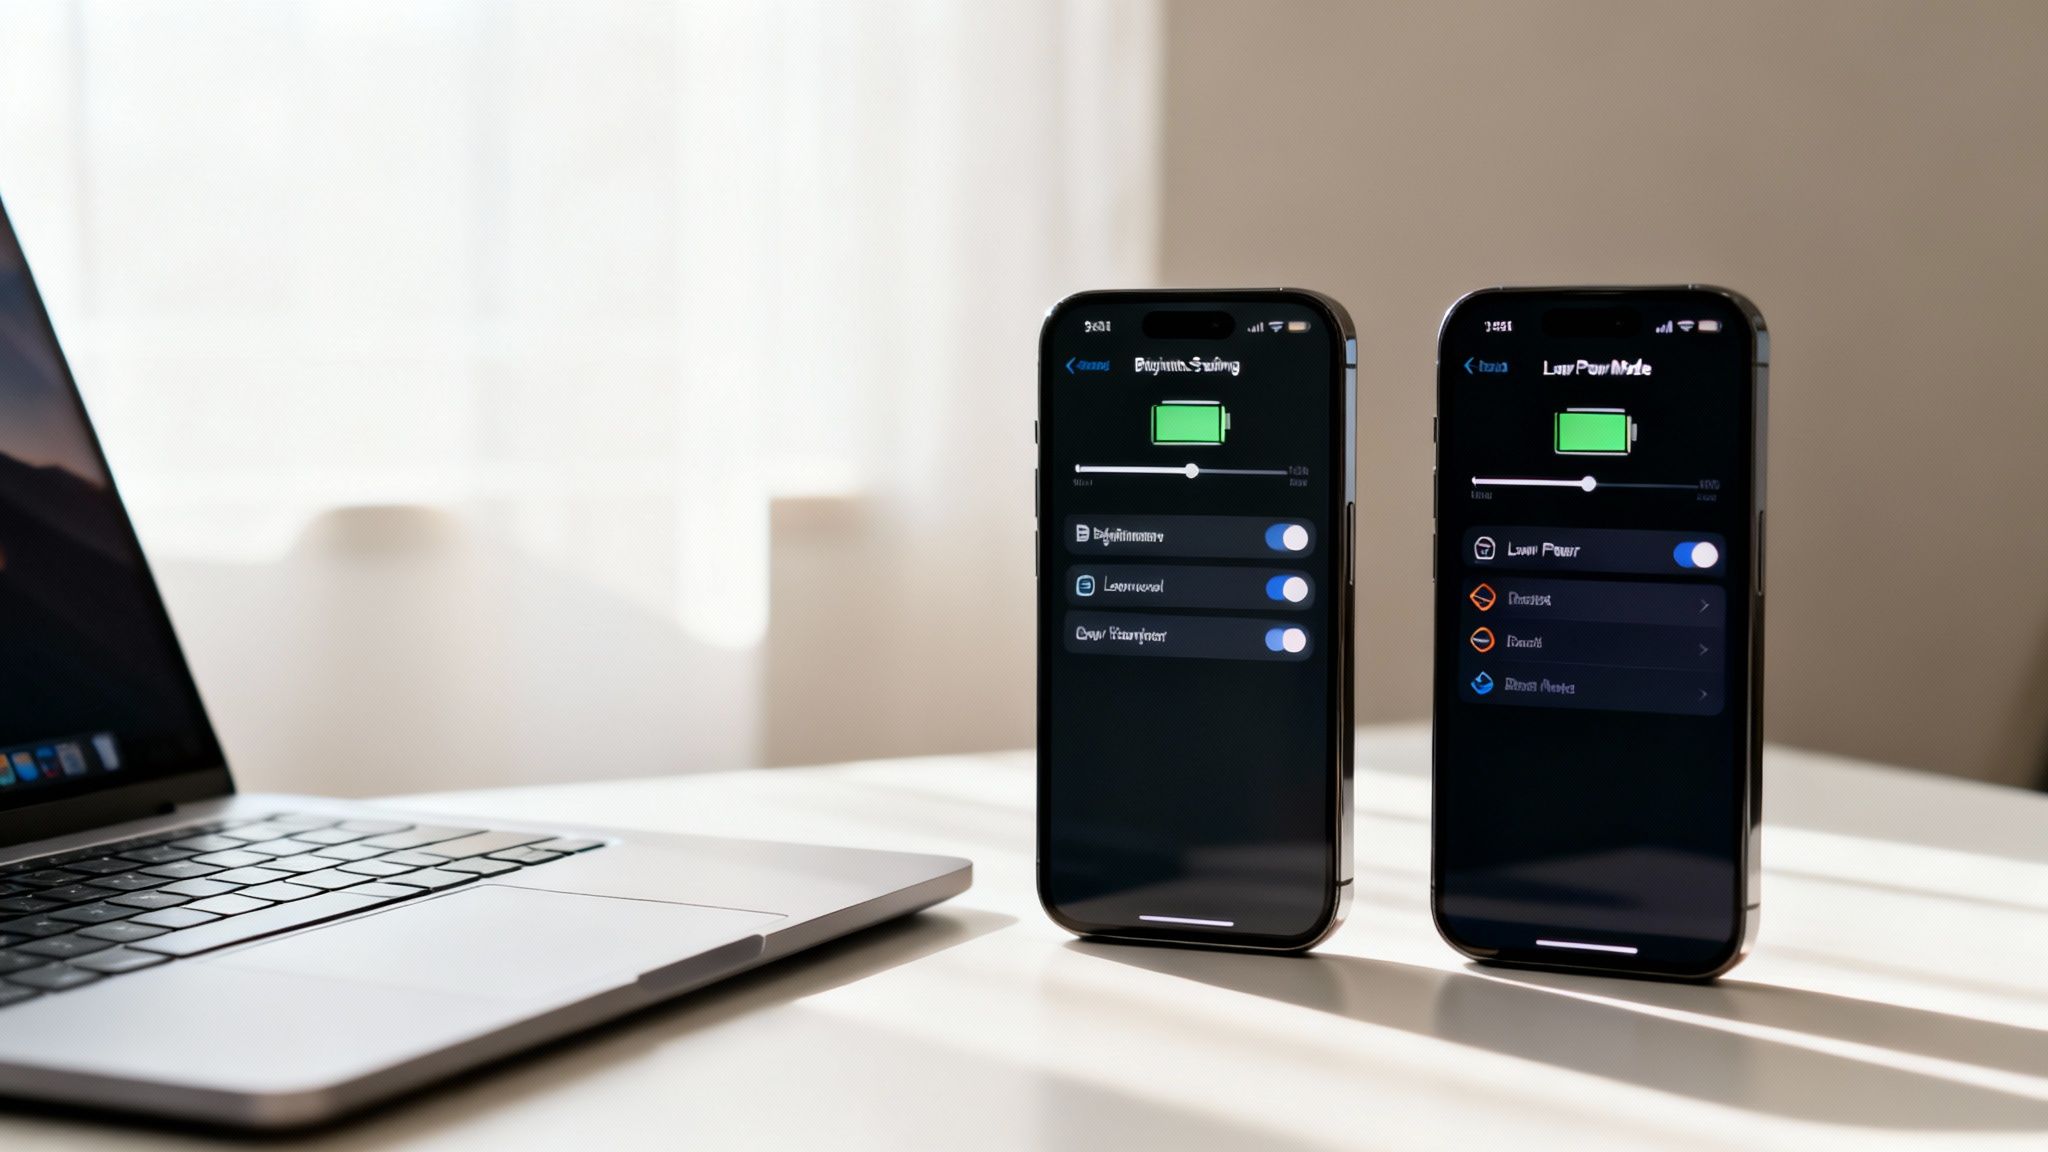
  • Use the smart features you already have. Modern phones and laptops come with built-in tools like Optimized Charging and Low Power Mode. They’re made to protect your battery for you, so use them!

The goal isn't to worry about your battery percentage all day. It's about creating good conditions for your battery, reducing wear so it works better for longer.

To make this even easier, here's a quick list of the best changes you can make today.

Top 5 Quick Wins for Battery Health

Habit Why It Works Impact Level
Charge to 80%, not 100% Avoids the stress that makes batteries age faster. High
Don't let it drop below 20% Prevents strain on the battery when it has very little power left. High
Keep it cool Heat causes chemical changes that permanently damage the battery. High
Use slow, overnight charging Creates less heat and stress than fast charging, especially when managed. Medium
Turn on Optimized Charging Your device learns your routine and holds the charge at 80% until you need it. Medium

These simple changes, when you do them regularly, lead to a much healthier battery over the life of your device.

Learning from Bigger Batteries

It turns out the same rules that protect the little battery in your phone also work for much bigger ones—like those in electric cars. In fact, we can learn a lot from how electric cars manage their batteries.

Studies on electric car batteries show they only lose about 2.3% of their health per year. That's mainly because smart systems stop them from charging to 100% for daily driving. This lines up perfectly with what we know about our own devices: keeping your phone's charge between 20% and 80% can make it last much longer. For those who use electric bikes, you can find similar strategies for maximizing e-bike battery range that follow these same basic ideas.

Why Your Battery Fades and What You Can Do About It

Ever notice how a brand-new phone feels like it can last forever, but a year later, you're nervously watching the battery percentage by 3 PM? That’s a real thing. It's called battery aging, and it happens to every phone, tablet, and laptop out there.

The batteries in our devices are amazing, but they don't last forever. Think of them like a new water bottle. At first, you can fill it to the very top. But with every use, tiny, invisible cracks start to form inside. Over time, that bottle just can't hold as much as it used to. Your battery is going through the same process, losing a little bit of its total capacity every time you charge it.

What's a "Charge Cycle," Anyway?

You might hear the term "charge cycle," but what does it actually mean? It’s simpler than it sounds. One complete charge cycle is counted every time you use up a total of 100% of your battery's power.

This doesn't have to happen all at once. Maybe you use 75% of your battery during the day, charge it overnight, and then use another 25% the next morning. Just like that, you’ve finished one full cycle. Most phone batteries are made to last for around 500 full cycles before their health really starts to drop—usually down to about 80% of what it was when it was new.

The Three Main Villains of Battery Health

While a little aging is normal, some things can make your battery wear out much faster. If you want to keep your device running well for years, you need to know what you're up against.

These are the three things that put the most stress on your battery:

  • Extreme Heat: This is the worst enemy for your battery. Heat speeds up the chemical changes inside your battery that cause it to break down. Leaving your phone on a hot car dashboard or playing heavy games while it’s fast-charging under a pillow are sure ways to cause permanent damage.
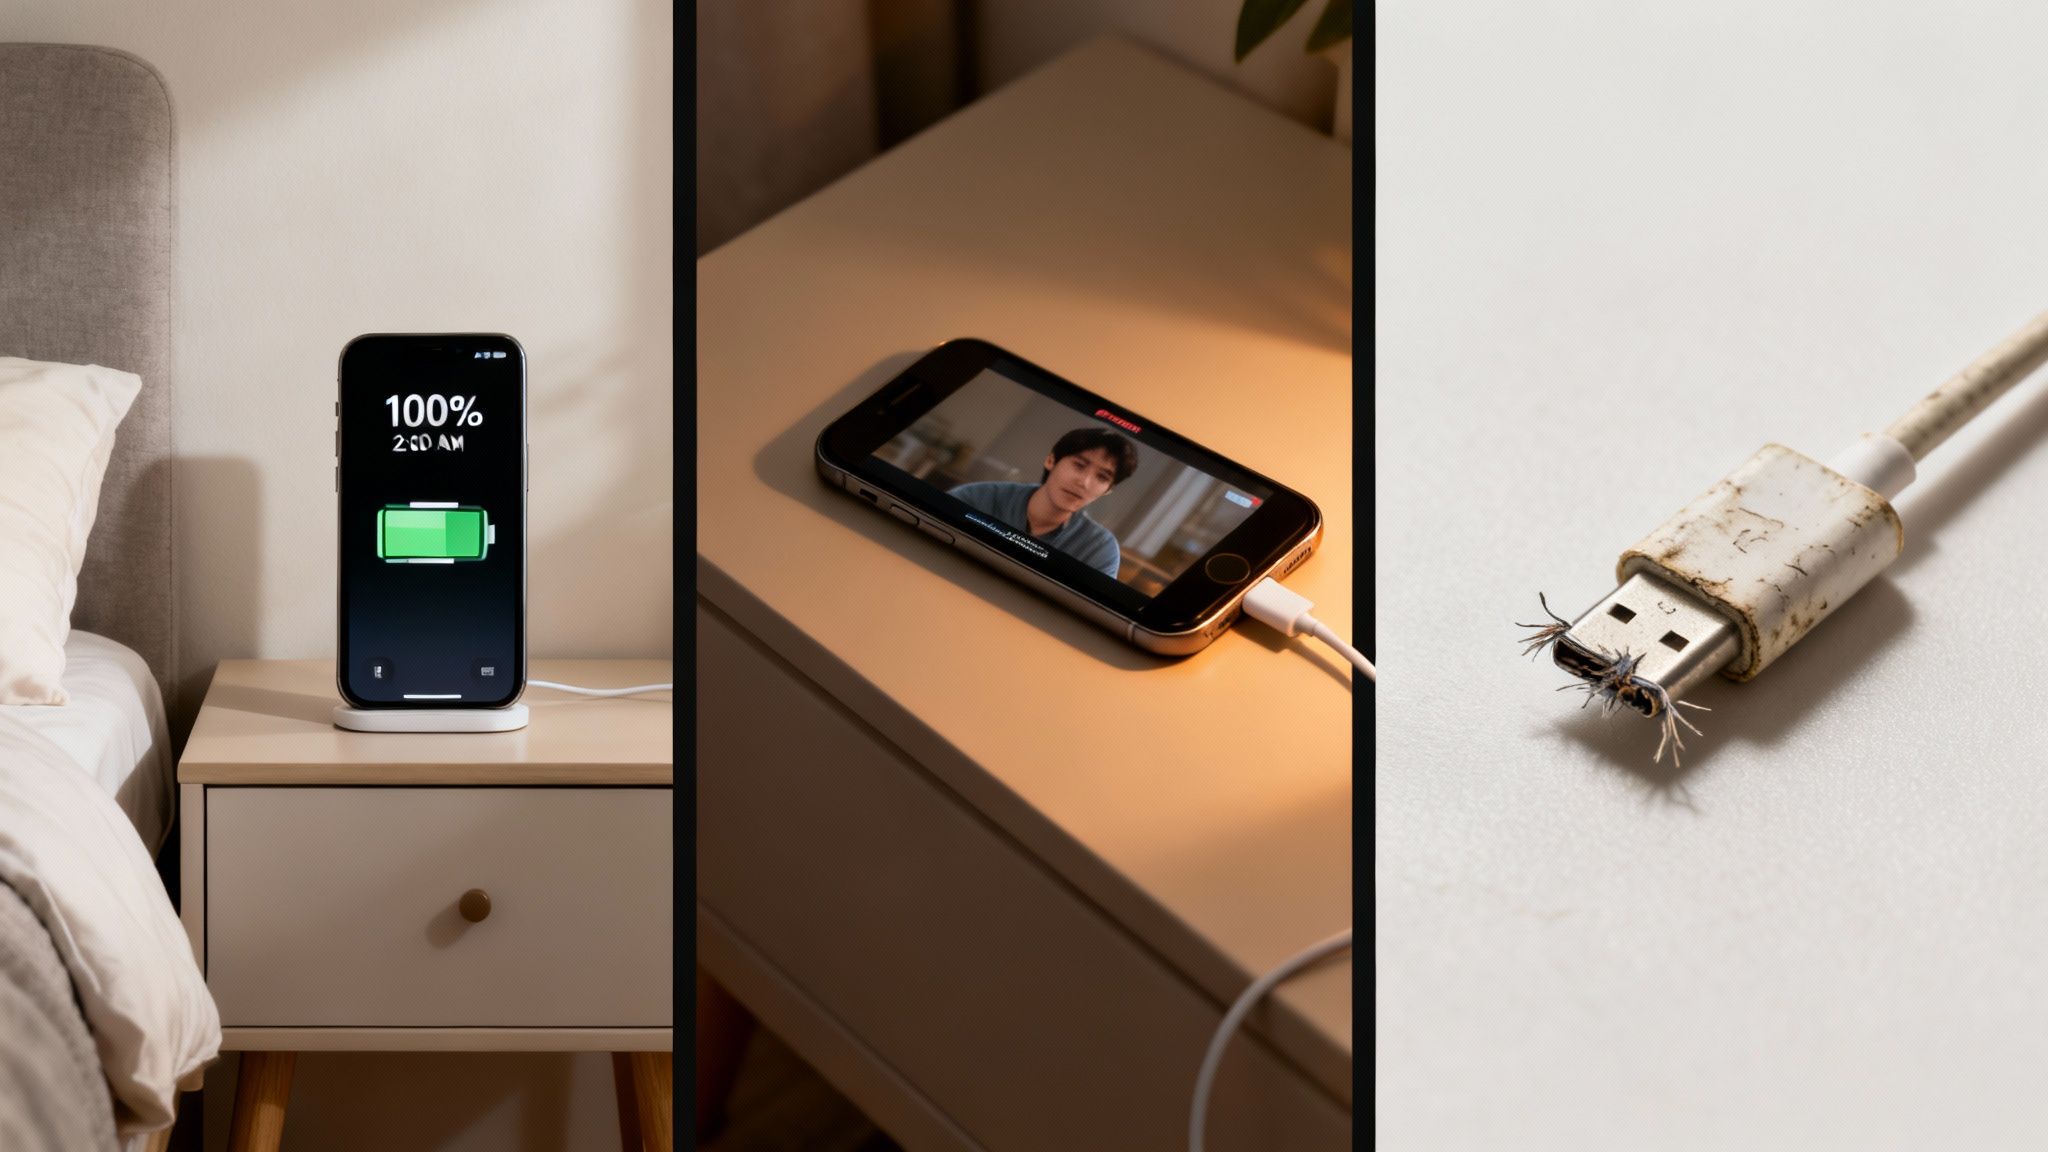
  • Staying at 100%: Leaving your phone plugged in all night, every night, forces it to stay at 100% for hours. This keeps the battery under constant stress. It’s like stretching a rubber band as far as it can go and just holding it there for hours—eventually, it’s going to get weaker. That’s what’s happening inside your battery.
  • Dropping to 0%: On the other hand, letting your battery completely die is also a bad idea. Draining it to 0% can mess with its internal parts, making it harder for it to hold a good charge in the future.

The big takeaway here? Batteries are happiest in the middle. They don't like being too hot, too full, or too empty. Just avoiding those extremes is the single most powerful thing you can do for your battery's long-term health.

How Your Daily Habits Make All the Difference

It really comes down to this: your habits have a direct effect on how fast your battery ages. Someone who charges their phone to 100% overnight and always lets it drop to 1% will see their battery health drop way faster than someone who tries to keep it between 20% and 80%.

The difference is big, too. By consistently avoiding those stressful highs and lows, a battery can stay healthy for hundreds of extra charge cycles. That means your device doesn't just last longer through the day—it stays useful and keeps its value for years to come. These small changes aren't just about getting a little more screen time; they're about protecting the heart of your digital life.

Build Better Charging Habits for Lasting Battery Health

Forget all the small software settings for a minute. The single biggest thing you can do for your battery’s long-term health is to change how you charge it. By building a few simple, smarter charging habits, you can seriously slow down the aging process and keep your device feeling new for much longer.

It starts with throwing out some old, outdated advice. You might remember being told to let your battery drain completely before plugging it in. That was good advice for old types of batteries, but for the modern batteries in every phone, tablet, and laptop today, it’s one of the worst things you can do.

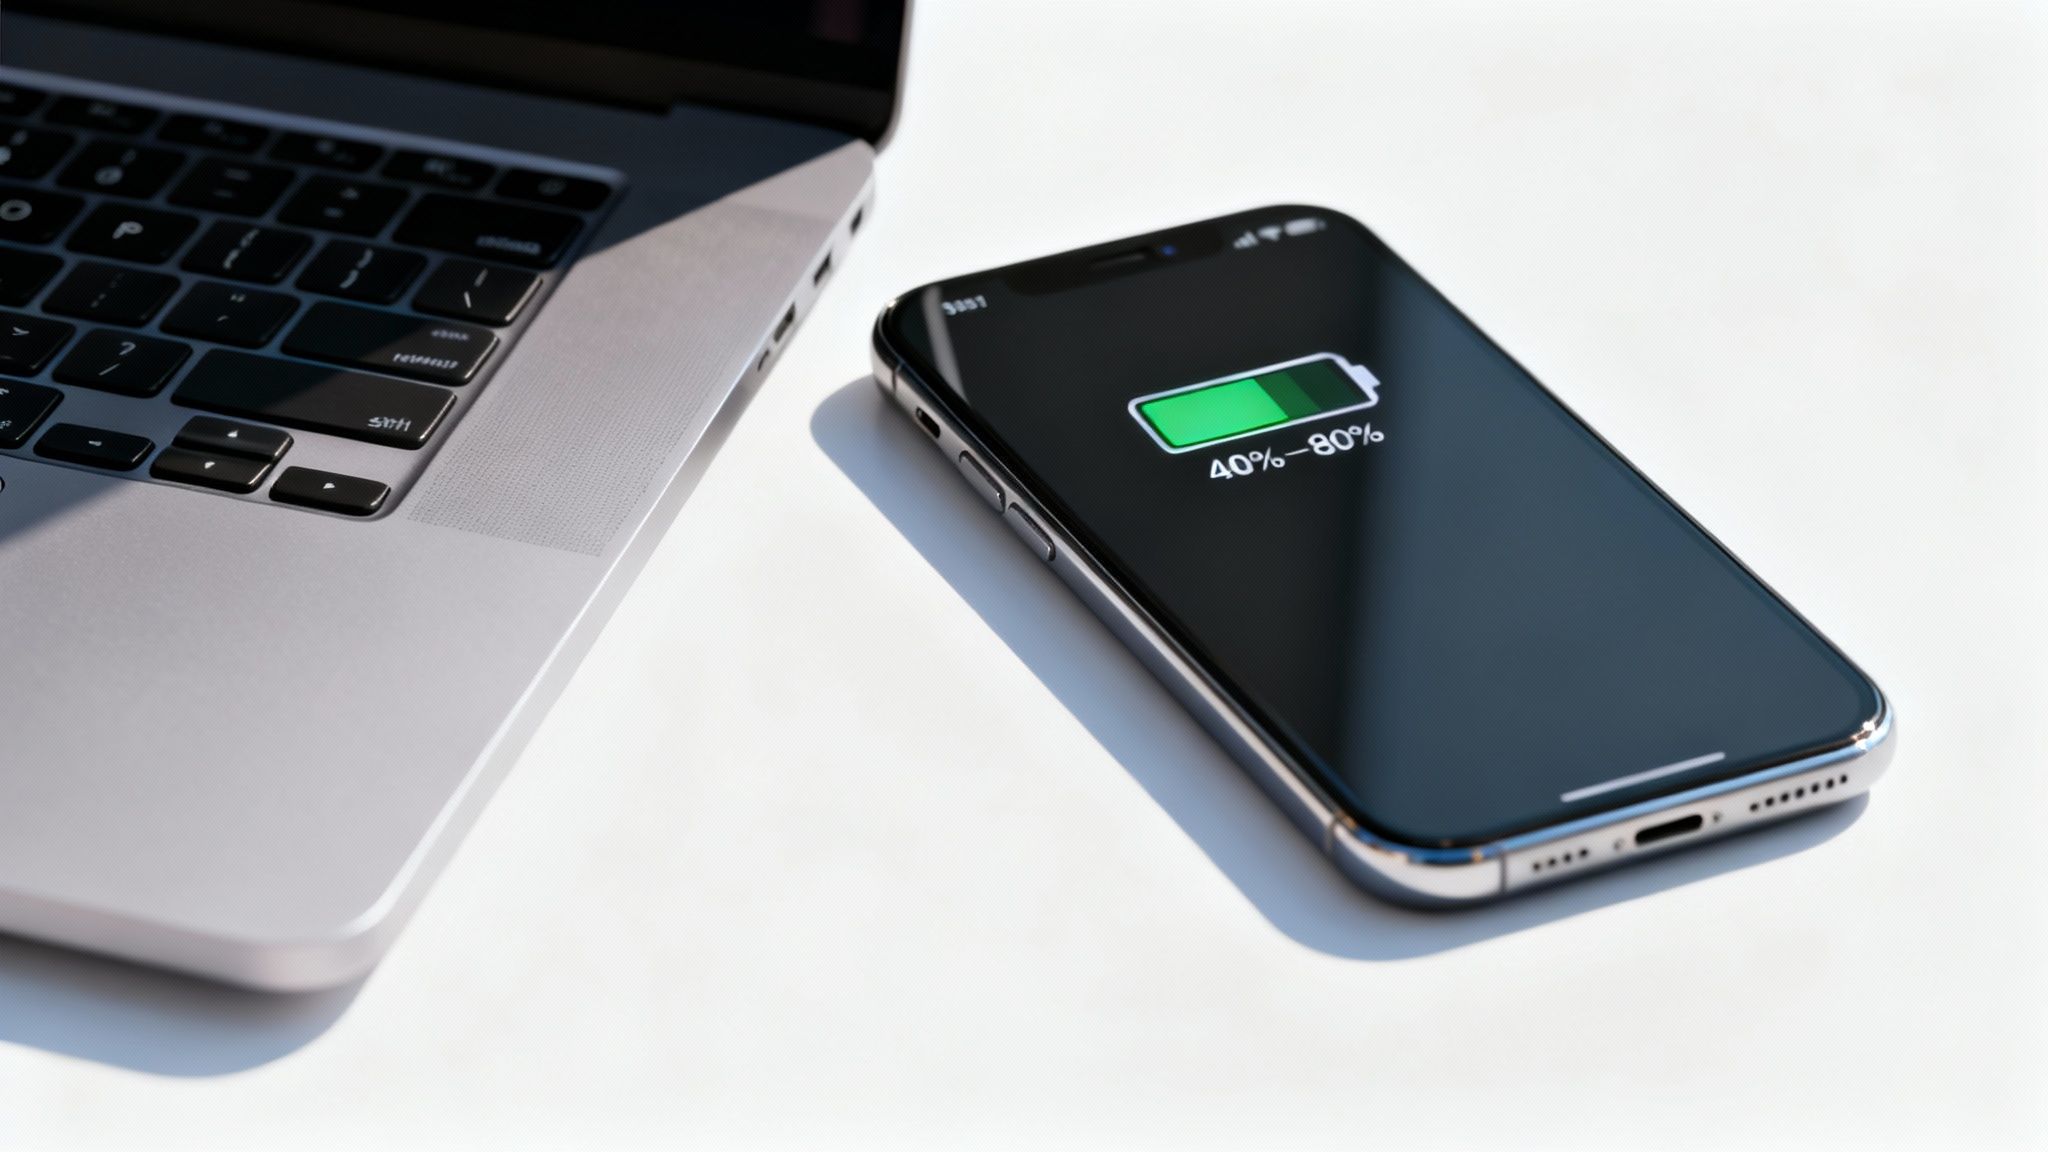
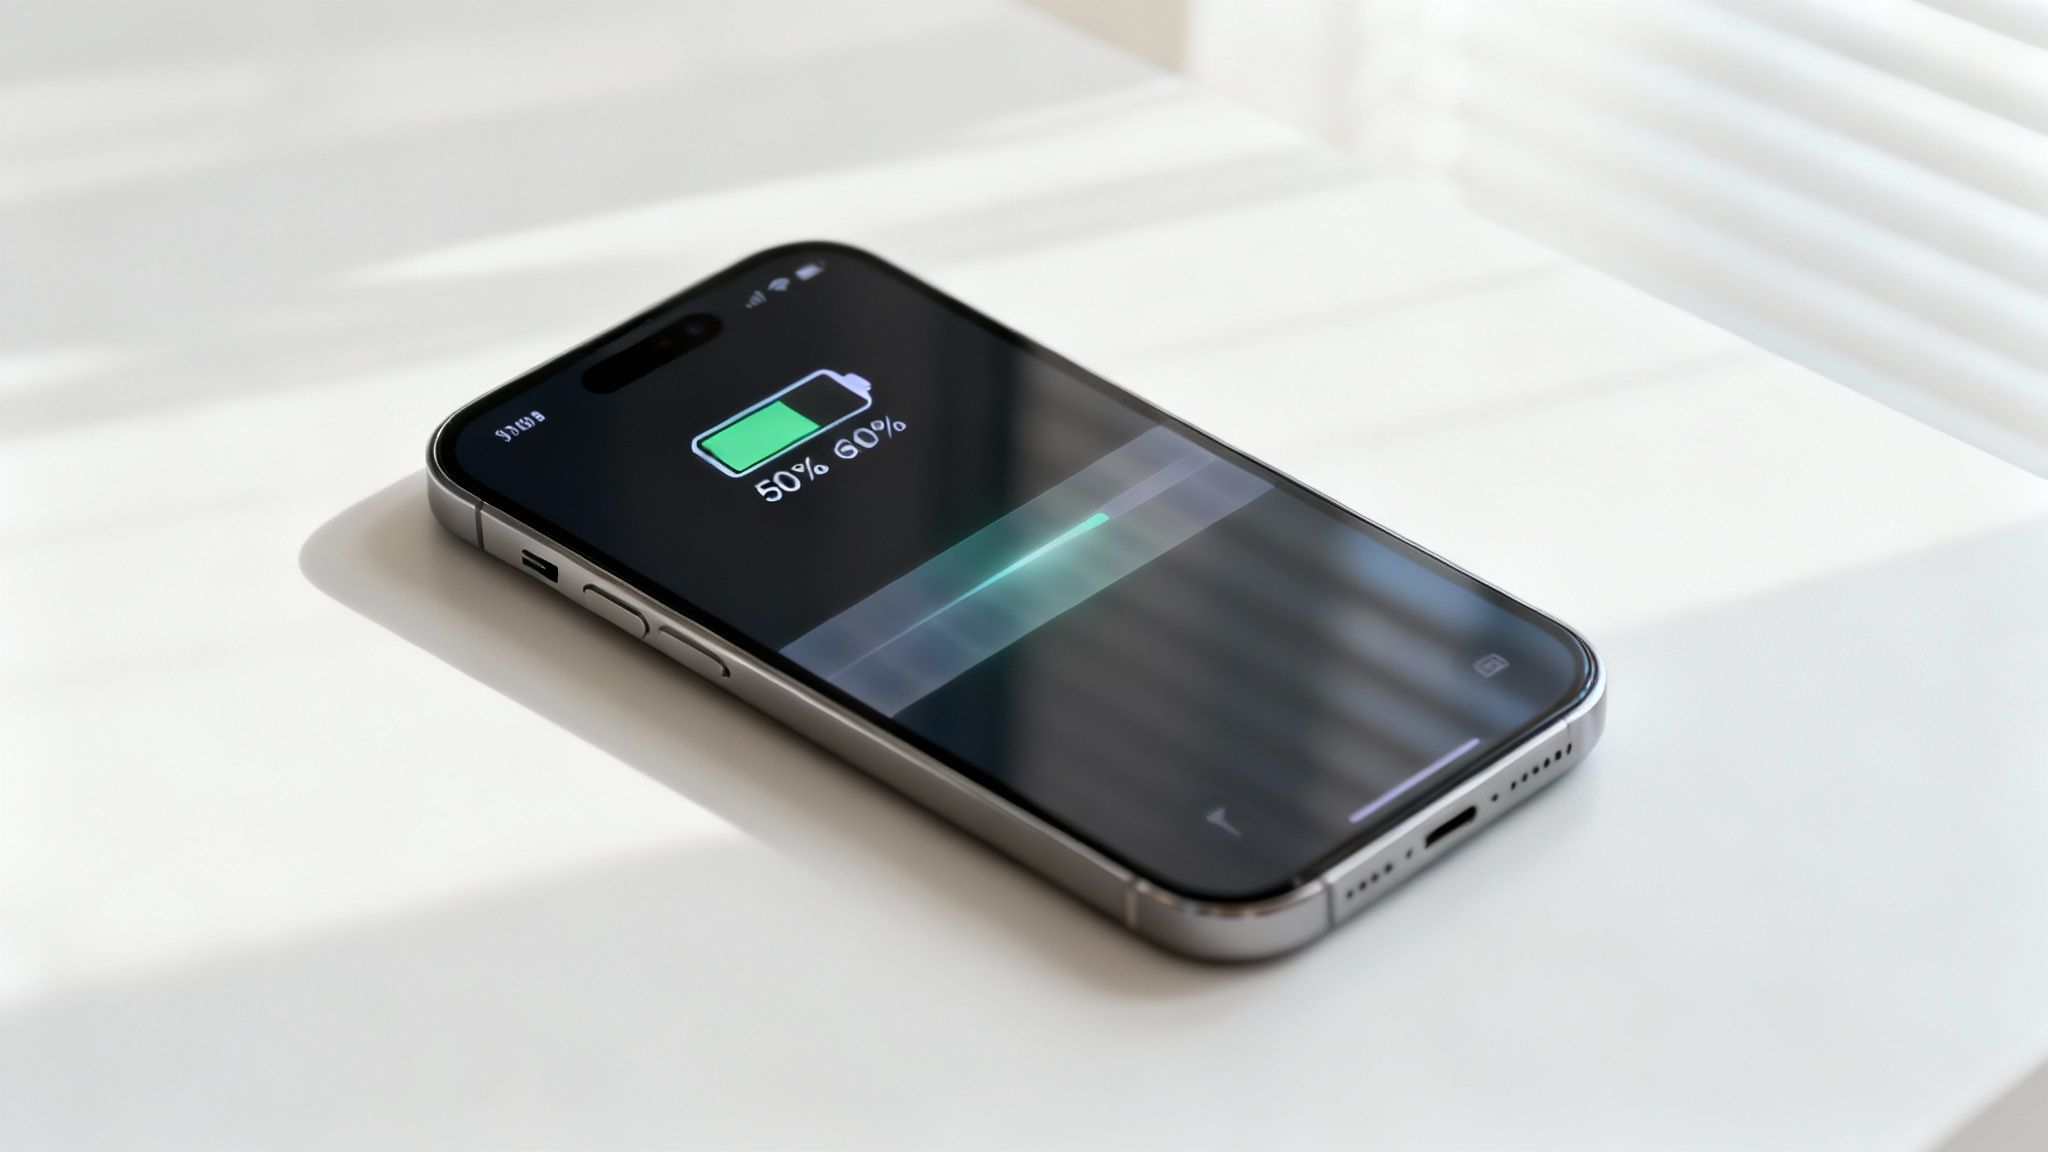
The Modern Sweet Spot: The 20-80 Rule

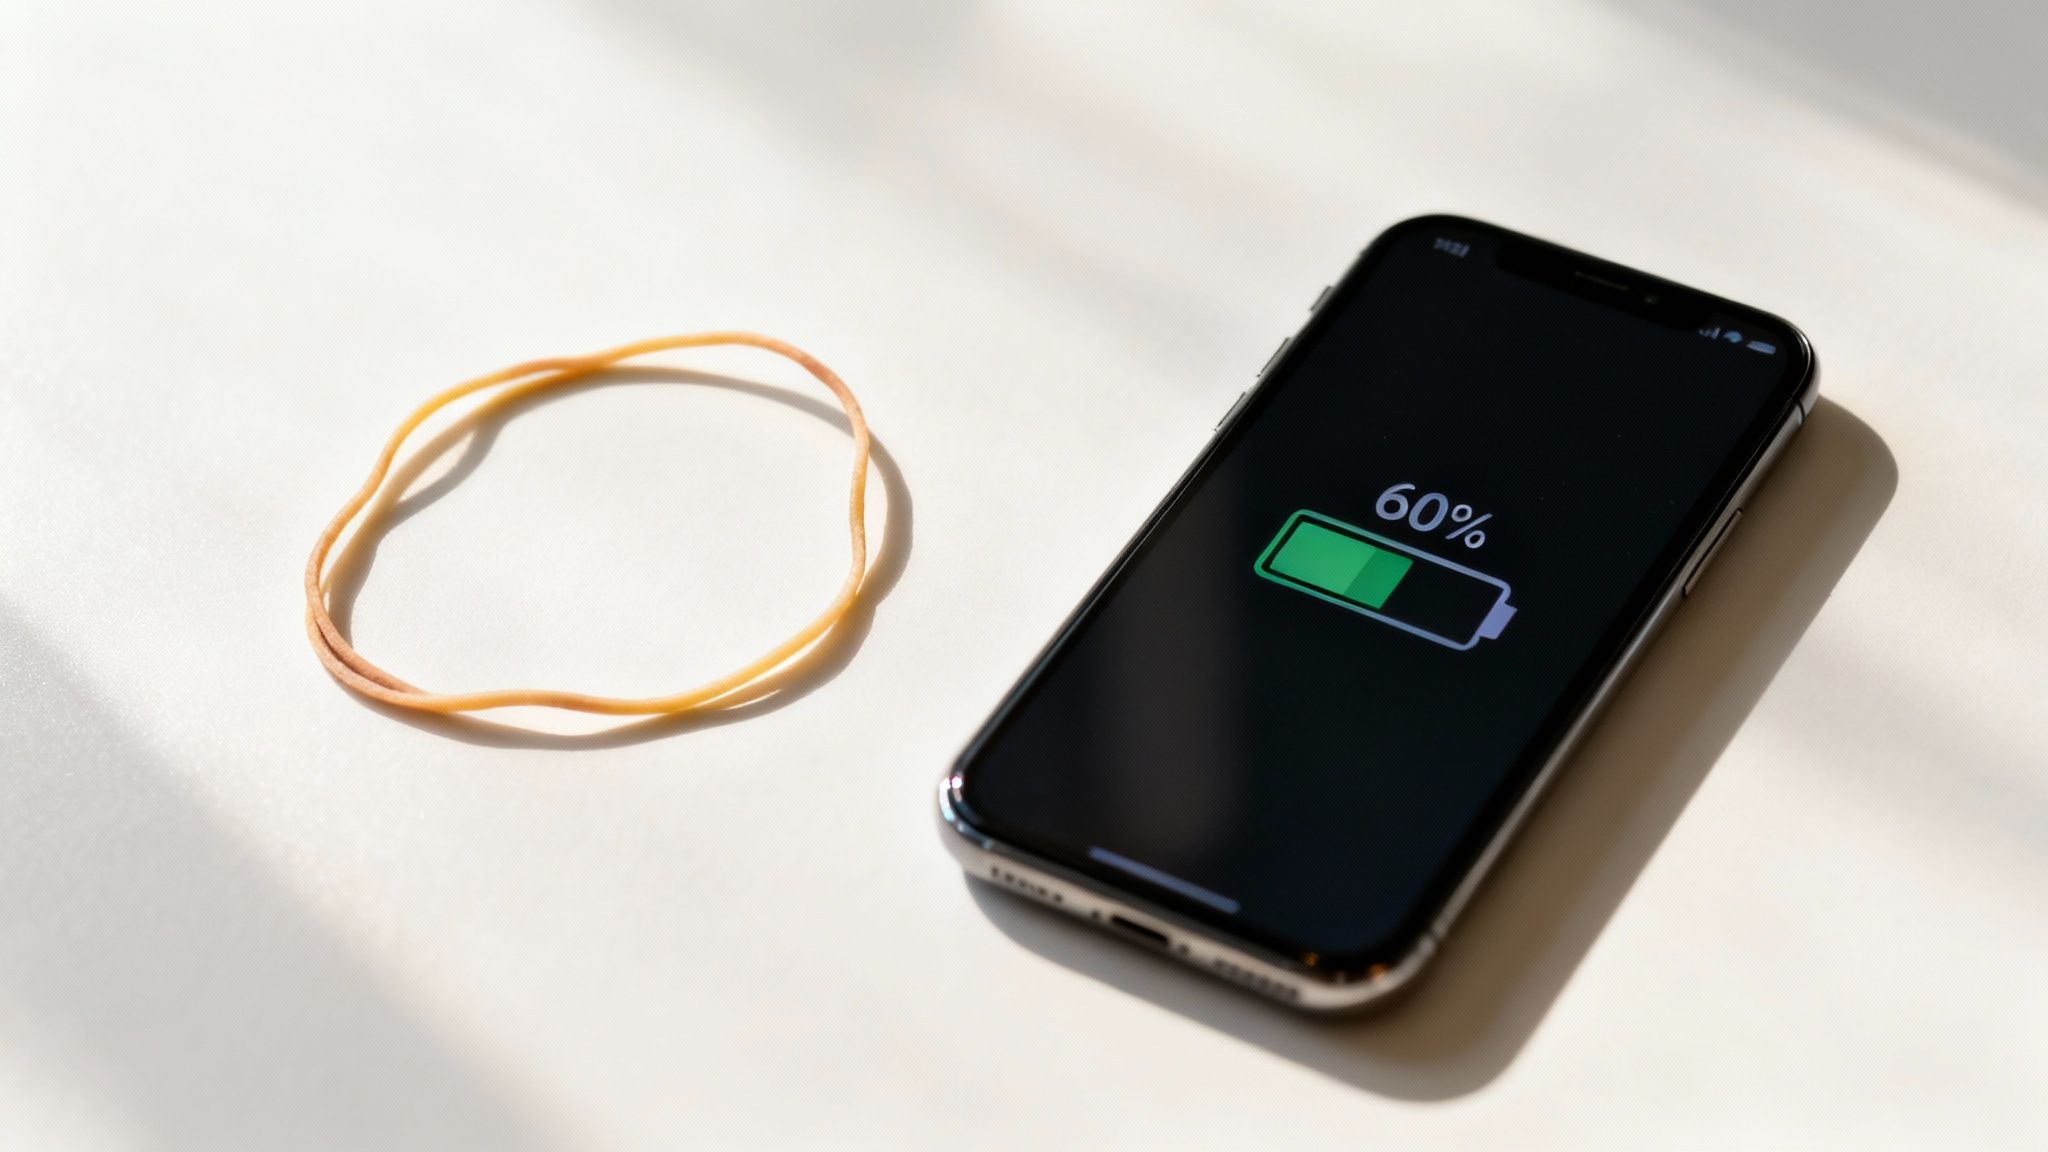
The new golden rule for battery health is the 20-80 rule. Simply put, your battery is happiest and under the least amount of stress when its charge level stays between 20% and 80%.

Think of it like this: filling a battery all the way to 100% is like over-inflating a tire. It puts everything under intense pressure. On the flip side, letting it drop to 0% is like letting all the air out, which can damage the tire's structure. That middle zone is the key.

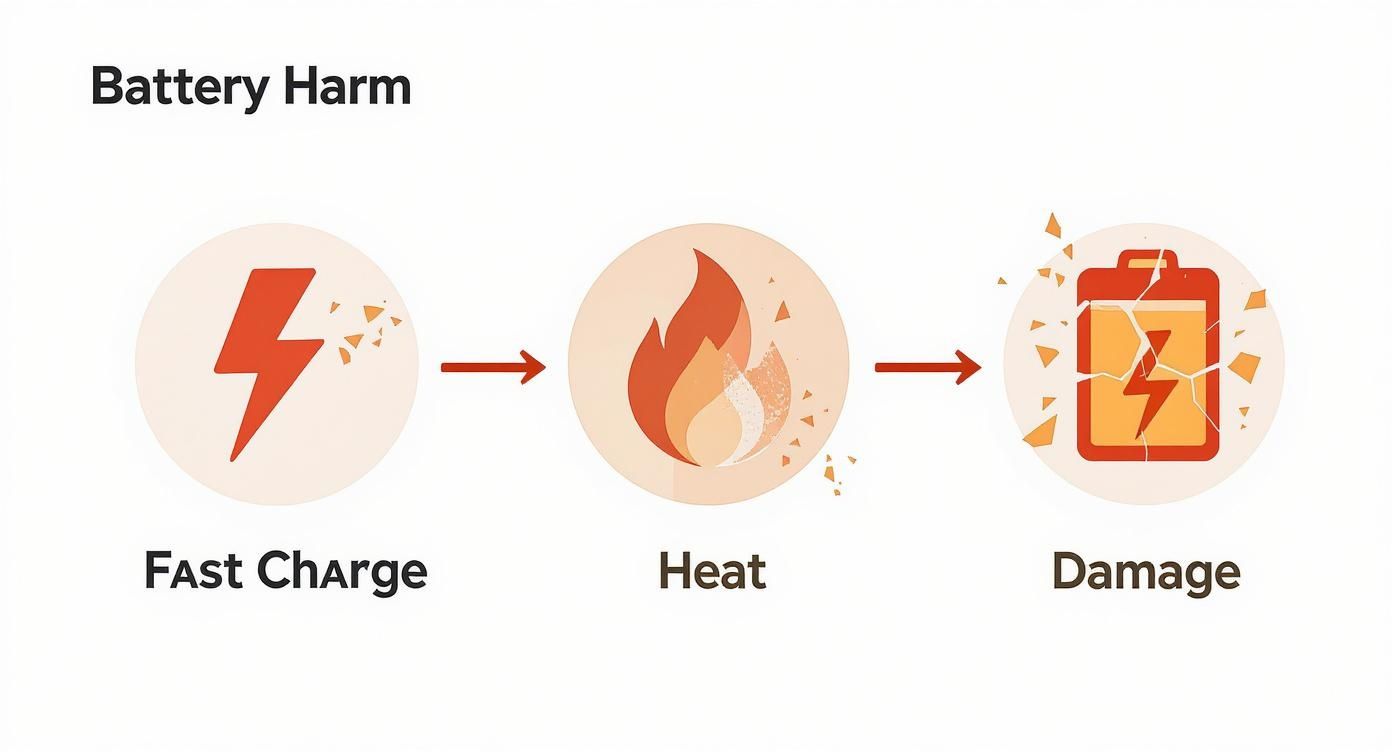
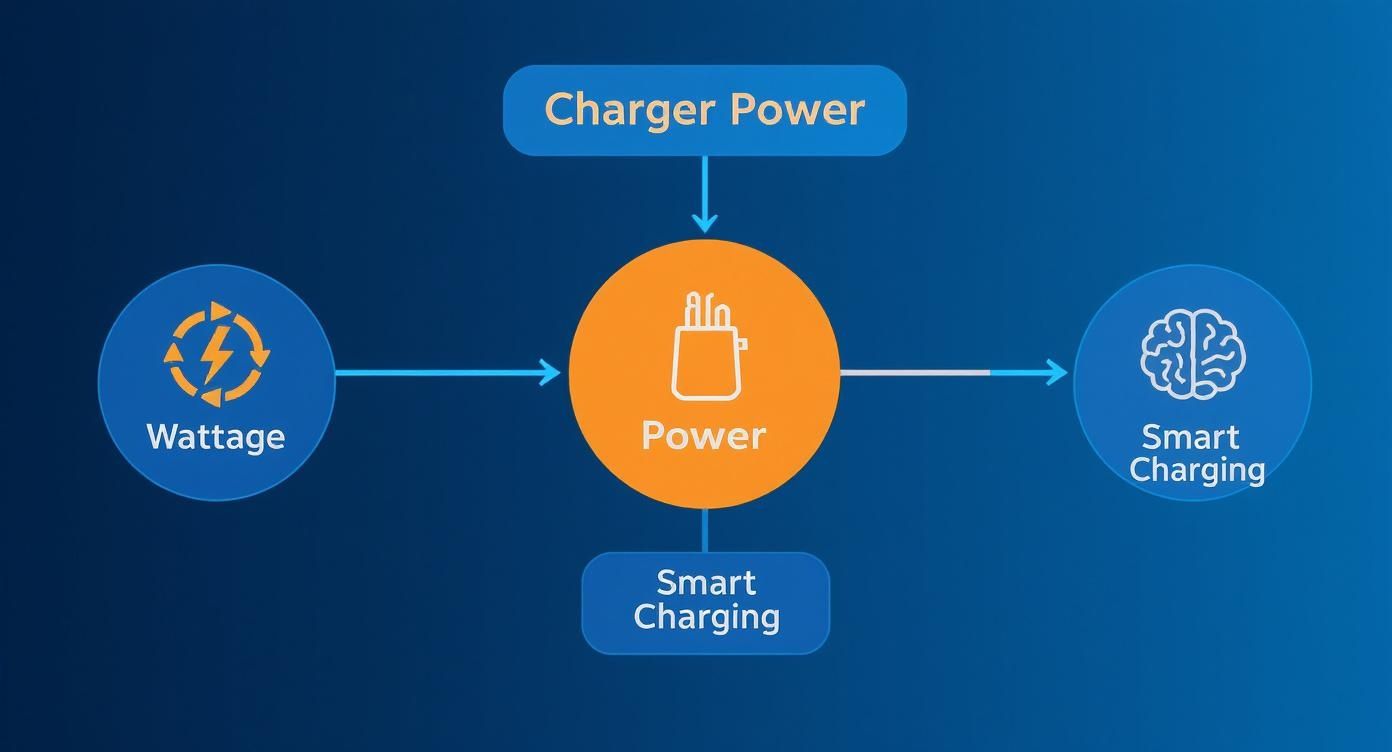
This diagram shows the main things that make a battery age faster. As you can see, heat and charging from empty to full are the biggest problems.

Diagram illustrating the battery aging process through heat exposure, full charge and discharge cycles, leading to reduced battery life.

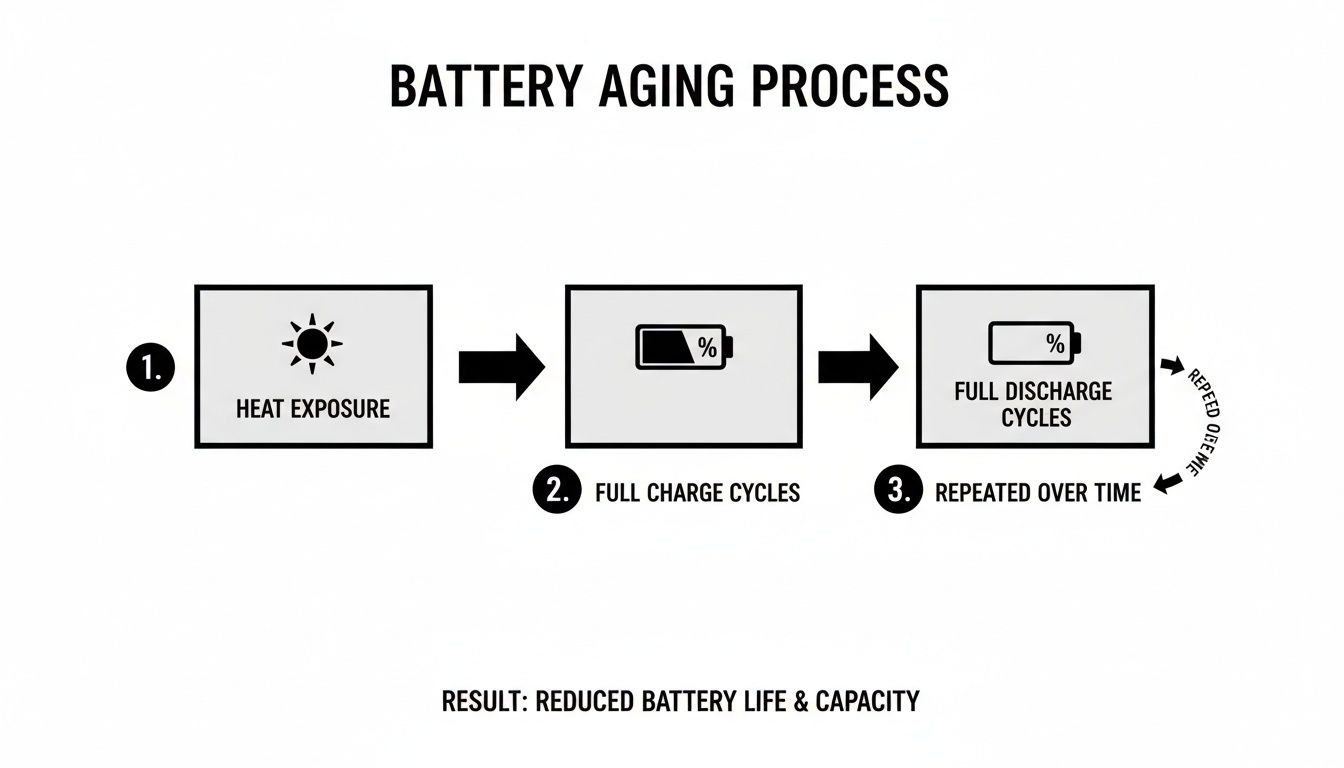
Avoiding these extremes is the best way to protect your battery’s ability to hold a charge over time.

Now, don't get obsessed about hitting these numbers perfectly every day. The goal is to make partial charging your normal habit. Instead of one long overnight charge, try shorter, more frequent top-ups during the day when it’s easy.

This isn't just a theory for small gadgets. A similar thing happens with electric cars. A study on electric car batteries found that real-world driving habits—not constant, extreme charging or draining—actually made the batteries last nearly a third longer than lab tests predicted. It’s solid proof that moderate use is much healthier than a constant cycle of full-to-empty. You can read the full study about EV battery findings to see how this is changing things.

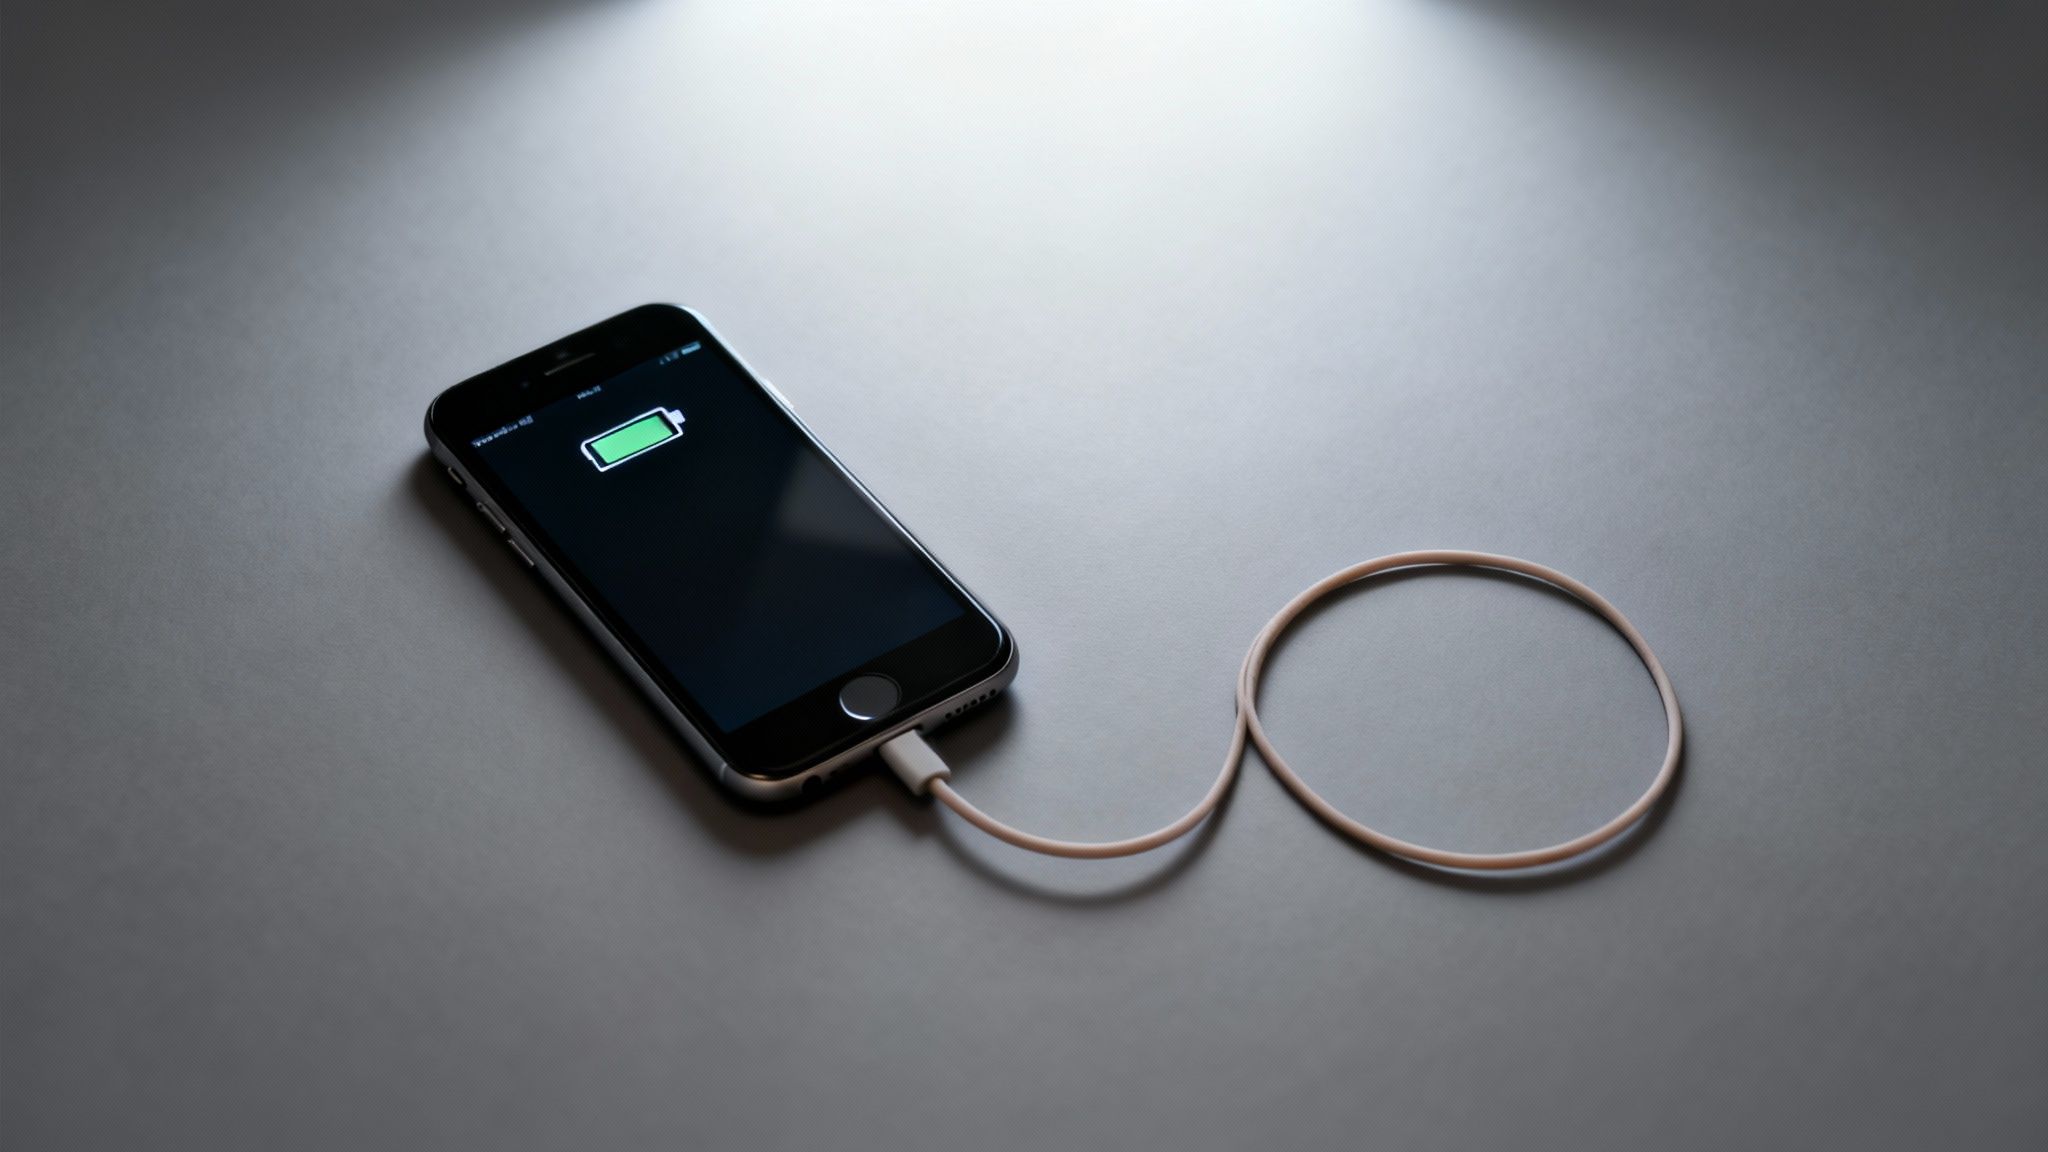
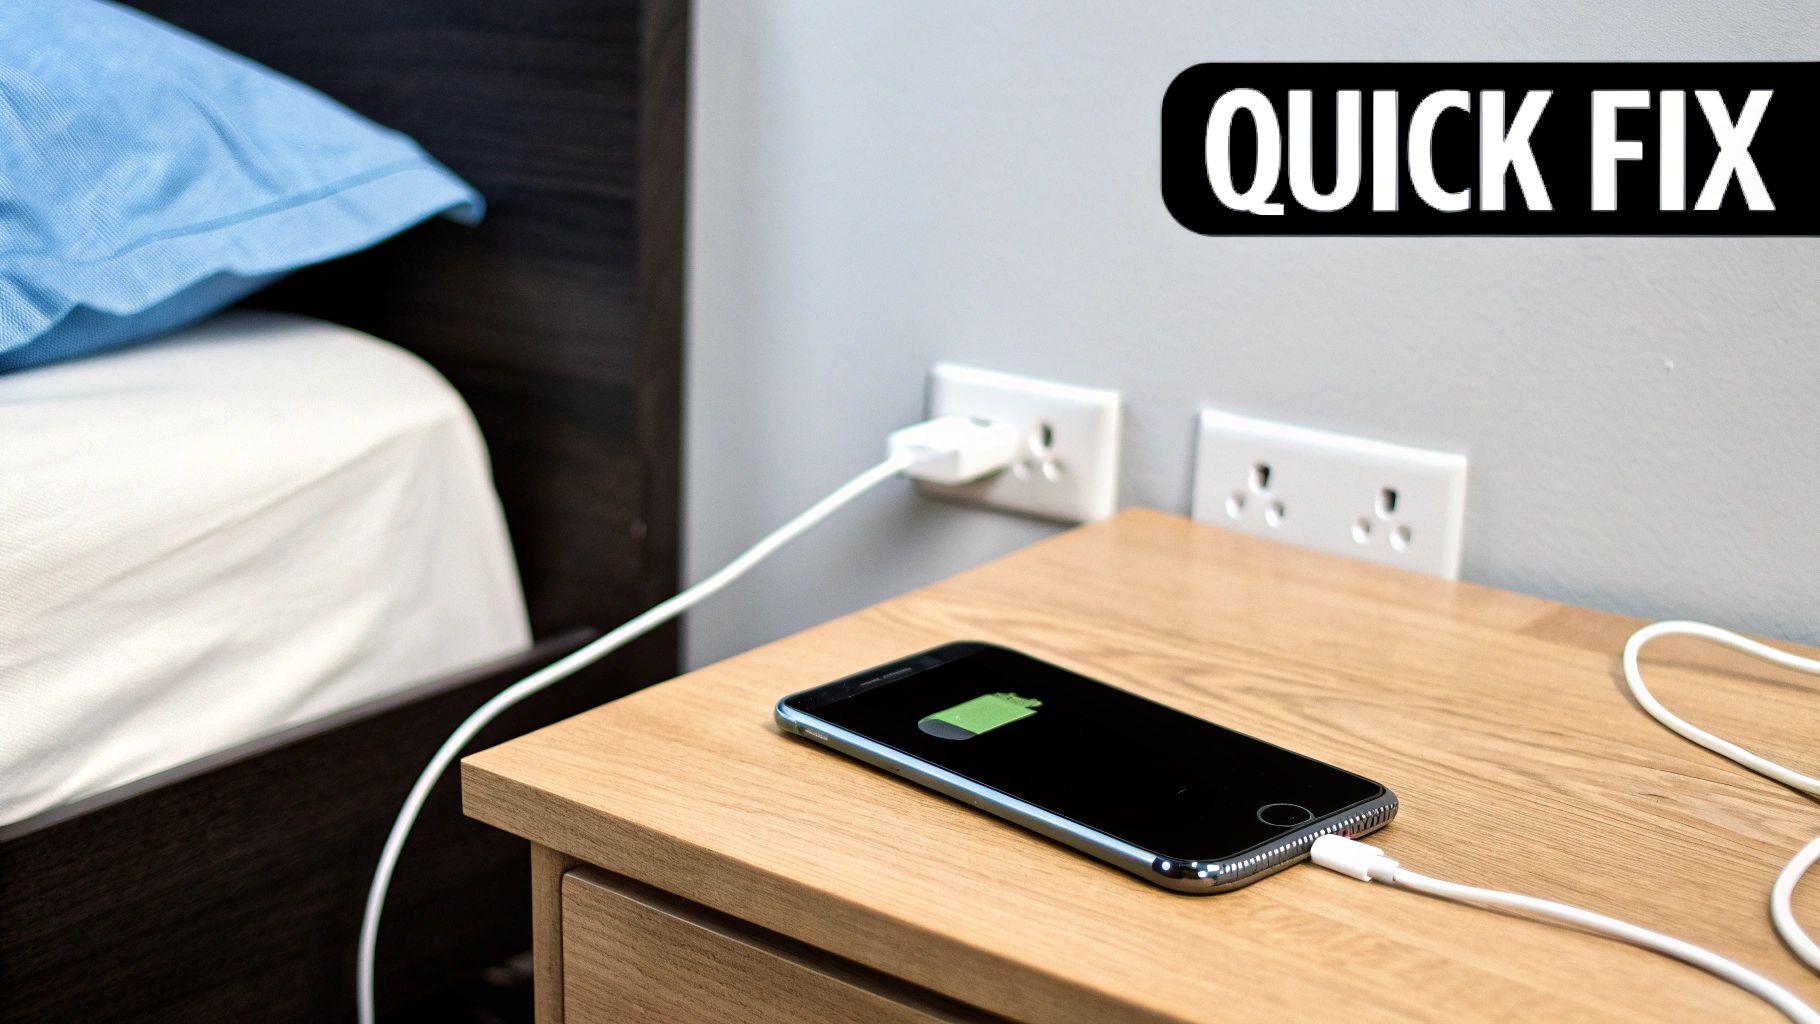
The Truth About Overnight Charging

This brings us to the big one: is leaving your phone plugged in overnight actually bad for it? The short answer is yes, but it's a little more complicated.

Leaving your device plugged in all night keeps it at 100% for hours. As we've learned, this creates stress and extra heat—two of the main things that ruin batteries.

Thankfully, device makers know this is a common habit. They’ve built some clever software features to protect your battery from your own routine.

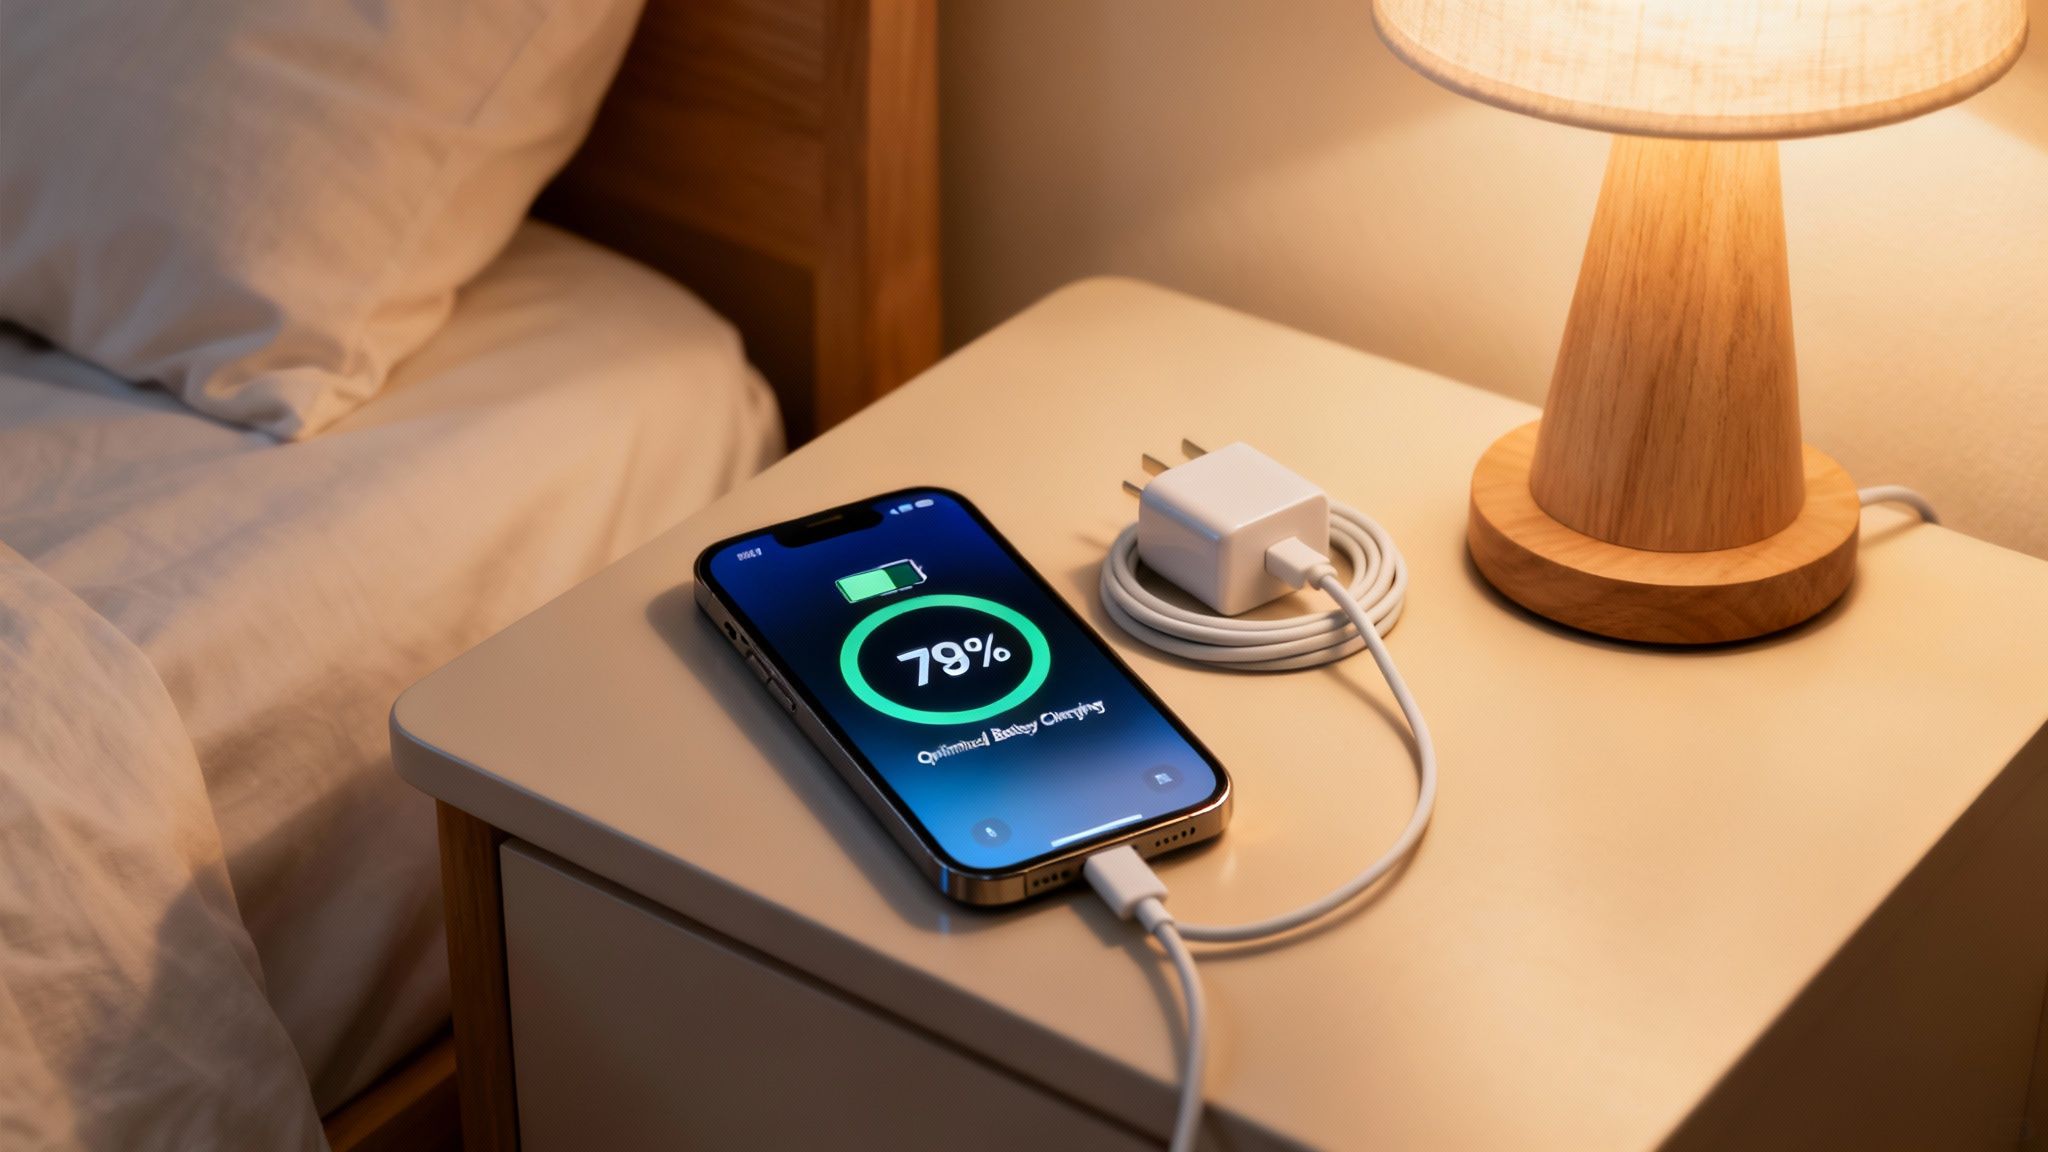
Your device's built-in charging software is a powerful helper. By learning your daily schedule, it automatically stops the battery from sitting at 100% for long periods, which greatly reduces stress and wear overnight.

These features work by learning your sleep schedule. They'll quickly charge your phone to 80% and then pause, holding it there for most of the night. Then, just before your alarm goes off, the software starts again to add the final 20%, so you wake up to a full battery without the hours of unnecessary stress.

Here’s what these features are called on different devices:

  • For iPhones and iPads: It's called Optimized Battery Charging. Find it under Settings > Battery > Battery Health & Charging.
  • For Google Pixel Phones: Look for Adaptive Charging. It’s located in Settings > Battery > Adaptive Charging.
  • For Samsung Galaxy Devices: It’s known as Protect Battery. Turn it on in Settings > Battery and device care > Battery > More battery settings.

While these tools are a huge help, they aren't a perfect fix. They reduce the damage but don't get rid of it completely, since the device still eventually reaches that stressful 100% state. For the best long-term results, the ideal habit is still to unplug it before it gets full. But if you’re going to charge overnight, turning these features on is a must.

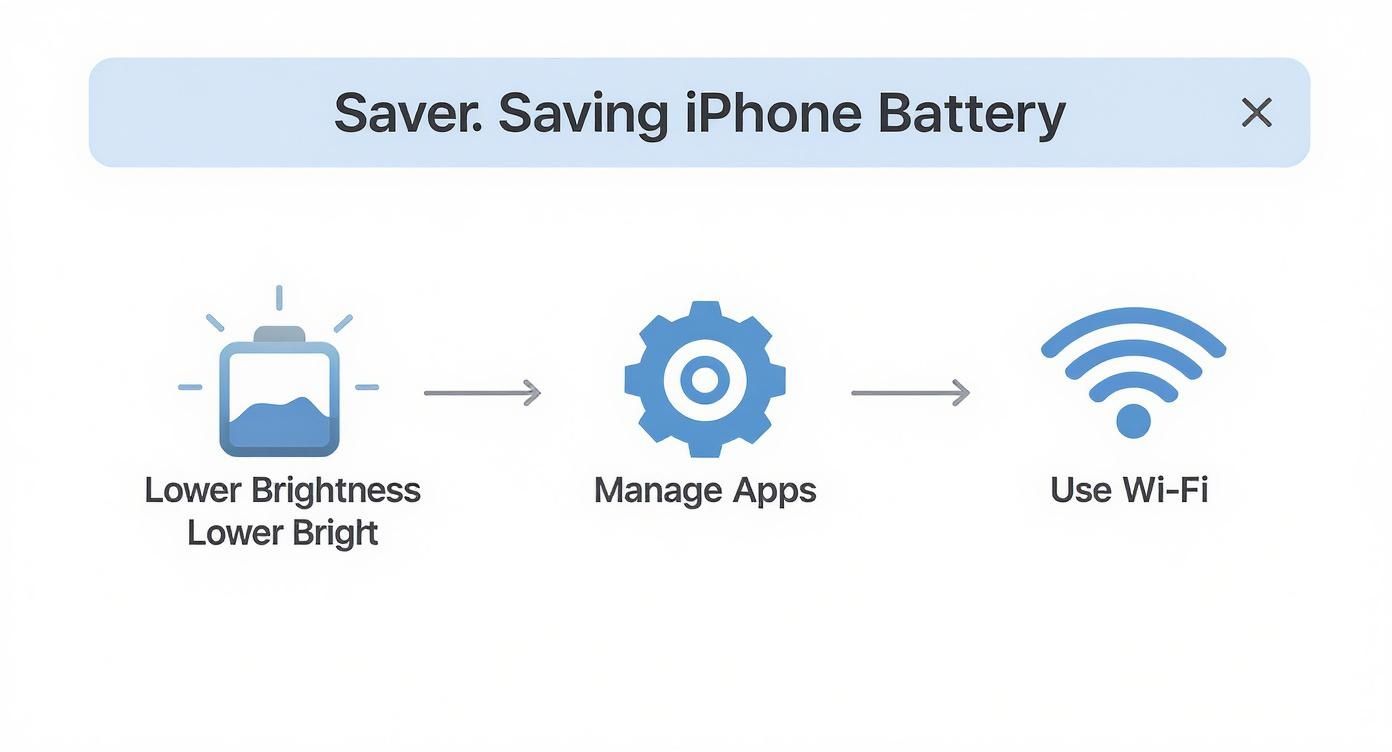
Adjust These Simple Settings to Save Battery Life

Two smartphones display battery saving settings, including Low Power Mode, next to a laptop.

While smart charging habits are your best tool for long-term battery health, your device's settings are your best friend for getting through a long day. Your phone, tablet, and laptop are already packed with simple but powerful tools made to save power when you need it most.

It can feel a little confusing trying to figure out which settings to change, but just a few key adjustments can make a huge difference. These changes are all about telling your device to stop wasting precious energy on things you aren't using.

Master Your Screen and Display

Your device’s screen is almost always the biggest power user. It’s a beautiful, bright window into your digital life, but it also uses a lot of battery. Taming it is the quickest and easiest win you can get.

Start by lowering your screen brightness. You really don't need it turned all the way up unless you're in direct sunlight. For most situations, keeping it around 30-50% is perfectly fine and saves a surprising amount of battery. Better yet, just turn on Auto-Brightness and let your device handle it for you.

Next, you'll want to use Dark Mode. If you have a device with an OLED or AMOLED screen (which includes most modern phones), Dark Mode is a game-changer. Unlike older screens that light up the whole display, an OLED screen turns off individual parts to create true black. That means a black background uses almost no power—a fantastic way to save battery life.

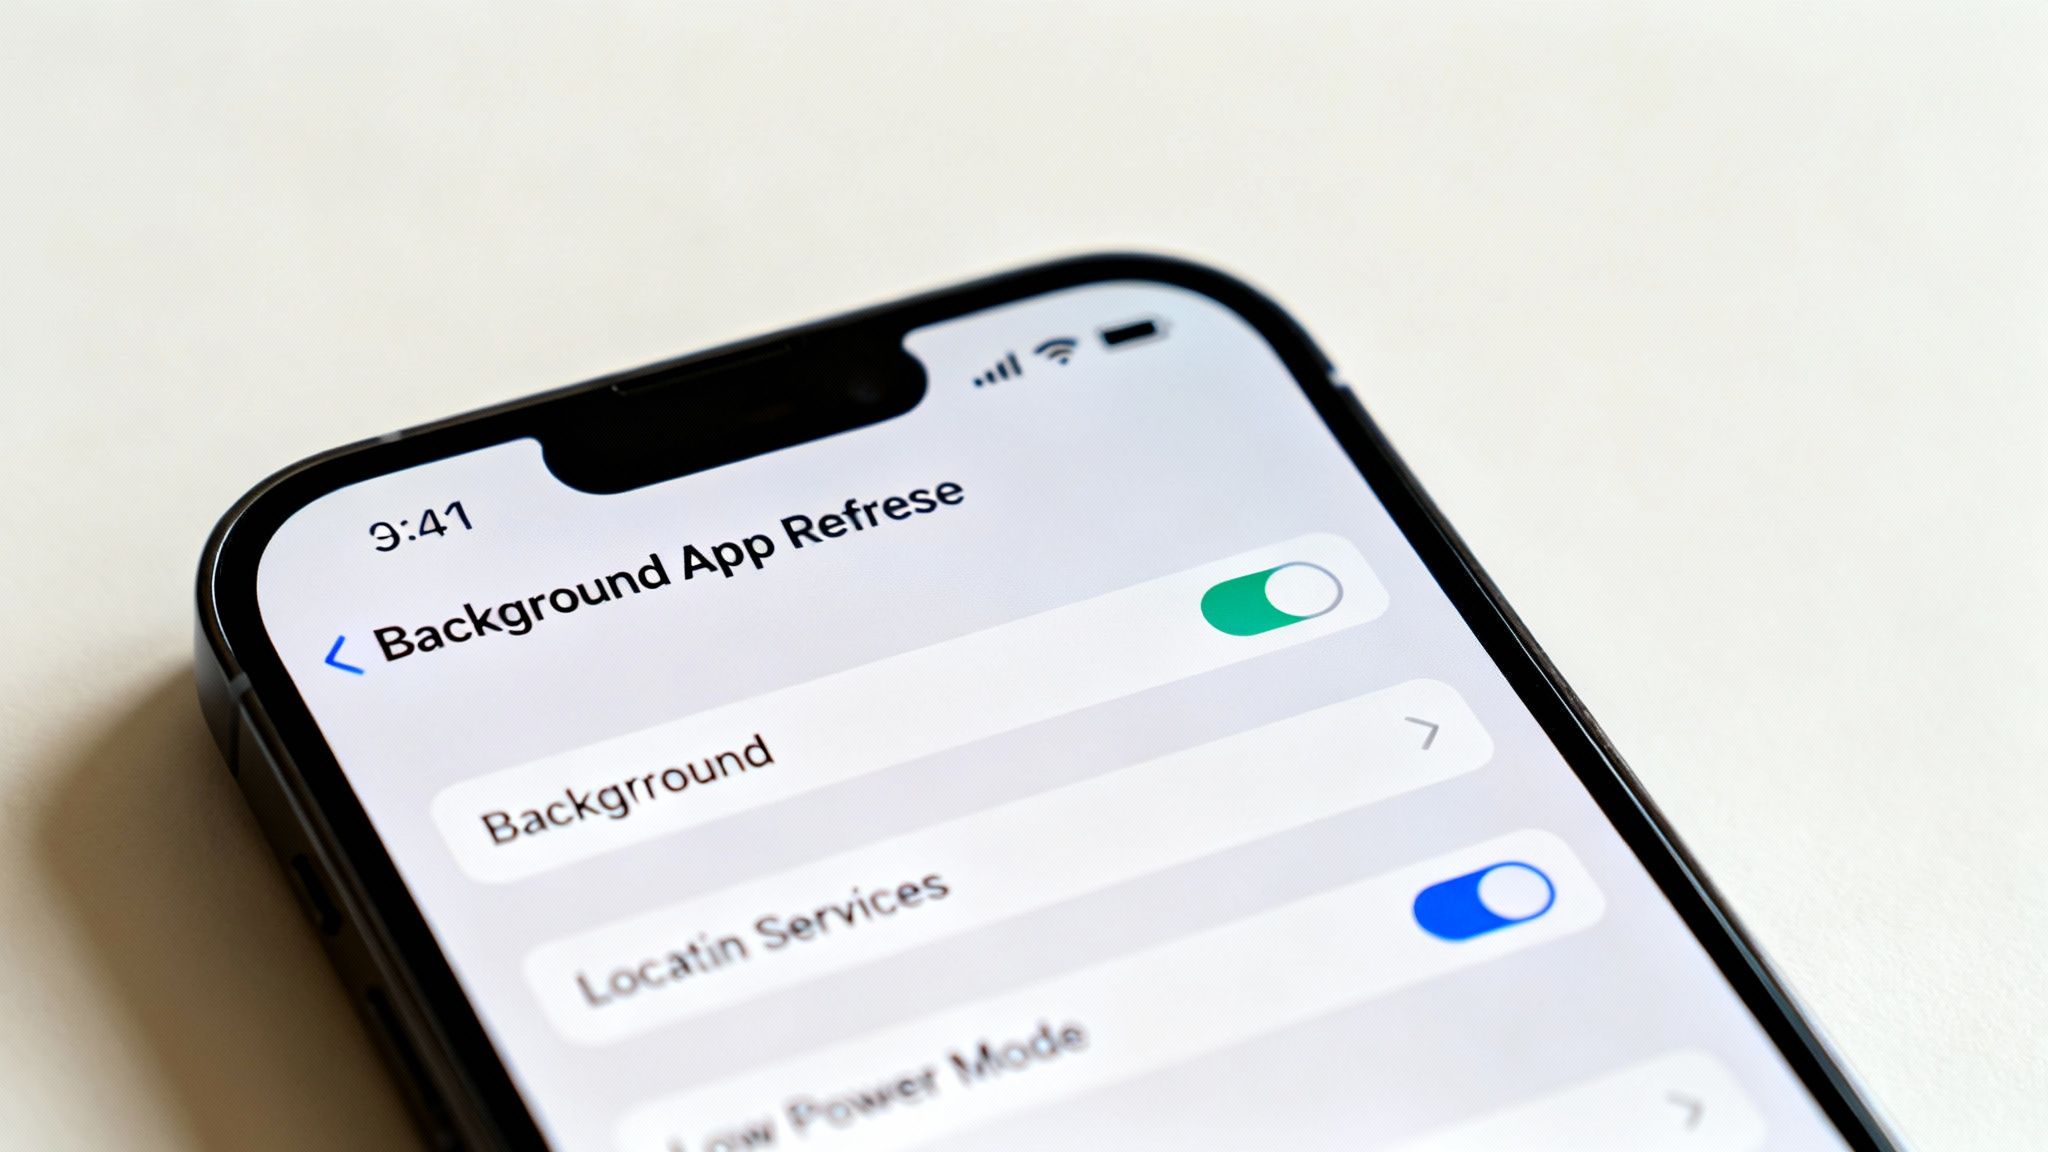
Tame Background App Activity

Ever close an app, only to get a notification from it minutes later? That's Background App Refresh at work. This feature lets apps check for new content and updates even when they're not on your screen.

It's useful for important apps like messaging or email, but it constantly drains a little battery for dozens of other apps that don't need to be running in the background.

  • On iOS/iPadOS: Go to Settings > General > Background App Refresh. You can turn it off completely or, the smarter move, turn it off for individual apps that don't need to be always on.
  • On Android: This is usually called "Background usage limits." Find it under Settings > Battery > Background usage limits and put any apps you don't need into "Deep sleeping" mode.

Taking just a few minutes to check your background app permissions can save a good amount of your daily battery life. If an app doesn't need to be on 24/7, put it to sleep.

The same idea applies to location services. Many apps ask for your location but don't actually need it to work. Go into your privacy settings and switch apps to "While Using the App" instead of "Always." For apps that have no reason to know where you are—like a simple game or photo editor—turn off location access completely.

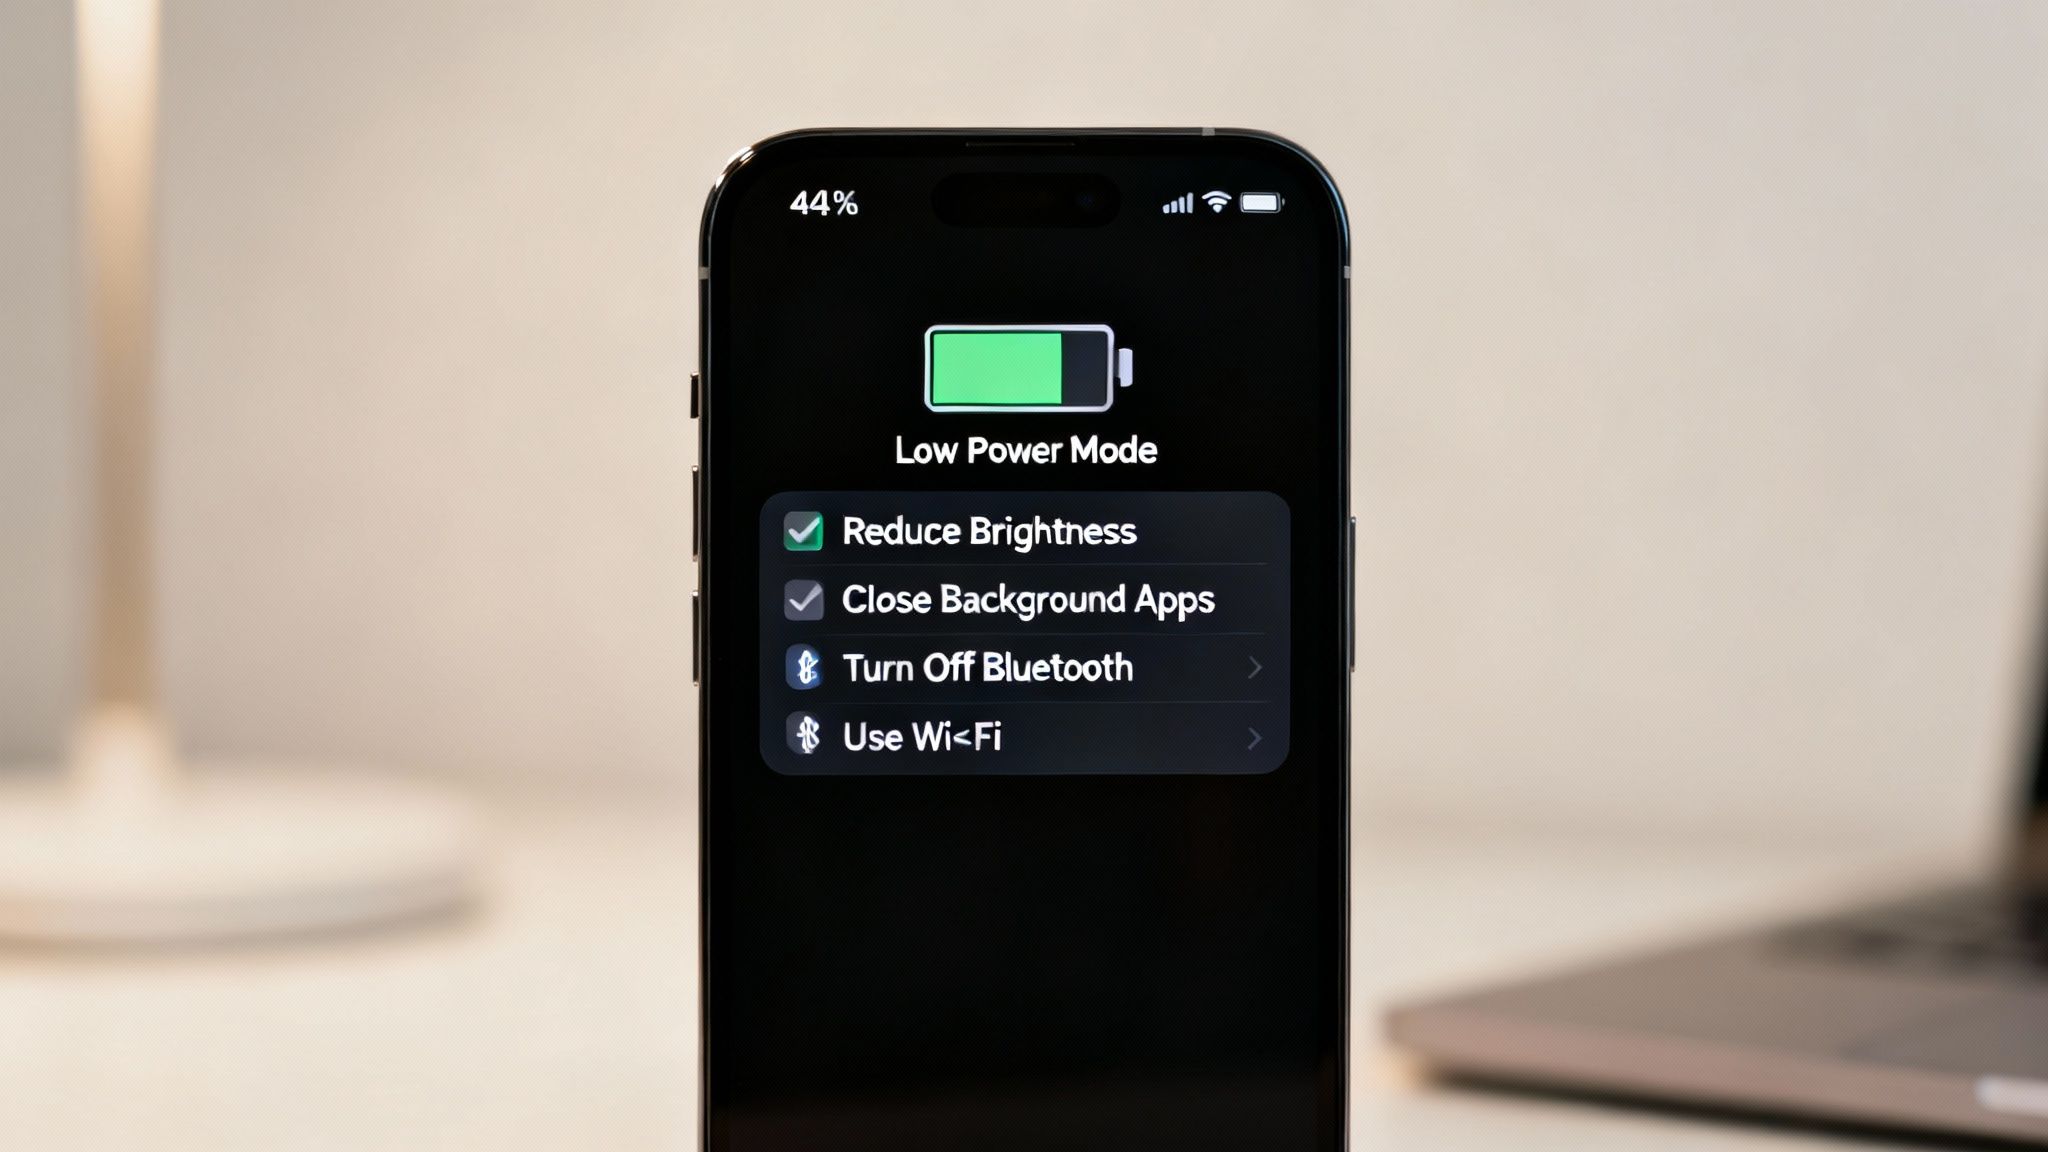
The Power of Low Power Mode

When your battery percentage starts getting low, your device’s built-in power-saving mode is your emergency helper. It's a one-tap solution that automatically makes several smart changes to stretch whatever charge you have left.

These modes are very effective because they temporarily slow down features that use the most power.

  • Low Power Mode (iOS/iPadOS): This reduces background activity, automatic downloads, and some visual effects. It also dims the screen and can slow the device down slightly.
  • Battery Saver (Android): This limits background apps, turns on Dark Mode, and stops some network connections. You can find a detailed breakdown in this guide to Android's power-saving mode.
  • Battery Saver (Windows): Dims the screen brightness and limits background notifications and activity.
  • Low Power Mode (macOS): Reduces system speed and screen brightness, choosing battery life over top performance.

The best time to flip this switch is when your battery hits 20%. Don’t wait until you're at 5%—turning it on early gives you a much longer runway. Just don't get in the habit of keeping it on all the time, as it limits your device’s performance and background functions, meaning you'll miss out on the full experience you paid for.

Battery Saver Settings Across Different Operating Systems

Finding the settings menus on different devices can be confusing. This quick table shows you where to find these important battery-saving features on major devices.

Feature iOS/iPadOS Android Windows macOS
Power Saver Mode Settings > Battery > Low Power Mode Settings > Battery > Battery Saver Settings > System > Power & battery > Battery saver System Settings > Battery > Low Power Mode
Screen Brightness Control Center or Settings > Display & Brightness Quick Settings or Settings > Display Action Center or Settings > System > Display Control Center or System Settings > Displays
Background Refresh Settings > General > Background App Refresh Settings > Apps > [Select App] > Battery Settings > System > Power & battery Not directly user-controlled in the same way
Location Services Settings > Privacy & Security > Location Services Settings > Location Settings > Privacy & security > Location System Settings > Privacy & Security > Location Services

Ultimately, taking control of your device’s settings is all about making the software work for you. By adjusting how your screen behaves and which apps get to run in the background, you can easily squeeze more life out of every charge.

Automate Your Charging and Forget About It

A smartphone charges on a nightstand with a white adapter, next to a bed.

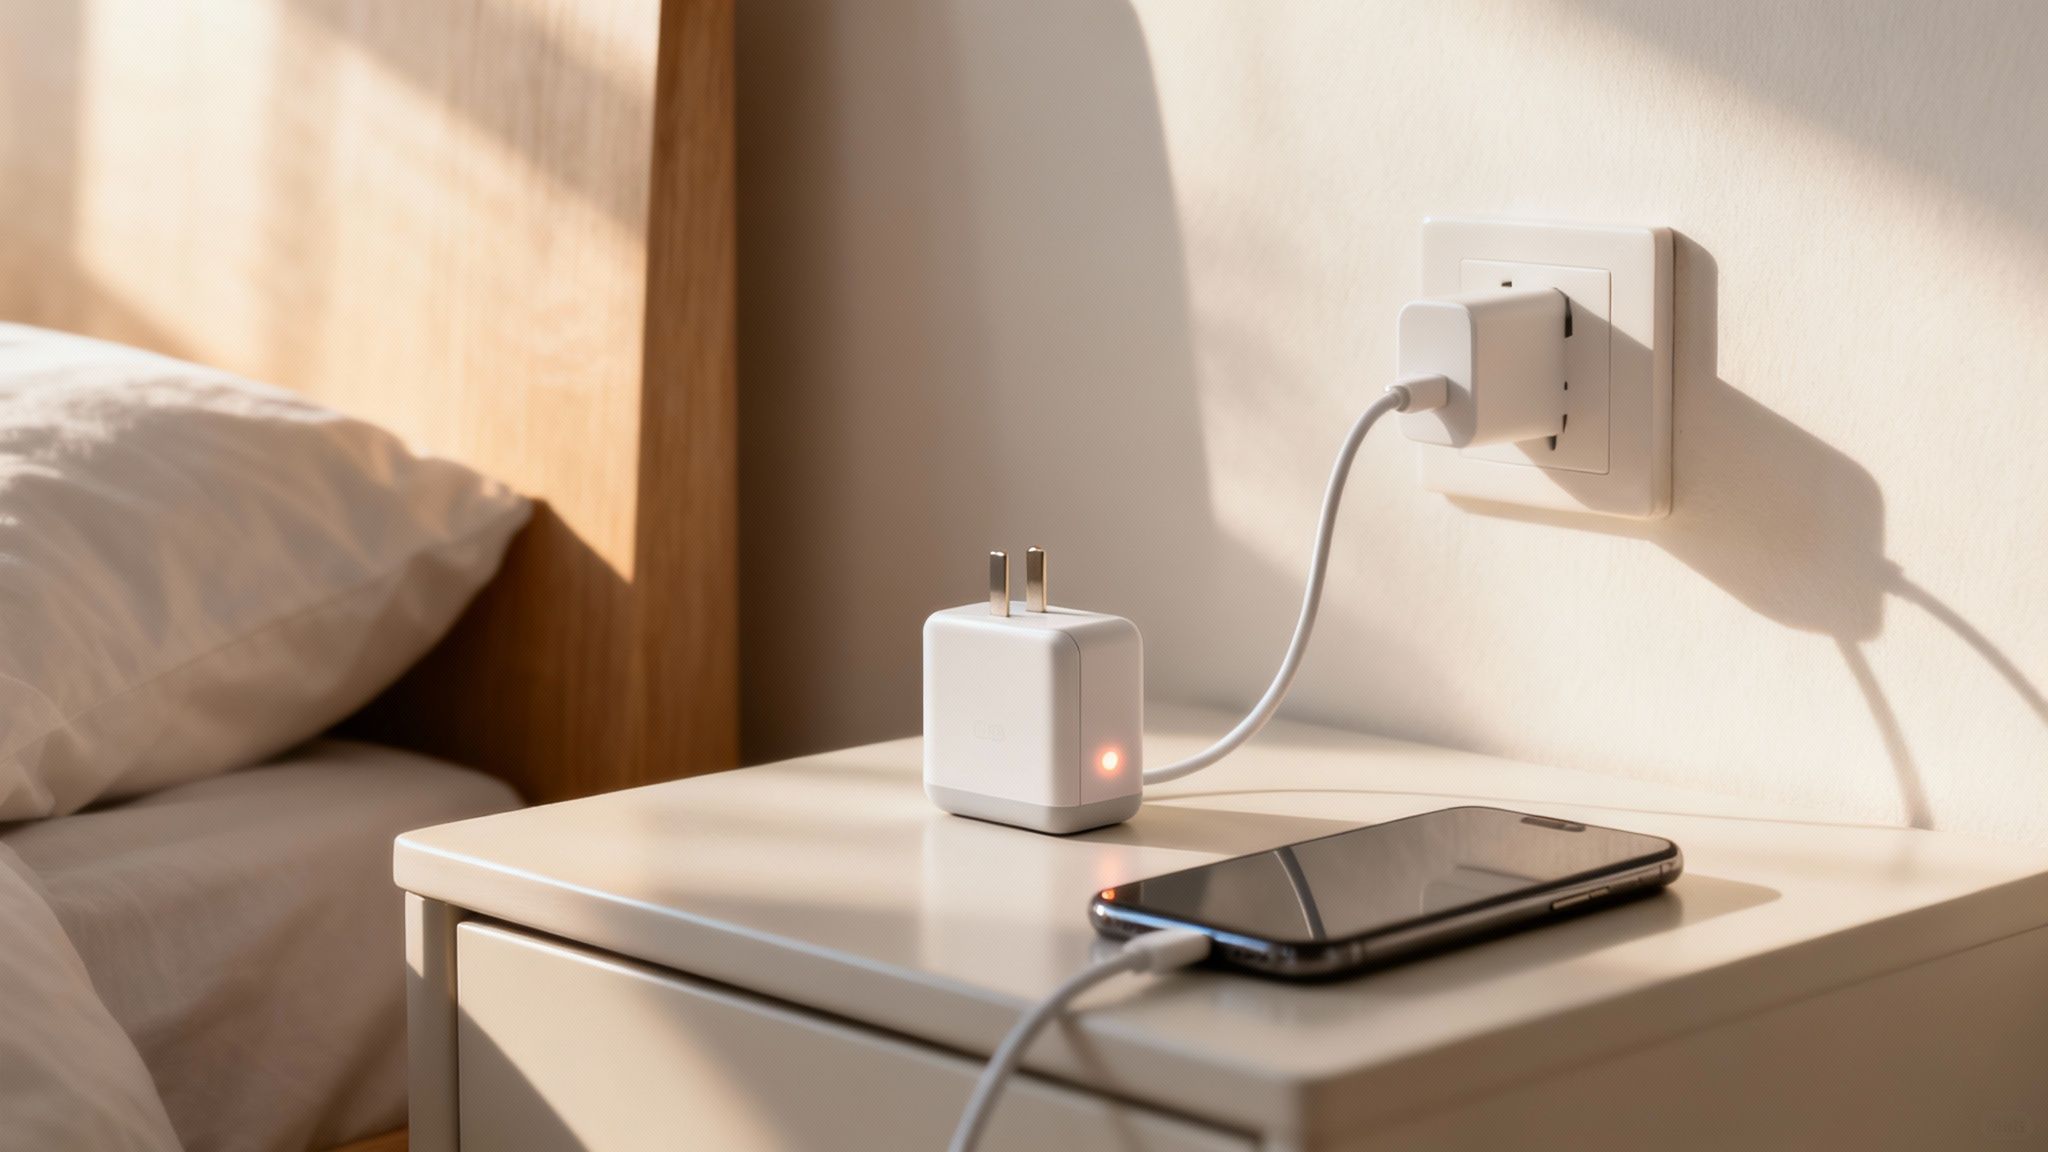
Look, building better habits is great, but let's be real—remembering to grab your phone off the charger the second it hits 80% is a huge pain. Life is busy. It’s way too easy to plug in your phone overnight and not think about it again until your morning alarm goes off.

This is where automation becomes your best friend. It takes the stress out of smart charging. Instead of relying on willpower or setting annoying alarms, you can use a tool that does all the work for you.

Why Hardware Is the Real Deal

The most reliable way to automate this process is with a physical gadget that sits between your charger and your phone. This is a huge step up from software-only solutions. While built-in features like Optimized Charging on an iPhone are a good start, they still end up charging the battery to a full 100%, which is exactly the stress we want to avoid.

A hardware tool gives you direct, foolproof control. It doesn’t just manage the charge—it physically cuts the power.

Think of it like a smart light switch for your charger. It watches your battery level, and once it hits the limit you’ve set, it completely shuts off the flow of electricity. This is important because it prevents any extra charging and totally removes the stress that wrecks your battery over time.

This means your device never has to sit at that stressful 100% state for hours, which is one of the biggest causes of early battery aging.

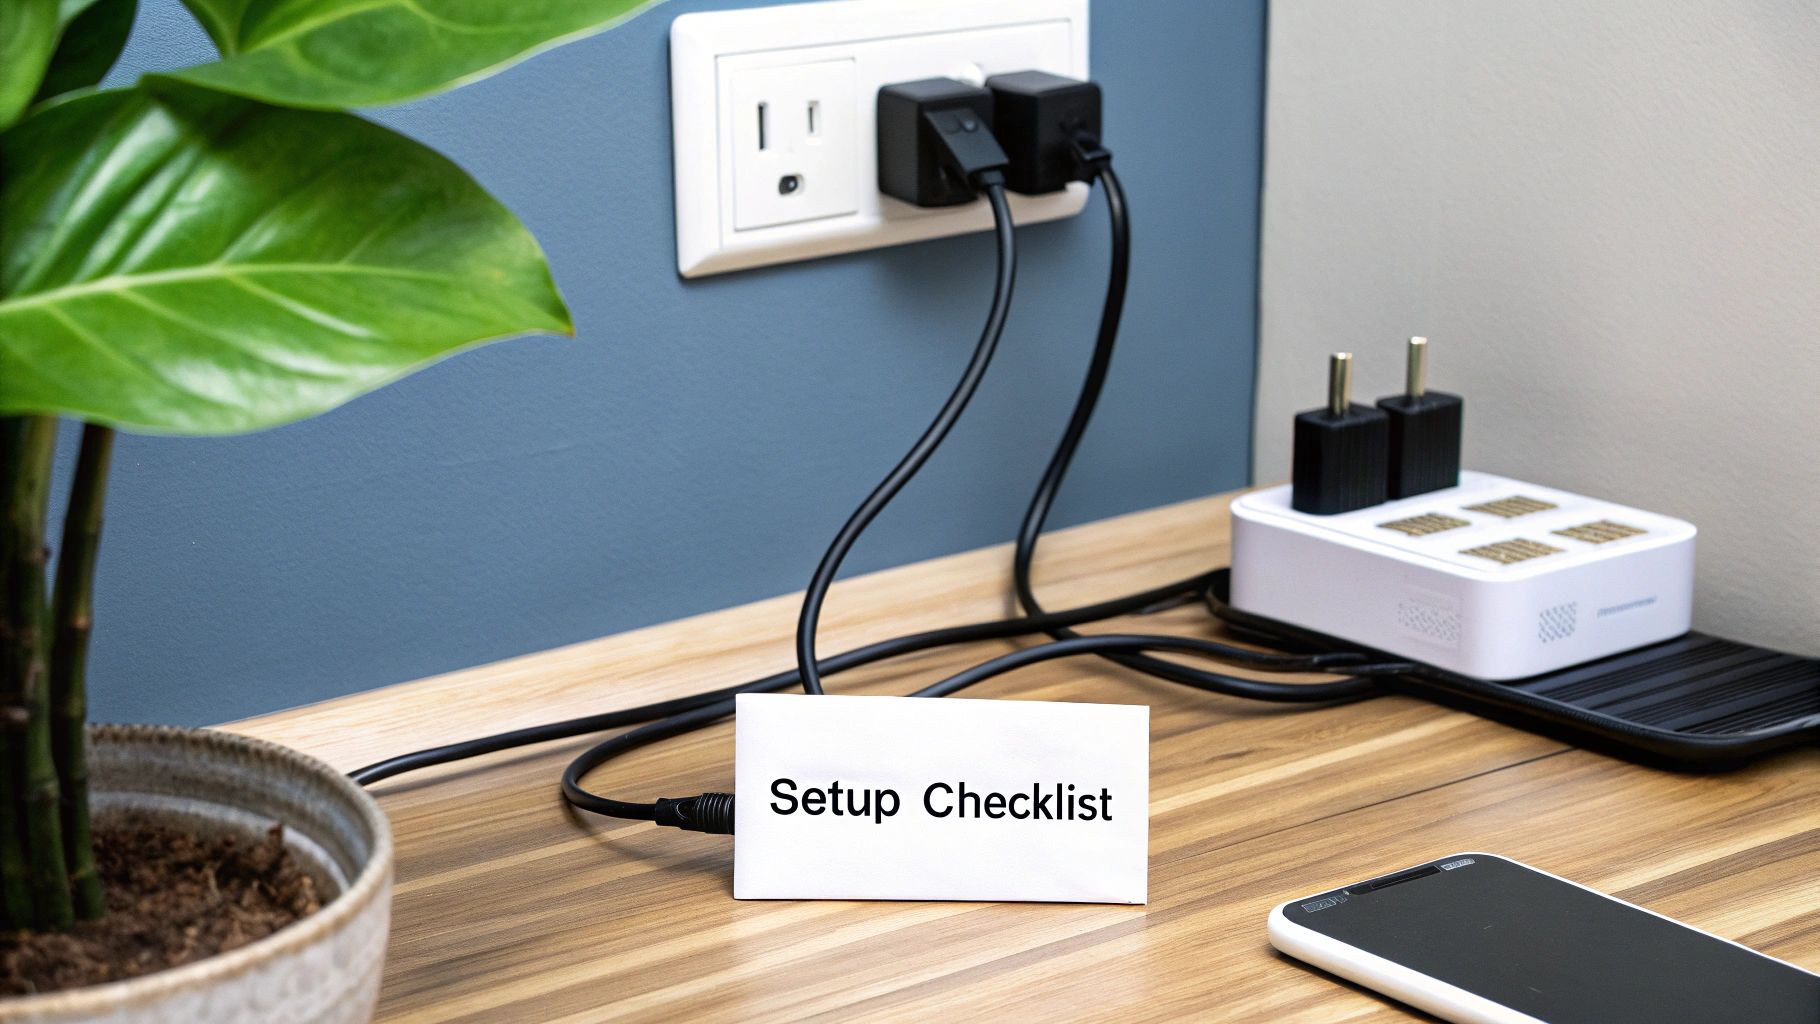
Putting It Into Practice with Chargie

One of the best-known tools for this is a tiny device called Chargie. It’s a simple, set-it-and-forget-it solution that makes perfect charging totally easy. You just plug the Chargie into your USB charger, then plug your normal cable into the Chargie.

From there, its app lets you set your ideal charging limit. For example, you can tell it to stop charging your phone once it reaches 80%. The moment that level is hit, Chargie physically cuts the connection from the wall adapter. Your battery is safe.

The app gives you precise control, basically automating all the best practices we've been talking about.

For anyone who charges their phone overnight, this is a total game-changer. Here’s how it works in the real world:

  1. You set your limit. You decide 80% is your magic number and set it in the Chargie app.
  2. You plug in at night. Just like you always do. Chargie allows power to flow until your phone’s battery hits 80%.
  3. The power cuts off. The instant it reaches that limit, the hardware inside Chargie disconnects the power. No more electricity reaches your phone for the rest of the night.
  4. You wake up ready to go. Your phone is at a healthy, stress-free charge level. It never spent hours straining at 100%.

This simple, one-time setup automates the single most effective habit for long-term battery health. If you want to learn more about the tech, you can check out this guide on what a battery charge limiter is and how it all works.

By investing in a small piece of hardware, you take all the guesswork and discipline out of the equation. You no longer have to think about when to unplug—it’s handled for you, perfectly, every single time.

Thinking Long-Term: Battery Care and Maintenance

So, you’ve got your daily charging habits figured out. Great. But what about the bigger picture? To really get years, not just months, out of your battery, you need a long-term game plan. A little bit of smart maintenance can protect your device from the kind of slow damage you don’t see until it’s too late.

One of the most common mistakes is how people store their old devices. If you're putting a phone, tablet, or laptop away for a few weeks or months, never leave it at 100% or let it die completely. Storing a battery at either extreme is a sure way to kill its ability to hold a charge for good.

The best level for storage is right around 50% charge. Just get it there, power it down, and put it in a cool, dry place. It's a simple step that makes a world of difference.

The Right Tools for the Job

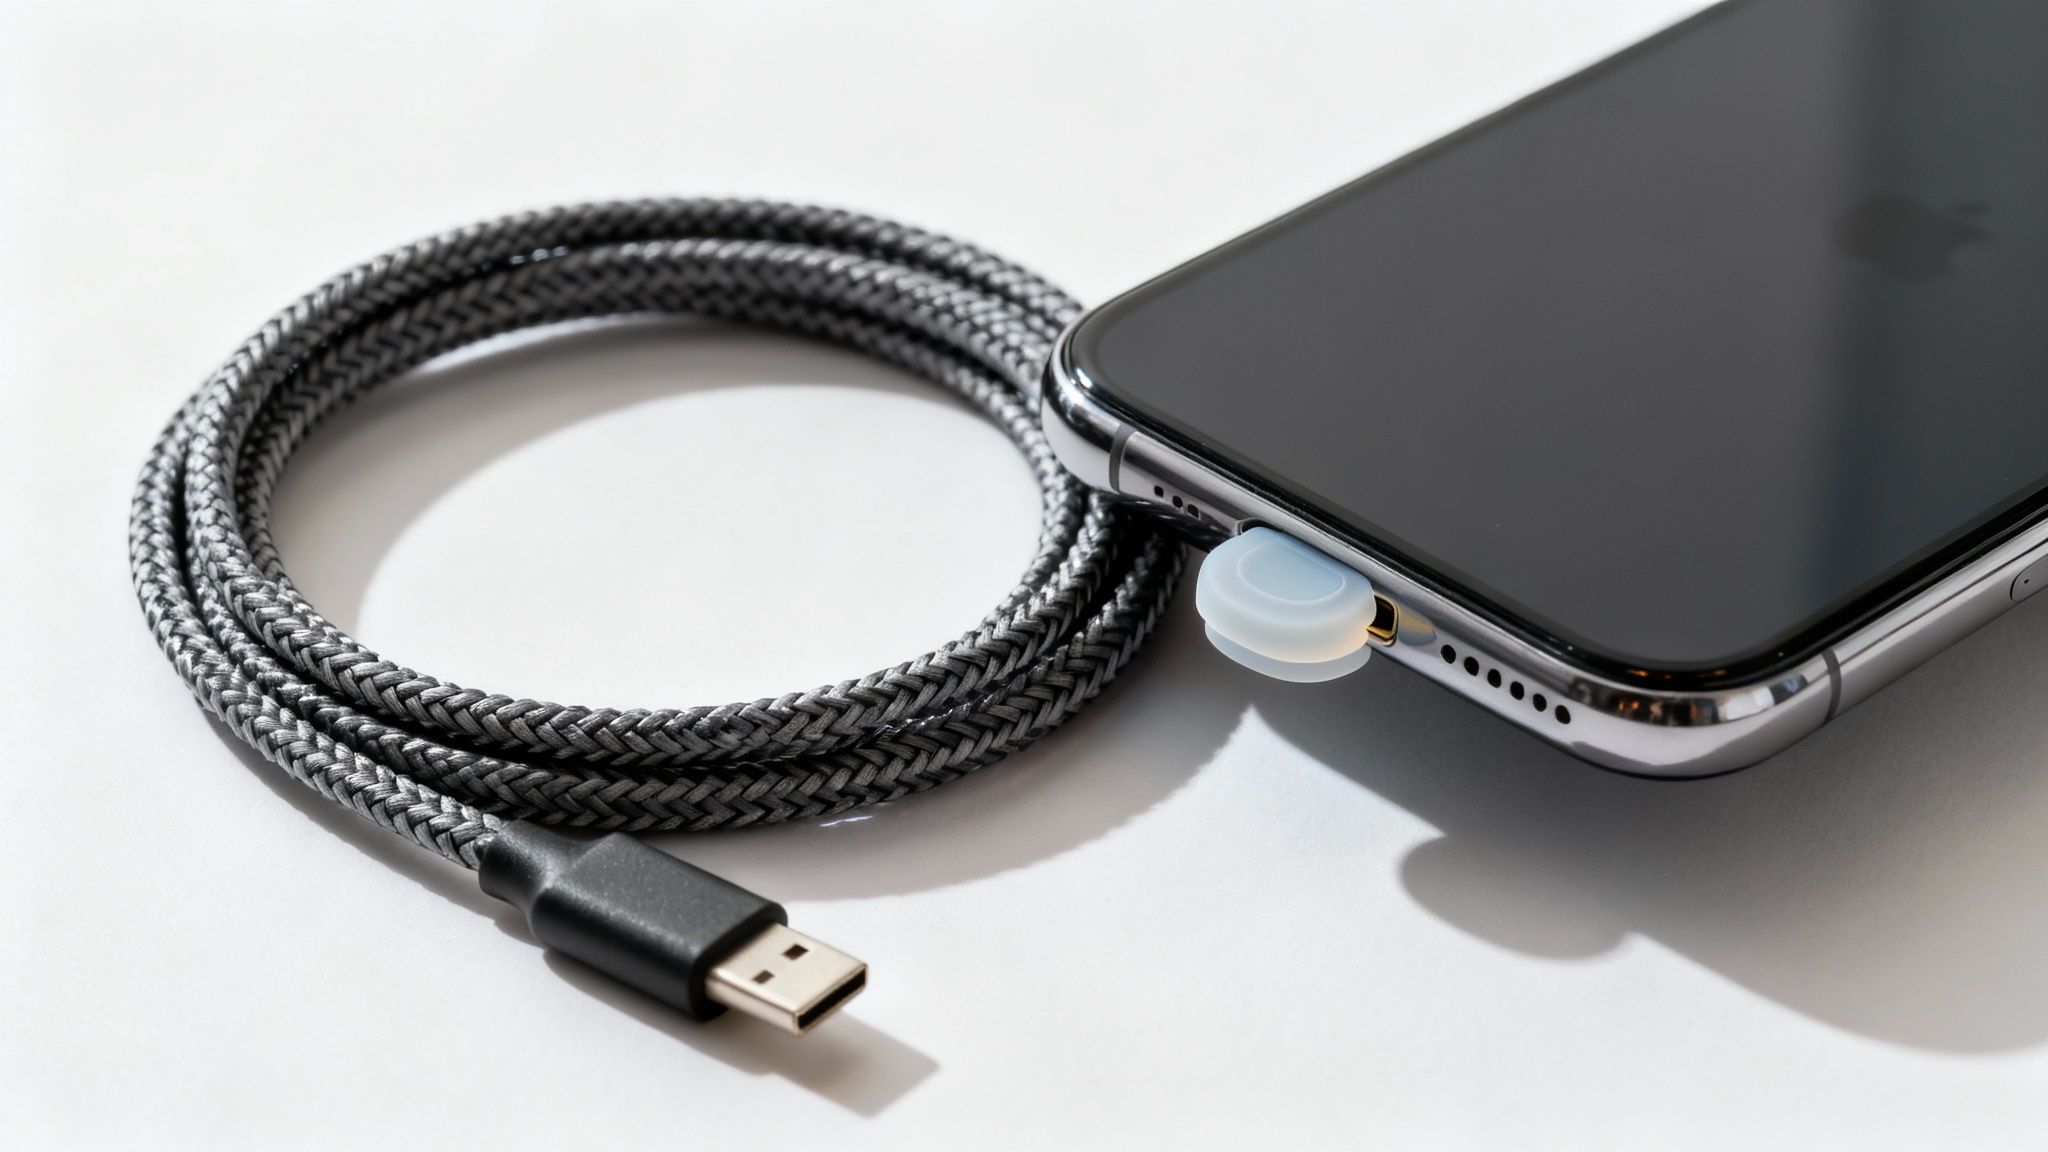
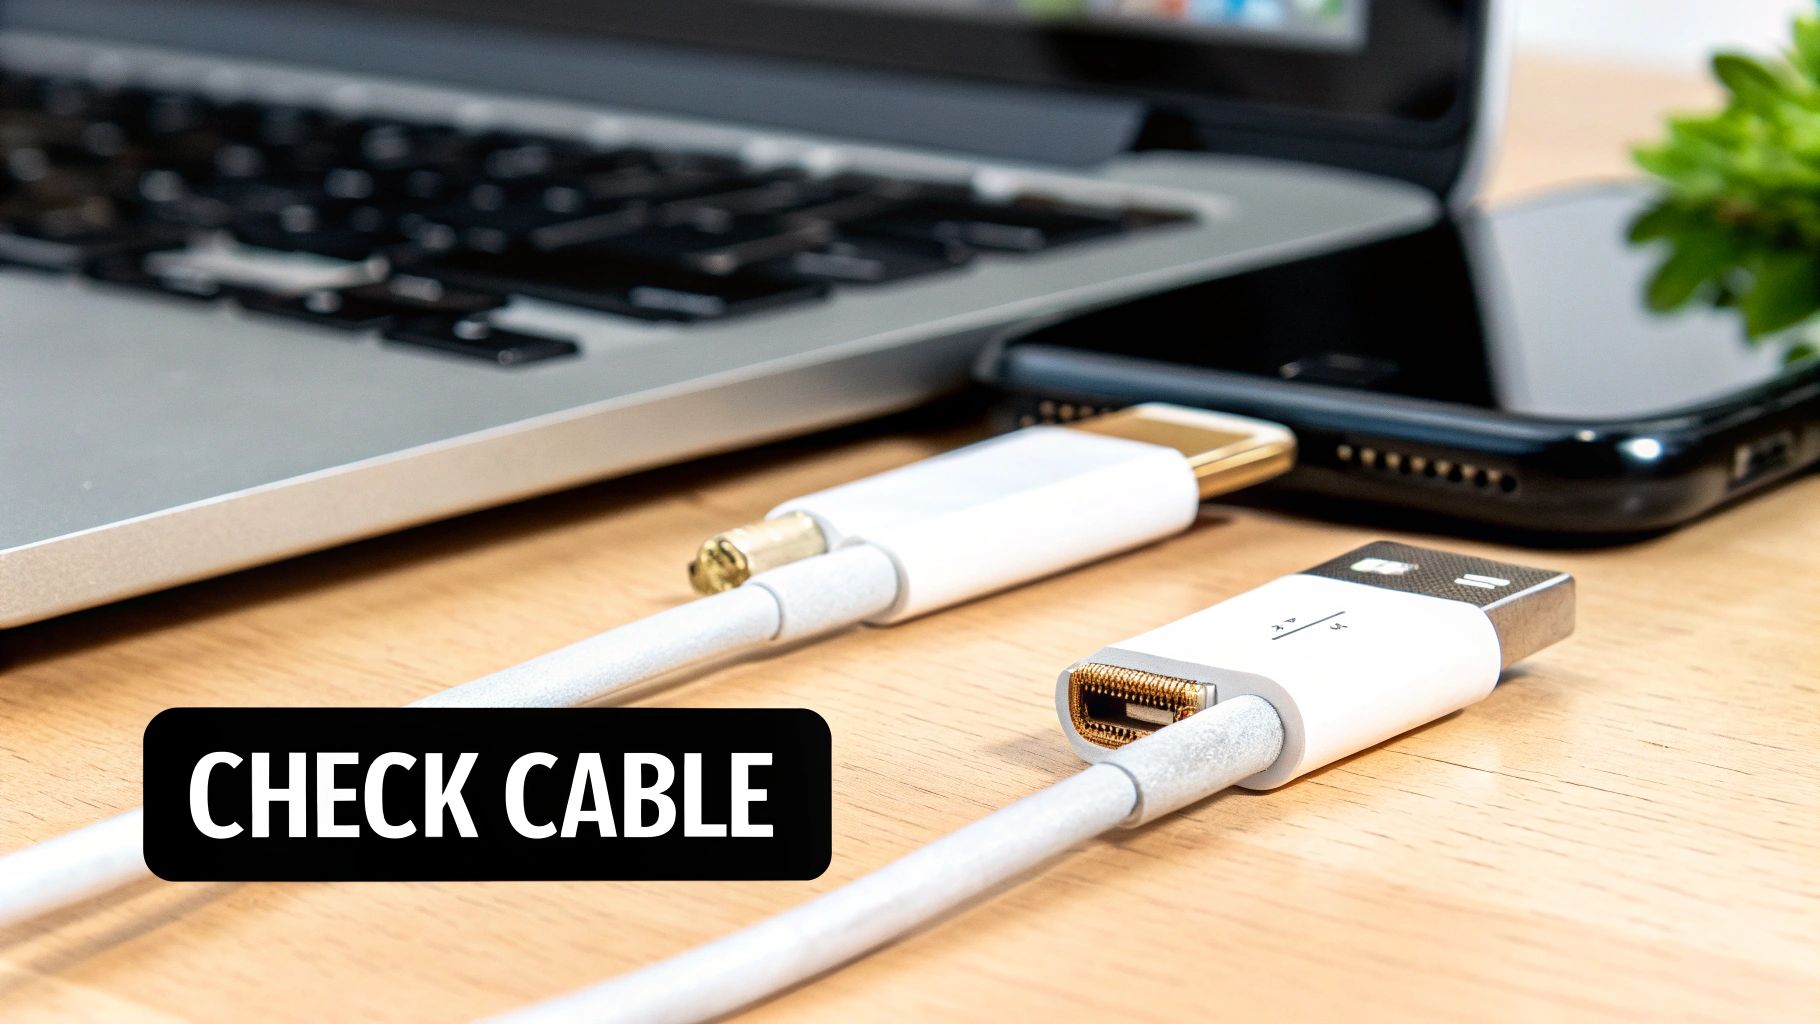
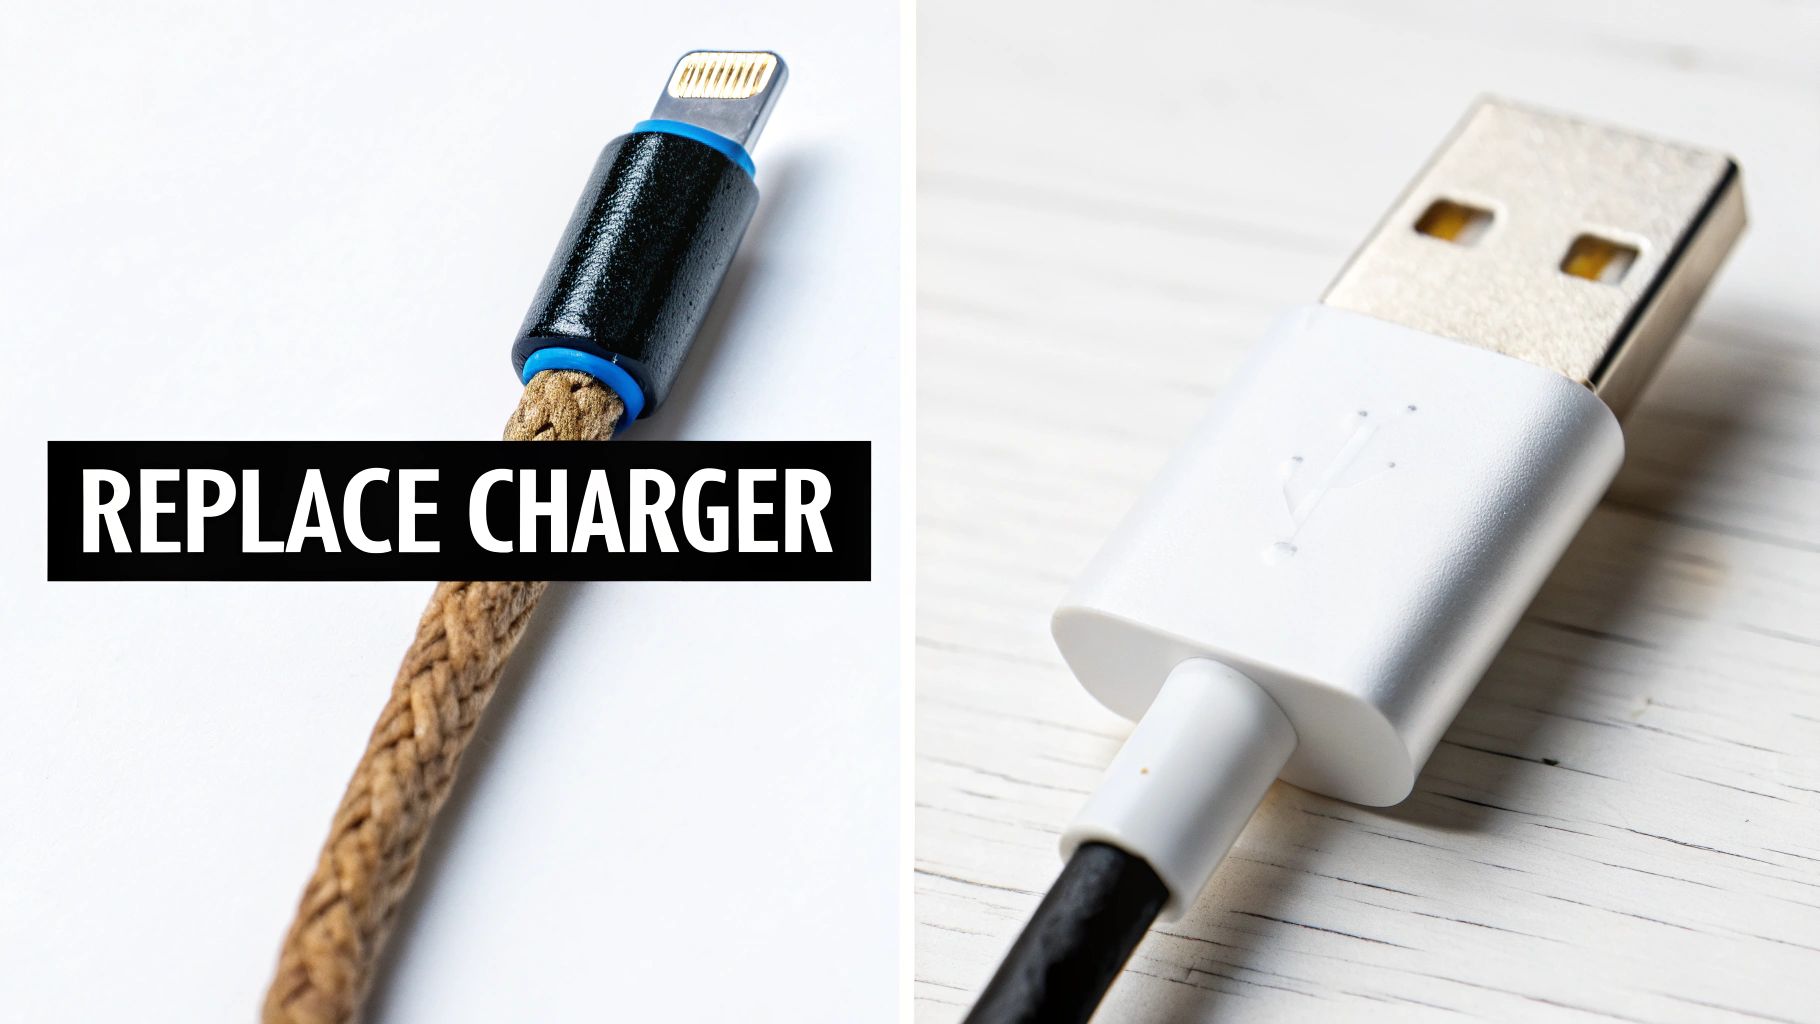
This brings me to another key point: your accessories matter. A lot. It’s incredibly tempting to grab that cheap, generic charging cable from a gas station when you’re in a hurry, but trust me, it’s a huge risk.

Those low-quality chargers and cables often lack the important safety features that prevent overheating and power surges. That’s a recipe for permanent battery damage. Do yourself a favor and stick with the charger that came with your device or one from a trusted, certified brand. It’s a small investment to make sure your battery gets a stable, safe charge every time.

Taking proper care of batteries has a positive effect far beyond our own devices. The same ideas that extend your phone's life are being used to give massive electric vehicle batteries a second life as power storage for the energy grid.

It's pretty amazing, actually. Research shows that with the right care, old electric car batteries can be reused for over 16 more years as power storage after they’re no longer fit for a car. It just goes to show you the incredible potential inside batteries when we treat them right. You can read more about these innovative battery reuse strategies.

Ultimately, all these little habits are about more than just saving a few hundred bucks on a new phone. When you make your battery last longer, you’re also doing the planet a favor.

Keeping our electronics running for as long as possible is one of the best ways to cut down on e-waste. By understanding the environmental impact of electronic waste, it's clear how these small, thoughtful choices can add up to a big, positive impact. And if you want to see the results of your efforts, you can learn how to check battery health and watch the numbers stay high.

Got a few more questions in your head? Good. Let's clear up some of the most common myths and concerns people have about their batteries.

Does Fast Charging Damage My Battery?

In a way, yes. It's a trade-off between convenience and a long battery life. Fast charging forces a lot of power into your battery very quickly, which creates a lot of heat. And as we've already covered, heat is the absolute worst enemy of a healthy battery.

While it won't kill your battery overnight, making a habit of fast charging every single time will definitely make it age faster compared to slower, cooler charging methods.

Think of it this way: fast charging is great when you're in a hurry and need a quick power boost. But for your regular, nightly charge? Slower is always, always better in the long run.

Should I Let My Battery Die Completely Before Charging?

Nope, absolutely not. That's advice from the old days of different batteries, and it's terrible for the modern batteries in our devices.

Draining your battery all the way to 0% puts a huge amount of stress on its internal parts. Doing this repeatedly can cause permanent damage and reduce the total amount of charge it can hold. A much better habit is to plug in your device before it drops below 20%. It's such a simple change, but it makes a huge difference.

How Do I Know When It’s Time for a New Battery?

Your phone or laptop will start giving you some pretty clear hints. The most obvious sign is that you just can't get through the day anymore on a single charge. You'll find yourself looking for a charger by mid-afternoon.

You might also notice it shutting down suddenly, even when the battery meter says you still have 20% or 30% left. That's a classic sign of an old battery that can't provide steady power anymore.

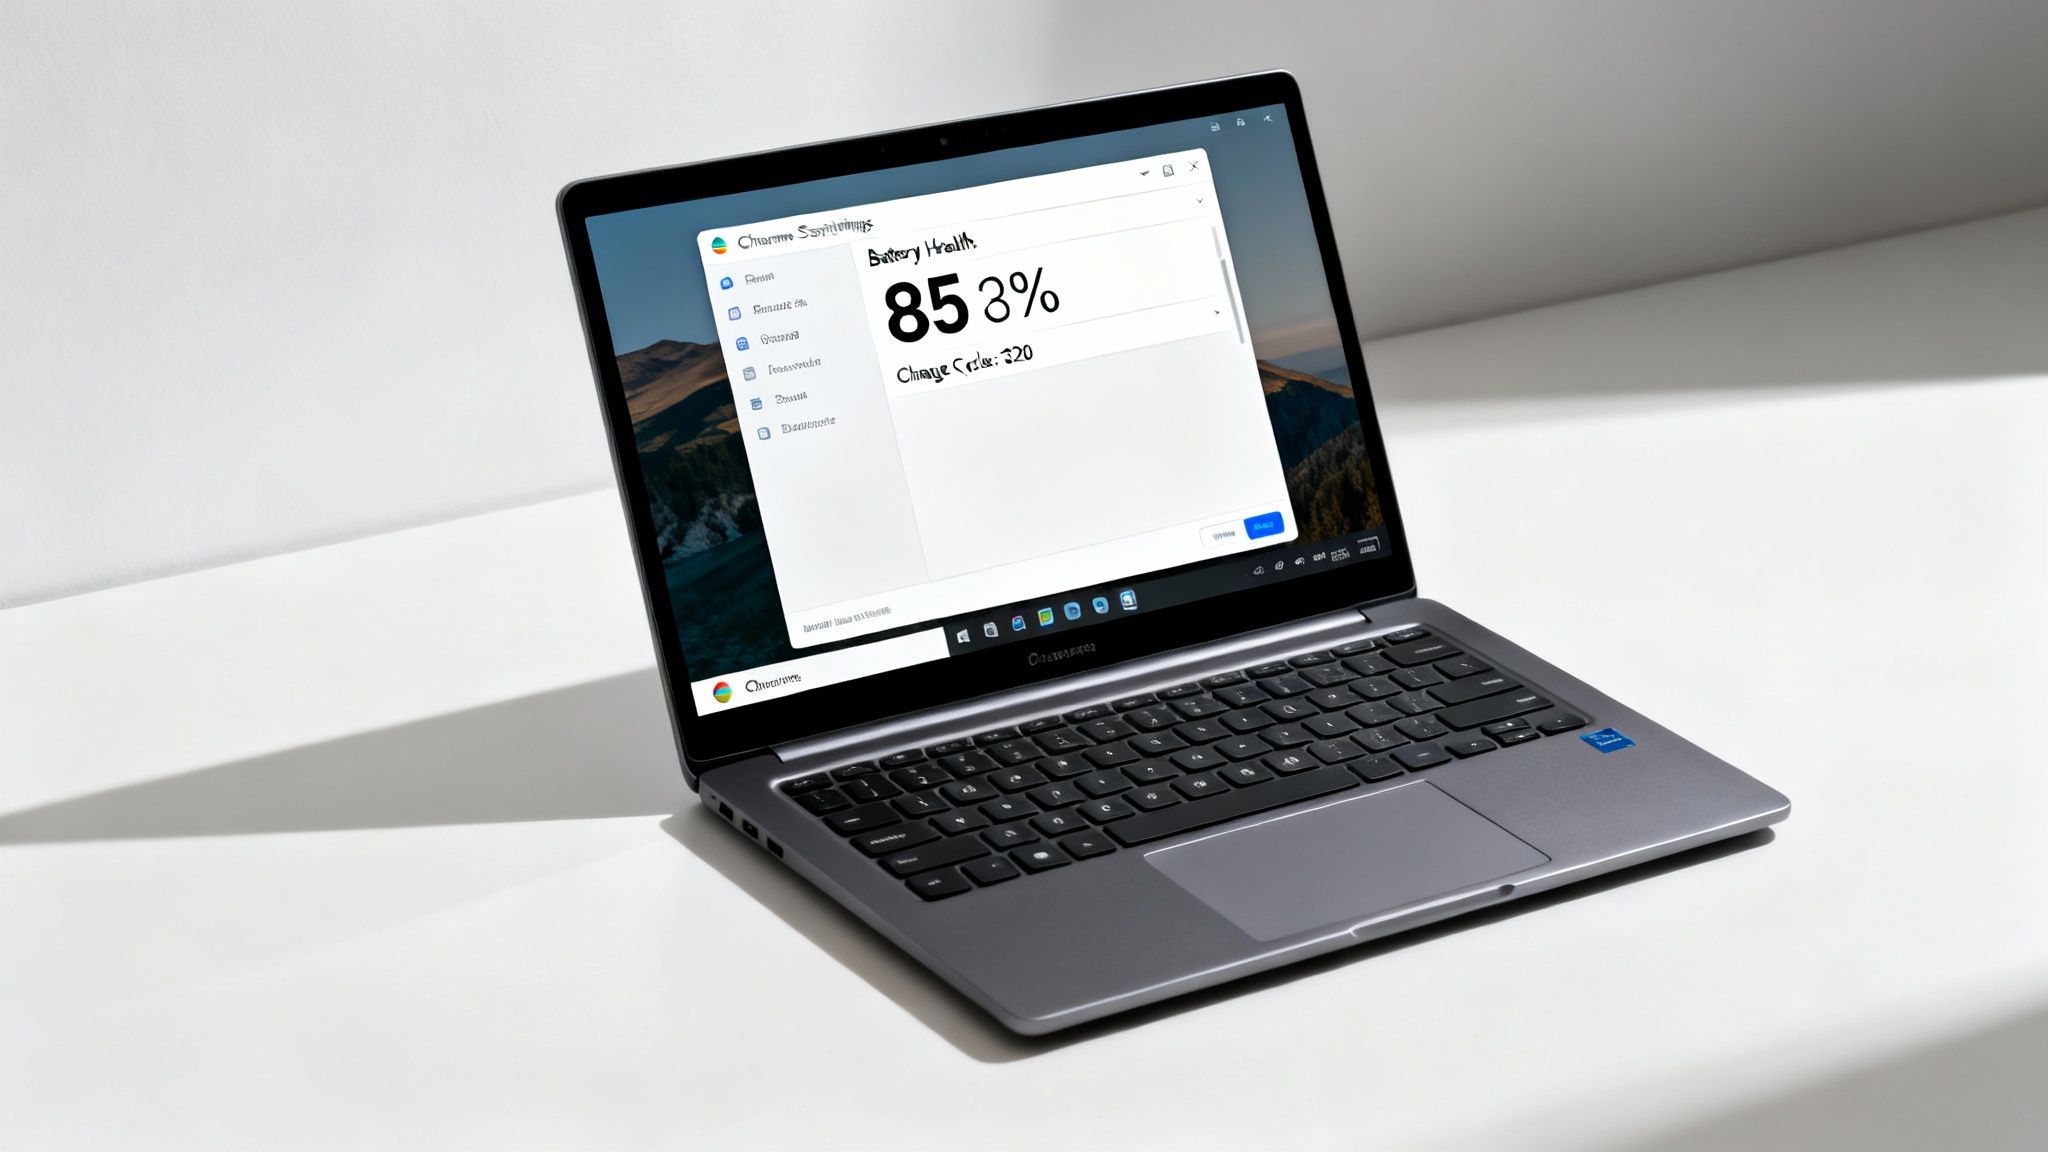
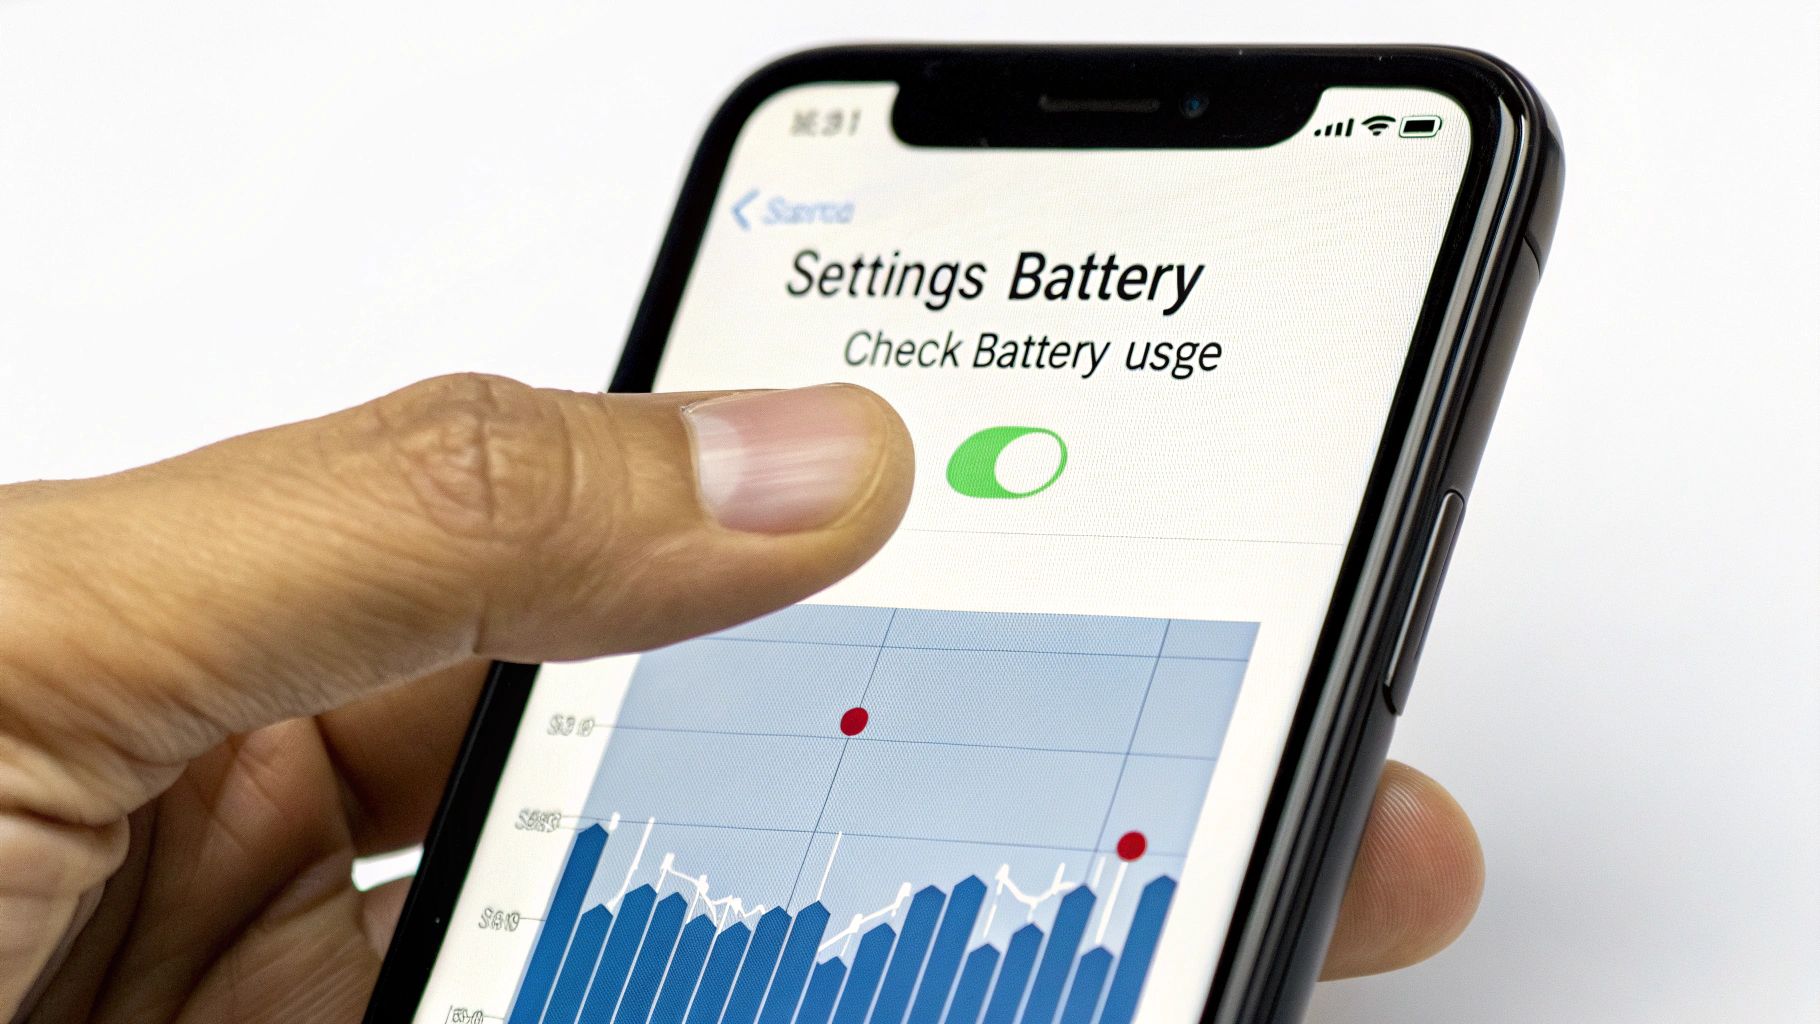
Most phones have a built-in health checker in the settings menu. Look for "Maximum Capacity." If that number has dropped to around 80% or less, you can be sure a new battery will make your device feel brand new again.


Ready to stop worrying about your charge levels and let technology do the hard work? Chargie automates all the best practices we've talked about. It physically cuts power at whatever limit you set, making sure your battery stays in top shape for years to come. Get your Chargie today and extend your battery life effortlessly.

How To Conserve iPhone Battery And Make It Last Longer

We've all been there: you look at your iPhone, and it's barely noon, but your battery is already low. It’s a sinking feeling. Before you start getting lost in confusing settings, let's talk about the quick wins—the simple changes that make a real difference, right now.

Your Five-Minute Fixes For Better Battery Life

You don't need to be a phone expert to get your battery life back. A few smart taps can have a big effect, controlling the biggest power users without changing how you use your phone.

Think of this as your emergency checklist. We're going to fix the features that drain power the fastest, and it will take less time than making a cup of coffee.

Close-up of an iPhone screen displaying Low Power Mode at 44% battery to conserve power.

The Biggest Battery Hogs and How to Tame Them

So, what are the usual problems? Your iPhone’s beautiful screen is one of the biggest. The brighter it is, the faster it uses power. It's a simple cause and effect.

The other major power drain happens in the background. Apps are always updating, checking your location, and sending you notifications. All these things use up your battery, even when your phone is in your pocket. These background activities can easily drop your daily usage from a solid 8–9 hours down to just 6. For a deeper look at what affects your iPhone's battery, check out our article about iPhone battery saving tips.

The good news is that you have complete control over these features.

Pro Tip: Don't just save Low Power Mode for when you're at 10%. I've made a habit of turning it on around 30% or 40%. It’s a great way to make sure my phone lasts through a long evening without me having to look for a charger.

The table below shows five of the best things you can do right away to fight these common battery drainers.

Top 5 Quick Fixes for iPhone Battery Drain

Here’s a look at the most powerful changes you can make in just a few minutes. Each one deals with a specific power-hungry feature and tells you exactly where to go to fix it.

Quick Fix What It Solves How to Do It
Enable Low Power Mode Reduces overall power use by limiting background activity, fancy screen effects, and some network features. Go to Settings > Battery and turn on Low Power Mode. You can also add it to your Control Center for one-tap access.
Lower Screen Brightness The screen is one of the biggest power users. Lowering its brightness is the single best quick fix. Swipe down to open the Control Center and drag the brightness slider down. Or go to Settings > Display & Brightness.
Turn Off Background App Refresh Stops apps from getting new information in the background, which is a major hidden battery drain. Go to Settings > General > Background App Refresh and either turn it off completely or for certain apps you don't need updating all the time.
Manage Location Services Stops apps from constantly using GPS, which uses a lot of power. Go to Settings > Privacy & Security > Location Services. Set apps to "While Using" or "Never" instead of "Always".
Reduce Push Notifications Fewer notifications mean your screen lights up less often, saving a surprising amount of power over a day. Go to Settings > Notifications and turn off notifications for apps that don't need to alert you instantly.

Learning these five simple habits is the first and most important step. Once you’ve done these, you can move on to the more advanced tips we’ll cover next.

Digging Into Your iPhone Settings To Stop Hidden Drains

Beyond the quick fixes, your iPhone's Settings app holds the real key to amazing battery life. Many of the default features run quietly in the background, constantly using power without you even knowing. Taking control of these settings is the next step to truly master your iPhone's battery and make it through even the busiest days.

Close-up of an iPhone screen displaying 'Background App Refresh' settings with toggles enabled.

Let's go on a quick tour of the most important settings, and I'll show you exactly what to change and why. These aren't just random switches; each change is meant to stop a specific type of hidden power drain.

Tame The Power of Background App Refresh

Background App Refresh is a classic battery hog. It's the feature that lets your apps check for new things even when you aren't using them. While that’s handy for your email or news app, it becomes a huge power drain when dozens of apps are all trying to update at once.

Instead of just turning it on or off, think smart. Which apps really need to be perfectly updated the moment you open them? Probably only a few.

You can control this by going to Settings > General > Background App Refresh. From there, you have a few options:

  • Turn it off completely for the most savings.
  • Set it to Wi-Fi only, which stops apps from using your phone's data plan to refresh.
  • The best way: Go through the list and turn it off for apps that don't need constant updates, like a game or a photo editor.

Fine-Tune Your Location Services

GPS is one of the most power-hungry things your phone does. It's amazing how many apps ask for your location but don't actually need it to work. Sure, a weather app might need your location once when you open it, but a social media app probably doesn't need to track you all the time.

Go to Settings > Privacy & Security > Location Services. You'll see a list of every single app that has asked for your location. Look at this list carefully and be strict.

  • Never: For apps that have no reason to know where you are.
  • Ask Next Time Or When I Share: This is a great option that makes the app ask for permission each time.
  • While Using the App: This is the best setting for most apps that need your location to work, like maps or ride-sharing services. It makes sure they only use GPS when you have them open.
  • Always: Save this for only the most important apps. It lets them use your location at any time, which can really drain your battery.

I found a huge problem on my own phone: a shopping app that was set to "Always." It was using my location in the background to send me ads for nearby stores. Changing it to "While Using" stopped that hidden drain immediately.

Reduce Motion and Unnecessary Visual Effects

Your iPhone is full of beautiful, smooth animations that make it feel nice to use, but they also make your phone's brain work a little harder. While each little animation doesn't use much power, it adds up over thousands of times you use your phone each day.

To turn them down, go to Settings > Accessibility > Motion and turn on Reduce Motion. This replaces some of the fancier animations, like the 3D effect on your home screen, with simpler, faster ones. It might feel a bit different at first, but many people end up liking the quicker feel and the small battery savings it gives.

Rethink How Your iPhone Gets Mail

Here's a big one. If you don't need to see every single email the second it arrives, changing your Mail settings can be a huge power saver. The normal "Push" setting keeps a constant connection to your email server, which uses up energy.

Go to Settings > Mail > Accounts > Fetch New Data. Here you can turn off Push and choose a "Fetch" schedule instead. Setting your phone to get new mail every 15 or 30 minutes—or even only when you open the app—means it only checks for new messages at set times. It's a small change that saves a surprising amount of battery.

Manage 5G for Better Battery Life

5G is very fast, but it can also be a real battery killer, especially if the 5G signal in your area isn't strong and your phone is always searching. Luckily, Apple gives you smart ways to manage this.

Go to Settings > Cellular > Cellular Data Options > Voice & Data. You'll see three choices:

  1. 5G On: This forces your iPhone to use 5G whenever it's available, which can drain the battery faster.
  2. 5G Auto: This is the best setting for most people. Your iPhone will only use 5G when it won't hurt battery life too much, switching to 4G/LTE for easier tasks.
  3. LTE: If you're really struggling with battery and don't need top speeds, switching to LTE can give you a very noticeable boost.

By learning these specific settings, you can stop those quiet drains that use up your battery all day long, giving you more power when you actually need it.

Simple Daily Habits For A Longer-Lasting Battery

Changing your iPhone’s settings is a great start, but it's only half the battle. The small choices you make every day—your digital habits—are just as important for keeping your battery going strong. These aren't huge life changes, just simple, smart changes that really add up.

Interestingly, many common "battery-saving" tricks are actually myths. What feels like a smart move can sometimes backfire and drain your battery even faster. Let's bust a few of those myths and build some simple routines that really work.

Stop Force-Quitting Your Apps

This is probably the most common habit out there: swiping up to close every single app. It feels like you're cleaning up and freeing up power, right? In reality, this can actually hurt your battery life more than it helps.

When you switch away from an app, your iPhone puts it in a sleep state in its memory, where it uses almost no power. When you force it to close, the system has to shut it down completely. The next time you open that app, your iPhone has to load everything from the beginning, which uses way more power and, you guessed it, more battery.

The only time you should ever force-quit an app is if it's frozen, crashed, or just acting weird. Otherwise, let your iPhone do its job. It's made to manage background apps well.

Prioritize Wi-Fi Over Cellular Data

How your iPhone connects to the internet has a huge effect on battery drain. Whenever you can, connect to a trusted Wi-Fi network. It takes far less energy for your phone to stay on a Wi-Fi connection than a cellular one.

This is especially true when you're in a place with a weak cell signal. If your iPhone is struggling with just one or two bars, its cellular parts have to work extra hard just to find and hold onto a signal, which is a huge battery killer. It’s like the difference between a quiet conversation and shouting across a noisy room—one takes a lot more effort.

If you know you're headed into an area with bad service, like a basement or a rural area, and you don't need data, just turn on Airplane Mode. It's a fantastic battery-saving move.

Be Mindful of Extreme Temperatures

Phone batteries have a comfort zone. They're happiest when they are in temperatures between 62° to 72° F (16° to 22° C). Putting your iPhone in extreme heat or cold can cause both immediate battery drain and long-term damage.

Leaving your phone on the dashboard of a hot car can permanently damage its battery. Likewise, using it in freezing weather can temporarily reduce its ability to hold a charge.

  • Avoid direct sunlight: Don't leave your phone baking on a beach towel or a windowsill.
  • Keep it out of hot cars: A car's inside can heat up to dangerous levels in minutes.
  • In the cold, keep it close: Put it into an inside pocket where your body heat can keep it warm.

It’s also worth noting that newer iPhones are just better at this. For example, the iPhone 15 Pro Max can last for about 9 hours and 35 minutes of heavy use, while an older iPhone 12 might only give you 6 hours and 36 minutes. Newer models have better power management and heat controls, which makes a big difference since heat is a major enemy of battery health.

Manage Notifications To Reduce Screen Wake-Ups

Every single time your screen lights up for a notification, it uses a little bit of power. One notification is nothing, but hundreds throughout the day? That adds up to a serious drain. Every buzz and every notification sound also adds to it.

Take control of your notifications to stop the constant screen wake-ups. Try using the Scheduled Summary feature for apps that aren't urgent. It groups their notifications and delivers them in one or two batches per day, which cuts down on interruptions and power use.

Beyond that, even your media habits can make a difference. Consider exploring the best offline music apps for your commute or workout. When you're not constantly streaming over Wi-Fi or cellular, you’re saving a surprising amount of power. It's a simple change that pays off.

Charging Your iPhone the Right Way

How you charge your iPhone is just as important as how you use it day-to-day. There's a lot of confusing advice out there, so let's clear up the myths and focus on what actually works. Using these habits won't just help your battery last longer today; it'll keep it healthy for years to come.

An iPhone displaying 79% charge and optimized battery charging sits on a nightstand next to a lamp and bed.

Most of us do this: plugging in our phones overnight and waking up to a 100% charge. It feels good, but keeping a battery at a full charge for hours puts a lot of stress on it. Over time, this habit can actually make your battery age faster.

But don't worry, this doesn't mean you have to give up charging overnight. Apple has built some pretty smart software to handle this for you.

Let Optimized Battery Charging Do the Heavy Lifting

To fight the stress of sitting at full charge, Apple created Optimized Battery Charging. You can find it in Settings > Battery > Battery Health & Charging.

When you turn it on, your iPhone starts learning your daily routine. It’ll charge up to 80% and then cleverly pause, waiting to finish that last 20% right before you usually wake up and unplug it.

So, if your alarm goes off at 7 AM, your phone will hit 80% and then just wait there for most of the night. It only starts the final charge in the hour or so before you need it. This simple trick greatly cuts down the time your battery spends at that stressful 100% mark.

It’s a fantastic set-it-and-forget-it feature that protects your battery's long-term health without you having to think about it. If you want to learn more about smart charging, this is a great guide on when to charge your iPhone for optimal health.

The 20-80% Sweet Spot

You've probably heard people talk about the "20-80 rule." The idea is simple: the best range for a phone battery is to keep its charge somewhere between 20% and 80%. Letting it constantly drop to 0% or sit at 100% causes way more wear and tear.

Think of it like a rubber band. If you're always stretching it to its absolute limit, it's going to wear out fast. For iPhone 15 models, Apple made this even easier by adding an 80% Limit setting that stops the phone from charging past that point at all.

This is all because of how these batteries work. They lose a little bit of their total capacity with every charge. Apple designs its modern batteries to keep 80% of their original capacity after about 1000 full charges—a huge improvement over older models.

Debunking Common Charging Myths

Before we move on, let's look at some of the most common myths I hear about charging. It's easy to get bad advice, so let's set the record straight.

Charging Myths vs. Reality

Common Myth The Reality
You should always let your battery drain to 0% before charging. False. This was true for old types of batteries but is bad for modern ones. Small charges are much healthier.
Leaving your phone plugged in overnight will "overcharge" it. Not exactly. Modern iPhones stop charging at 100%. The real problem is the stress of being held at full charge, which Optimized Charging helps fix.
Any cheap charger is fine. Nope. Only use MFi-certified chargers. Uncertified ones from the gas station can be dangerous and cause serious damage to your battery.
Fast charging will destroy your battery. It's a trade-off. Fast charging creates more heat, but iPhones manage this to reduce damage. It’s safe, but slower charging is cooler and gentler.

Getting these basics right is key. Using a certified charger and paying a little attention to your charging habits can make a massive difference in how long your battery—and your iPhone—lasts.

Pinpointing and Fixing Severe Battery Drain

Sometimes, even after trying your best, your iPhone's battery still drains with scary speed. If you've tried all the usual tricks and your battery life is still a problem, it’s time to play detective. The good news is your iPhone has the tools you need to see exactly what’s going on and find the real source of a major power drain.

An iPhone displaying battery usage statistics with a graph and app list, beside a magnifying glass.

This is about moving from guessing to knowing. Instead of just randomly turning things off, you can find the specific app or process that's causing trouble and deal with it directly.

Become a Battery Detective

Your first stop is your iPhone's built-in battery screen. Go to Settings > Battery and give it a moment to load. This is your main hub for understanding exactly where all that power is going.

You'll see a couple of graphs: one showing your battery level over the last 24 hours (or 10 days), and another showing your activity. Below that is the most important part—a list of apps ranked by how much battery they've used. This is where the clues are hiding.

Tap the list to switch between Battery Usage and Activity. Keep a close eye on any "Background Activity" label you see under an app's name. If an app you barely use is showing a lot of background activity, you've likely found the problem.

I once had a social media app I hadn't even opened all day use up 30% of my battery in the background. That's a huge red flag. It usually means something is wrong with the app itself, like it's stuck trying to get new data.

Reading the Clues in the Graphs

Those graphs at the top tell a story. Look for any steep, sudden drops in your battery level. Now, match that time with the activity chart right below it. Was your screen on and were you using the phone? Or did the drop happen while the phone was supposed to be resting?

This helps you figure out the when and why:

  • Is the drain happening while you're actually using an app? If so, a heavy-duty app like a game or streaming service is the obvious cause.
  • Is the drain happening overnight? This points to a background app that's not behaving. It could be a misconfigured email account constantly trying to sync or just a buggy app that won't go to sleep.
  • Did the battery drop sharply right after an iOS update? It happens. Sometimes a new version of iOS can cause unexpected battery issues on certain devices.

By looking for these patterns, you can go from a vague "my battery drains fast" to a specific "my battery dies between 2 AM and 4 AM because of this one app's background activity." For a deeper look at these steps, check out our guide on what to do when your iPhone battery drains fast.

Common Culprits and How to Fix Them

Once you have a suspect, it's time to take action. Thankfully, most of these issues are pretty common and have simple solutions.

The Buggy App

If one app is using a crazy amount of power, especially in the background, it's probably just bugged.

  1. Check for an Update: First thing's first, go to the App Store. App makers often release fixes for battery-draining bugs pretty quickly.
  2. Delete and Reinstall: If an update doesn't solve it, try deleting the app completely and reinstalling it. This can often clear out bad data that's causing the problem.
  3. Cut Off Its Background Access: As a last resort, go to Settings > General > Background App Refresh and just turn it off for that specific app.

A Problematic iOS Update

While not super common, it's possible for a major iOS update to mess with battery life. If you notice a huge drop in battery life right after updating, the first thing to try is a simple restart.

Press and hold the side button and one of the volume buttons until the power-off slider appears. Shut it down, wait about 30 seconds, then turn it back on. You'd be surprised how often this clears up small software problems.

Bad Network or Email Settings

If your iPhone is constantly looking for a stable Wi-Fi or cellular signal, it will be working overtime and killing your battery. The same goes for an email account that can't sync properly—it will just keep trying over and over again, draining power in the background.

A great troubleshooting step here is to reset your network settings. Go to Settings > General > Transfer or Reset iPhone > Reset > Reset Network Settings. Just know that this will erase all your saved Wi-Fi passwords, so you'll have to log back into your networks.

If you think an email account is the problem, try turning it off for a bit in Settings > Mail > Accounts. If the battery drain stops, you've found the issue. You'll likely need to remove the account and add it back again to fix it.

iPhone Battery Questions We All Have

Even with all the tips in the world, a few common questions always seem to come up about iPhone batteries. Let's clear the air and answer some of the most common questions and mysteries.

Is Leaving My iPhone Charging Overnight Really That Bad?

Not really, and you can thank a clever little feature called Optimized Battery Charging for that. Your iPhone actually pays attention to your daily routine. It charges up to 80% and then pauses, waiting to finish that last 20% right before you typically grab it in the morning.

This simple trick greatly cuts down on the time your battery sits at 100%, which is a high-stress state for batteries. So go ahead, plug it in at bedtime. The software is smart enough to protect your battery's long-term health while you get some rest.

Should I Be Closing My Apps to Save Battery?

This is probably the biggest battery myth out there, and the short answer is no. In fact, constantly swiping up on all your apps can actually make your battery life worse.

When you switch away from an app, your iPhone puts it into a sleep state where it uses almost no power. Forcing it to close removes it from your iPhone's memory completely. The next time you need that app, your phone has to do all the heavy work to launch it from scratch, which burns more power than simply waking it from its sleep state.

My rule of thumb: Only force-quit an app if it's genuinely not working right—frozen, glitchy, or not responding. Otherwise, let your iPhone do its job. It's made to manage background apps well.

So, When Is It Actually Time to Replace My iPhone Battery?

Apple’s official advice is to think about a new battery once its health drops below 80% of its original capacity. It's easy to keep an eye on this yourself. Just go to Settings > Battery > Battery Health & Charging.

You'll definitely feel it when it gets below that 80% mark. The phone won't last nearly as long, and you might even notice it slowing down a bit during hard tasks. A fresh battery can honestly make an older iPhone feel like new again, giving it a whole new lease on life.

Does 5G Drain the Battery Faster Than Wi-Fi or 4G?

Yes, it sure can. 5G uses a lot of power, especially if you're in an area where the signal is weak. Your phone has to work much harder to find and hold onto that connection, which directly leads to more battery drain.

For most of us, leaving the phone on its default "5G Auto" setting is the best move. It’s smart enough to use 5G when you need the speed for big downloads or streaming, then drop back to the more efficient 4G/LTE for everything else. But at the end of the day, a solid Wi-Fi connection will always be the kindest option for your battery.


Take full control over your iPhone's charging habits and extend its lifespan with Chargie. This smart device and app combo allows you to set precise charging limits, preventing the overnight damage that slowly degrades your battery. Learn more and get yours at https://chargie.org.

Maximize Your Chromebook Battery Life With These Simple Tips

On paper, a Chromebook should give you anywhere from 8 to 12 hours of battery life from a single charge. But as you've probably noticed, that number can be a bit… optimistic. Real-world use, with all its different tasks, often tells a different story.

Simple things like making the screen super bright, keeping a dozen tabs open, or even just sitting in a spot with a weak Wi-Fi signal can cut down that unplugged time in a big way.

What's Really Draining Your Chromebook Battery?

Ever have one of those days where your Chromebook's battery seems to last forever, only to have it die before lunch the next day? You're not alone. Figuring out what's actually eating up your power is the first step to getting more time out of every charge.

The number one power hog is almost always the screen. That beautiful, bright screen takes a surprising amount of energy to keep lit. It’s a lot like a lightbulb—the brighter you make it, the more power it uses. Your Chromebook's screen is no different.

Running a close second is how you browse the web. Every single Chrome tab you open is like a tiny app, asking for its own piece of memory and processing power. Let that tab count creep up, especially with sites that have auto-playing videos or flashy ads, and you're forcing the device's brain to work overtime. And a hard-working brain gets thirsty for power.

This chart breaks down the usual suspects that drain your battery the fastest.

Bar chart illustrating the top 3 Chromebook battery drainers: screen, tabs, and Wi-Fi.

As you can see, just getting a handle on your screen, tabs, and connection can make a huge difference day-to-day.

To give you a clearer picture, here's a quick rundown of common activities and how they tend to affect your battery.

Common Battery Drainers and Their Impact

Activity Typical Impact on Battery Quick Fix
Streaming Video (e.g., Netflix, YouTube) High Lower the screen brightness and video quality.
Running Android Apps High Close apps you aren't actively using.
Video Conferencing (e.g., Zoom, Meet) High Turn off your camera when not needed.
Having Many Tabs Open Medium to High Close tabs you don't need or bookmark them.
Using a Weak Wi-Fi Signal Medium Move closer to your router if possible.
Listening to Music (Screen Off) Low No fix needed; this is very power-friendly.
Typing in Google Docs Low Keep brightness at a comfortable, medium level.

This table isn't an exact science, but it gives you a good idea of where your power is going. A few small adjustments to your high-impact activities can really stretch your battery life.

The Processor's Role in All This

The "brain" of your Chromebook, its processor, also has a massive say in your battery life. Some processors are built for pure speed, while others are designed with saving power as the main goal. It's a trade-off that directly affects how long you can stay unplugged.

Lately, processors known as ARM-based chips have really been shining in the power-saving department.

A processor's power-saving ability is just as important as its speed. A power-saving chip can perform daily tasks using less energy, leading to hours of extra battery life without slowing you down.

For example, Chromebooks with the latest MediaTek ARM processors have set a new standard for battery performance compared to many of their Intel-based cousins. In some pretty heavy testing, these machines kept about 6 hours of battery life even at 90% charge under a heavy load. During lighter use, that estimate shot right back up to 12 hours.

Even better, this power-saving ability is often paired with fast charging, letting a battery jump from 10% to over 80% in just an hour. You can see how these chips perform in real-world tests on YouTube to get a feel for the difference.

The Hidden Power Hogs

Finally, there are the silent battery vampires working in the background. You never see them, but they're always there, sipping away at your charge.

These are the background jobs keeping your Chromebook up-to-date and in sync:

  • Constant syncing: Your Chromebook is always talking to Google Drive, making sure your files are backed up.
  • Update checks: ChromeOS is regularly calling home to look for the latest software updates.
  • A struggling Wi-Fi connection: If your signal is poor, the Wi-Fi has to work much harder just to stay connected, which burns a surprising amount of power.

Once you know where all the power is going, you can start making smarter choices to keep your Chromebook running all day long.

Instant Fixes to Boost Your Battery Life Today

An open black and silver Chromebook laptop displaying multiple windows on a wooden desk.

If you're hunting for some quick wins to boost your Chromebook battery life, you're in the right spot. These are simple, practical adjustments you can make right now that, when combined, can have a surprisingly big impact. No tech genius required—you just need to know where to look.

The changes that give you the most immediate results almost always involve your screen and how you manage your online activity. A few tweaks to some key settings can often get you back hours of unplugged time without really cramping your style.

Master Your Display Settings

Your Chromebook’s screen is, by a long shot, the single biggest power user. The good news? It's also the easiest thing to control. A couple of small adjustments here can make a world of difference.

First up, lower the brightness. Most of us have our screens turned up way brighter than we actually need. Give it a shot—drop it down to around 50-60% and see if you even notice after a few minutes. Unless you're outside in direct sunlight, that’s usually enough.

Next, get your sleep settings in order. You want to tell your Chromebook to turn off its screen and go to sleep much faster when you’re not actively using it.

  • Turn off the display: Try setting this to 5 minutes of no activity.
  • Put the device to sleep: Set this to 10 minutes of no activity.

These settings are perfect for preventing the screen from burning power when you step away to grab a coffee or take a quick call. It's a "set it and forget it" fix.

Tame Your Tabs and Extensions

Think of every open tab and running extension as a tiny leak in a bucket. One or two might not seem like a big deal, but when you have dozens, they create a constant drain on your memory, the device's brain, and ultimately, your battery. Sooner or later, that bucket runs dry.

Time to be ruthless. Go through your browser extensions and get rid of anything you don't use. If you installed something a year ago on a whim and haven't touched it since, it needs to go. Many extensions run in the background even when you aren't using them, silently chipping away at your Chromebook battery life.

A simple approach to tabs and extensions is one of the best ways to get the most battery life. Closing what you don't need frees up power and lets your Chromebook run more smoothly.

Get into the habit of closing tabs when you're done with them. Don't let them pile up. If you need to save a page for later, that's what bookmarks are for. This simple change in habit can have a noticeable effect on both your Chromebook's performance and how long it lasts on a single charge.

Cut Out Unnecessary Connections

Your Chromebook is always trying to talk to the outside world, and these wireless connections all sip power. Turning off the ones you aren't actively using is a simple but effective way to save some juice.

Start with Bluetooth. If you're not connected to wireless headphones or a mouse, just switch it off. This stops it from constantly scanning for nearby devices. It's a small change, but it adds up.

Another easy win is the keyboard backlight. It's fantastic in the dark, but during the day, it's just a battery drain with no benefit. Most Chromebooks have a simple shortcut key to dim or turn the backlight off completely. Use it. Little adjustments like this are what give you that extra hour away from the wall outlet.

Smart Charging Habits for Long-Term Battery Health

Squeezing a few more hours out of a single charge is great, but that's just a short-term win. If you want to master your Chromebook battery life, you need to think about the long game. This means adopting habits that keep your battery healthy for years, not just for today. It’s all about protecting its ability to hold a strong charge over its entire lifespan.

Think of your Chromebook's battery like a muscle. Constantly pushing it to its absolute limits—charging to 100% and then running it down to 0%—is like overtraining. It causes stress and wears the battery out faster. That's what kills your battery's overall lifespan, forcing you to hunt for an outlet more and more as the months and years go by.

Avoid the 100 Percent Trap

It feels almost natural to leave your Chromebook plugged in, letting it sit at 100% for hours. But this is one of the fastest ways to wear out a modern battery. Keeping it at that full charge puts a constant, high-level strain on it.

A much healthier approach is what many of us call the "80/20 rule." Try to keep your battery between 20% and 80% whenever you can. This is the sweet spot that reduces stress and can dramatically extend the number of charge cycles your battery can handle before it starts losing power.

Keeping a battery at a 100% charge is like holding a rubber band stretched to its absolute limit—eventually, it just loses its spring. Charging to 80% is more like stretching it just enough, preserving its strength for much, much longer.

Smart Charging Tools and Features

Let's be real: unplugging your Chromebook the second it hits 80% isn't always easy. Who has time for that? Thankfully, there are some clever tools out there designed to do this for you. One of the most popular is a smart charging dongle like Chargie, which basically acts as a gatekeeper between your charger and your Chromebook.

Here's how this little gadget can help you take control of your charging routine.

Close-up of a hand adjusting screen brightness on a silver Chromebook laptop.

Hardware like this lets you set a specific charging limit, say 80%, and it automatically cuts the power once your device hits that level. It takes the guesswork out of it. If you're curious about the science, it's worth understanding how to charge your lithium-ion battery for a longer life.

Google's Built-In Protections

Google gets it, too. Battery lifespan is a huge deal, especially for big users like schools where making a device last from four to six years can save a fortune. The tech managers in these places often use built-in ChromeOS features to enforce smart charging rules, like stopping the max charge at 80% to focus on long-term health.

Many newer Chromebooks also come with a feature called Adaptive Charging. It's pretty smart—it learns your daily routine and adjusts the charging speed to make sure your battery hits 100% right when you need it, not hours beforehand. This prevents it from sitting at that stressful full charge overnight. It's a simple, background feature that quietly works to protect your device.

How to Check Your Chromebook Battery Health

We’ve all been there. Your trusty Chromebook, which once lasted all day, suddenly starts looking for a charger by lunchtime. It’s easy to blame the battery and assume it's getting old. But is it really wearing out, or have your daily habits just gotten more power-hungry?

Before you start shopping for a new one, it’s worth getting some real facts. Thankfully, ChromeOS has a handy, built-in tool that gives you a clear and simple report card on your battery's actual condition. It cuts right through the guesswork.

This tool shows you two key numbers that tell the real story: the battery's current health percentage and its charge cycle count. Knowing this helps you figure out if your Chromebook battery life is just getting shorter with age or if there’s a more serious problem.

Accessing Your Battery Report

Getting to this information is surprisingly easy—no tech skills required. It's tucked away in a simple diagnostic app that gives you a quick snapshot of your system’s main parts.

Here’s how you find it:

  • Click the clock in the bottom-right corner of your screen to open the Quick Settings panel.
  • Next, click the little gear icon to open the main Settings menu.
  • In the search bar at the top, just type "Diagnostics" and open the app when it appears.
  • Inside the Diagnostics window, you'll see a Battery section with the stats you need right on display.

This is by far the fastest way to get an honest look at what’s going on with your battery.

What the Numbers Actually Mean

Once you're in the app, you'll see a few numbers, but the two you really want to pay attention to are Battery health and Cycle count.

  • Battery health: This is a percentage that shows your battery's current maximum ability to hold a charge compared to when it was brand new. If it says 95%, that means it can only hold 95% of its original charge. A lower number here is a clear sign of wear.

  • Cycle count: This number tracks how many full charge-and-recharge cycles the battery has been through. A single cycle is counted every time you use up 100% of the battery's power—it doesn't matter if you do it all at once or in smaller chunks, like using 40% today and 60% tomorrow.

A healthy battery will typically stay above 80% health for its first 300-500 charge cycles. If your cycle count is still low but your health percentage has taken a nosedive, it could point to a bigger problem.

The lifespan of these batteries can vary quite a bit by brand. While the average Chromebook lasts about 7.6 years, some interesting data shows Lenovo devices often keep 82% of their battery capacity after three years. In contrast, brands like Samsung might dip to around 70% in that same timeframe. You can see more details in this in-depth analysis of Chromebook lifespans.

And if you want a more general overview, we also have a guide on how to check battery health on different devices.

Choosing Hardware for the Best Battery Experience

A sleek silver laptop displays a 'Battery Health' window showing 85% health and 320 charge cycles.

If you're shopping for a new Chromebook, the choices you make before you even buy can save you from a world of battery headaches later. Not all Chromebooks are built the same, and the parts inside play a huge role in how long you can actually stay unplugged.

Honestly, picking the right machine from the start is probably the single most effective thing you can do for a great battery experience.

The part that has the biggest impact on your Chromebook battery life is easily the processor. This is the brain of your device, and just like with people, some brains are built for sprinting while others are made for marathon running. Understanding this difference is key to picking a machine with real staying power.

ARM vs. Intel Processors

For years, Intel chips have been the go-to for laptops, known for their raw power. But another type of chip, known as ARM, has completely changed the game when it comes to battery life.

Think of it like this: an Intel chip is often a sprinter, burning a ton of energy in short, powerful bursts. An ARM chip, on the other hand, is a marathon runner, designed for incredible power-saving and endurance over the long haul.

This is exactly why you'll find that Chromebooks with ARM-based processors, like those from MediaTek, often have ridiculously long battery life. For everyday stuff—browsing the web, writing documents, streaming some Netflix—they just sip power instead of guzzling it. We recently saw a MediaTek-powered model that pushed well past 13 hours of real-world use on one charge.

If your absolute top priority is spending as much time away from an outlet as possible, you should actively hunt for a Chromebook with an ARM processor. The difference you'll feel day-to-day can be massive.

That’s not to say Intel-powered Chromebooks are bad—far from it. They usually pack more punch for demanding tasks like running complex apps or juggling dozens of open tabs. It's just a classic trade-off between power and endurance. If you're weighing your options, this excellent guide on how to choose the right laptop is a great resource for sorting through these kinds of decisions.

When it comes to picking a processor for your Chromebook, the choice boils down to what you value more: sheer performance or all-day battery life. Here's a quick breakdown to help you decide.

Processor Type and Expected Battery Performance

Processor Type Best For Typical Battery Life Impact
ARM-based (e.g., MediaTek, Snapdragon) Everyday browsing, streaming, light tasks, and maximum time unplugged. Excellent. These chips are designed to save power, often delivering the longest battery life.
Intel Core i3 / i5 / i7 Heavy multitasking, running demanding apps, and desktop-like performance. Good to Fair. More power means more energy use. Expect solid but not top-of-the-line battery life.
Intel Celeron / Pentium Basic tasks, budget-friendly models, and moderate use. A balance between cost and performance. Good. Generally more power-friendly than their Core i-series siblings, offering a decent middle ground.

Ultimately, there's no single "best" processor—only the one that's best for you. If you're a student who just needs to take notes and browse, an ARM chip is a no-brainer. But if you're a developer who needs serious power, you'll be glad you opted for the extra muscle of an Intel Core i5.

Choosing the Right Charging Gear

The hardware story doesn't stop once you've picked the Chromebook. The accessories you use to charge it are just as important for both daily convenience and the long-term health of your battery. Using a cheap, low-power charger from a gas station is a recipe for painfully slow charging times.

On the flip side, a high-quality charger that's properly matched to your Chromebook will deliver power safely and efficiently. Always check the power (wattage) your specific model needs. Most modern Chromebooks use USB-C, but that doesn't mean every USB-C charger is the same. A little charging brick designed for your phone will barely make a dent in your laptop's battery.

Here are a few key things to look for in a charger or power bank:

  • Enough Power (Watts): Make sure the charger's output (in watts) is at least what your Chromebook requires. Going a little over is fine; going under is not.
  • Power Delivery (PD) Support: Look for chargers that mention they support USB Power Delivery (PD). This lets the charger and your Chromebook talk to each other to find the fastest, safest charging speed.
  • Trusted Brands: Please, stick with well-known, trusted brands. A poorly made charger isn't just a waste of money—it can be a safety risk.

Getting a handle on how many watts are needed to charge a laptop will help you find the perfect power accessories, ensuring you're never stuck with a dead battery when you need it most.

A Few Lingering Questions About Chromebook Batteries

Even with all the best practices covered, you might still have a few specific questions bouncing around in your head. I get it. Sometimes it's those "what if" scenarios that really matter for day-to-day use. Let's tackle some of the most common ones I hear.

Think of this as your quick-reference guide. Getting these details right can make a huge difference, not just for your daily work but for the long-term health of your Chromebook's battery.

Is It Really That Bad to Leave My Chromebook Plugged In All the Time?

This is probably the number one question, and the short answer is: yeah, it's not great. While your Chromebook is smart enough to stop charging once it hits 100%, leaving it plugged in keeps the battery in a state of high stress.

Imagine holding a rubber band stretched out for days on end. Eventually, it loses its springiness. It's the same idea with a battery constantly held at full charge—it causes unnecessary wear that makes it age faster.

For the best results, you really want to live in that sweet spot between 20% and 80% charge. If your Chromebook spends most of its life on your desk, a tool that can automatically stop the charge at 80% is a game-changer for protecting its lifespan.

Can I Just Use Any Old USB-C Charger I Have Lying Around?

Technically, it'll probably fit. But that doesn't mean you should use it. Grabbing the USB-C charger from your phone is a common mistake, but it likely doesn't have enough power (wattage) to charge your Chromebook well. You'll end up with painfully slow charging, or worse, the battery might even drain while it's plugged in.

Your best bet is always to use the charger that came in the box. If you need a replacement or a spare, look for a high-quality one that checks these boxes:

  • Matches the original wattage: Look at your original power brick. If it says 45W or 65W, get a charger that matches or exceeds that number.
  • Supports Power Delivery (PD): This is the technology that lets your Chromebook and the charger talk to each other to figure out the fastest and safest charging speed. It's a must-have.
  • Comes from a brand you trust: A cheap, no-name charger from a gas station is a huge gamble. It could damage your battery or other internal parts, and it's just not worth the risk.

I've Tried Everything, and My Battery Still Drains Super Fast. What Gives?

So you've dimmed the screen, managed your tabs, and even checked the battery health report, but it's still dropping like a rock. Frustrating, I know. At this point, it's time to play detective and look for a problem app.

Often, it's a single Android app or a misbehaving Chrome extension running wild in the background, eating up your processing power. Try uninstalling any apps or extensions you've added recently, one by one, to see if the problem vanishes.

If you've done all that and your battery health report shows a capacity below 80% with a high cycle count (think 500 or more), it might just be that the battery is nearing the end of its natural life. It happens to all of them eventually, and it might be time to look into a replacement.


Ready to stop worrying about your battery's long-term health? The Chargie smart charging system automatically stops charging at a healthy 80%, drastically extending your Chromebook’s lifespan and saving you money on costly replacements. Protect your investment and learn more at https://chargie.org.

Discover the best way to charge battery for longer device life

If there's one single takeaway for making your phone or laptop battery last longer, it's this: keep it charged between 40% and 80%. Forget everything you heard in the past about charging to 100%. For the modern batteries we all use now, this simple habit reduces stress on the battery and helps it last longer.

The Most Important Rule for Modern Battery Charging

A smartphone displaying 40-80% battery charge sits next to a laptop on a white surface.

Let's be honest, most of us are still stuck on charging habits from a decade ago. We let our phones get very low, then plug them in all night to wake up to a full 100%. While this used to be the right move for older battery types, it’s actually damaging the batteries in your devices today.

The real key to a long, healthy battery life is to simply avoid the extremes. Constantly pushing a battery all the way to 100% or letting it drain completely to 0% puts a ton of strain on it. Think of it like a muscle—if you constantly push it to its absolute limit without any rest, it's going to wear out much faster.

Adopting a Healthier Charging Cycle

A much better approach is to be gentler with your battery. Instead of one huge charge from empty to full, aim for shorter, more frequent top-ups throughout the day. Plugging your phone in for 20 minutes here and there to keep it in that 40-80% sweet spot is far better for its long-term health.

This method, often called partial charging, prevents the high-stress conditions that cause batteries to wear out over time. It’s a small change to your daily routine, but it can make a huge difference in how long your devices last, saving you from slow performance and the cost of an early battery replacement.

The goal isn't to be perfect, but to be consistent. Simply avoiding the extremes of 0% and 100% on a regular basis will make the biggest difference in keeping your battery healthy over the years.

Old Habits vs. Modern Methods

To really make this clear, let's look at how the old advice most of us grew up with compares to the smart methods that work for today’s technology. The difference is pretty big, and understanding it is the first step toward charging smarter.

This table shows those old, harmful habits next to the new rules that will actually make your battery last longer.

Modern vs. Outdated Battery Charging Habits

Charging Habit Outdated Method (Harmful) Modern Method (Recommended)
Charge Target Always charge to 100% to "get the most out of it." Aim for an 80% charge limit for daily use.
When to Charge Wait until the battery is almost dead (below 10%). Start charging when the battery drops to around 40%.
Charging Duration Leave it plugged in overnight for a full charge. Unplug once it hits the target, or use a smart charging tool.
Overall Strategy One long charge cycle from nearly empty to full. Short, frequent top-ups to stay in the ideal range.

As you can see, the modern approach is all about moderation. By ditching the all-or-nothing mindset, you can keep your device’s power source in great shape for much, much longer.

Why the 40-80% Range Is a Game-Changer

A smartphone displaying 60% battery charge next to a rubber band on a white surface.

So, why is it so important to keep a battery between 40% and 80%? It might sound a bit nitpicky, but there's a simple reason it works so well.

Forget the complex science for a moment and think about a rubber band.

If you have a brand-new rubber band, you can stretch it a little, let it go, and do this thousands of times without any problems. It just works.

But what if you stretched that same rubber band as far as it could go and held it there for hours? Or, what if you constantly let it go completely loose? It wouldn't take long for it to lose its snap, get weak, and eventually break. It’s the extremes that do the real damage.

Your phone's battery works in a surprisingly similar way. Pushing it all the way to a 100% charge or letting it die completely to 0% puts it under a lot of stress. The 40-80% range is that comfortable middle ground, the low-stress zone where your battery can live a long and happy life.

The Problem with Hitting 100%

When you charge your battery to its maximum, the parts inside have to deal with high electrical pressure and rising temperatures. Leaving it plugged in at 100%—especially overnight—is like holding that rubber band at full stretch for eight hours straight.

This constant stress wears down a critical part of the battery that holds the charge. Over time, this damage permanently shrinks your battery's total capacity. You’ll eventually notice that a "full" charge just doesn't last like it used to. Finding the best way to charge battery really just means avoiding this high-stress state whenever possible.

On the other hand, letting the battery drain completely is just as bad. Letting the battery hit 0% can cause problems inside that make it harder for the battery to hold a charge in the future.

Staying within the 40-80% zone isn't about being perfect; it's about being smart. By avoiding the punishing extremes of 0% and 100%, you dramatically slow the aging process and keep your battery holding a strong charge for years, not months.

Understanding Charge Cycles and Longevity

Every battery is rated for a certain number of "charge cycles" before it starts to fade. A full cycle is one complete drain from 100% to 0%. But this doesn't mean you only have a few hundred charges before your phone is useless.

Partial charges are much, much gentler. In fact, charging from 40% to 80% uses only a small fraction of a cycle compared to a full 10% to 100% charge.

Here's an easy way to think about it:

  • Shallow Charges: Little top-ups here and there (like going from 50% to 70%) cause almost no wear.
  • Moderate Charges: Sticking to the 40-80% rule is a sustainable, low-stress strategy for daily use.
  • Deep Charges: Regularly going from nearly empty to completely full is what causes the most rapid aging.

This is exactly why topping up your phone a bit during the day is a far better strategy than the old "let it die, then charge it all night" habit. You get more total use out of your battery's lifespan by treating it gently.

The Role of Modern Battery Management

This isn't just a clever user tip; it's a key idea for the entire battery industry. The global battery market is built on advanced charging tech designed to make batteries safe and long-lasting.

Industry research has confirmed again and again that keeping a battery within certain electrical limits is key to its survival. Modern systems constantly watch the battery's charge level to prevent the damaging effects of overcharging or deep draining—the two main reasons batteries lose power. You can see how this is an industry-wide focus in deep dives into battery technology.

This is the science behind finding the best way to charge battery. It’s not guesswork. When you adopt the 40-80% habit, you're basically using the same rules engineers rely on to make batteries last, helping your devices perform well for as long as you own them.

How Heat and Fast Charging Secretly Harm Your Battery

Charge levels are only part of the story. Two silent problems are constantly working against your battery's health: heat and the super-convenient fast charging. If you've ever picked up your phone while it was plugged in and felt it was uncomfortably warm, you've experienced the number one cause of battery damage firsthand.

Think of your battery as a tiny, sensitive engine. When you push it too hard—either by charging too fast or using it in a hot place—it creates extra heat. That heat speeds up the chemical processes inside, causing the internal parts to break down far faster than they should. Honestly, finding the best way to charge battery often just means keeping it cool.

Simple Ways to Keep Your Device Cool

You don't need a complicated solution to manage heat. A few small changes to your charging habits can have a massive impact on your device's long-term health. The goal is simple: give your battery a chance to breathe while it powers up.

Here are a few practical tips you can start using today:

  • Remove the Case During Charging: Phone cases are great for protection, but they're also great at trapping heat. Taking the case off before you plug in lets the heat escape much more easily, keeping the battery in its happy zone.
  • Avoid Direct Sunlight: This one seems obvious, but it's easy to forget. Never leave your phone, tablet, or laptop charging on a sunny windowsill or, worse, in a hot car. The combination of charging heat and outside heat is a recipe for faster battery aging.
  • Pause Heavy Tasks: Try to avoid playing demanding games or streaming high-quality video while your device is plugged in. These activities make the processor work hard, which creates its own heat and adds to the warmth from charging.

The most important thing to remember is that heat is the number one enemy of a healthy battery. A cool battery is a happy battery, and even small changes to lower its temperature during charging can add years to its usable life.

The Hidden Cost of Fast Charging

Fast charging feels like a modern miracle, especially when you're in a hurry. Getting a 50% boost in just 30 minutes is incredibly convenient, but that speed comes at a price. Pushing that much power into a battery so quickly creates a lot of heat and puts immense stress on it.

I like to think of it like filling a water balloon. You can fill it slowly and gently with no problem. But if you turn on a fire hose and blast it, the balloon's material stretches violently and is far more likely to weaken or burst. Fast charging has a similar, though less dramatic, effect on your battery over time.

This technology has become essential for people who need quick power-ups, and its growth is huge. The fast charge battery market is projected to skyrocket from USD 25.58 billion in 2024 to USD 124.39 billion by 2035, driven by newer methods that try to balance speed with safety. You can read more about the trends in the fast charge battery market to see just how quickly this space is evolving.

When to Use Fast Charging (and When to Avoid It)

So, does this mean fast charging is always bad? Not at all. It’s a tool, and the key is knowing when to use it. The best approach is to use it only when needed—save it for those moments when you genuinely need a quick top-up before heading out the door.

For your daily, routine charging—especially overnight—a slower, standard charger is a much healthier choice. The gentle, low-temperature charge it provides is far less stressful on the battery, helping it last longer. You can learn more about why slow charging is essential for your smartphone's battery health in our detailed guide on the topic.

By being mindful of both heat and charging speed, you take back control over two of the biggest factors in battery damage. This balanced approach—using fast charging only when you really need it and prioritizing cool, slow charging for regular use—is a key part of keeping your battery in great shape for years.

Using Smart Tools to Automate Perfect Charging

Let's be real: trying to manually unplug your phone the second it hits 80% is a huge pain. It's just not practical for most of us. The good news is, you don't have to watch your devices anymore. Modern tech can do the heavy lifting for you, making smart charging an automated, set-it-and-forget-it process.

Device makers know that leaving a phone plugged in at high-stress levels kills batteries. That's why they've started building smart charging solutions right into their software, working quietly in the background to save your battery from aging too quickly.

Built-In Smart Charging Features

Your smartphone probably already has a feature designed to solve the overnight charging problem. Both Apple and Google have created systems that learn your daily routine to charge your phone more intelligently while you're asleep.

Instead of rushing the battery to 100% and letting it sit there for hours, these systems charge up to about 80% and then hit pause. They wait until just before you usually wake up to finish the job, so it hits 100% right around the time your alarm goes off.

  • Apple's Optimized Battery Charging: This is standard on iPhones and uses the device's software to figure out your charging patterns and daily schedule.
  • Android's Adaptive Charging: Google's version does pretty much the same thing, timing the charge to be full just as you're starting your day.

These tools are a great first step against battery damage. They dramatically cut down the time your device spends maxed out at that stressful 100% state, which is a huge win for its long-term health.

But even with these features, fast charging can still create a lot of heat—the number one enemy of a healthy battery.

An infographic illustrating how fast charging can lead to battery overheating and damage.

This simple graphic shows how the rush to get a quick power-up often creates extra heat, which is the main thing that makes batteries wear out faster.

Taking Control with Third-Party Tools

While the built-in features are a great start, they don't give you much control. You can’t tell your iPhone to stop at 85%; you just have to trust the software. For those who want more precise management, special third-party tools offer a much more powerful and customizable approach.

This is where a tool like Chargie comes in. It's a small hardware device that acts as a smart switch between your charger and your phone. Paired with an app, this little gadget lets you set an exact charging limit—say, 82%—and it will automatically cut the power once your phone reaches that level.

This level of control makes it effortless to stick to the 40-80% sweet spot. It completely automates the process, so you can plug your phone in at night and forget about it, knowing it won't be overheating at 100% for hours.

Why Automation Is the Future of Battery Care

At the end of the day, automation is what makes proper battery care actually happen. Relying on yourself to unplug your phone at the right time is likely to fail, but letting smart hardware and software handle it ensures you're always doing it right. A dedicated battery charge limiter like the one from Chargie can also do things that go way beyond a simple percentage cap.

For example, the Chargie app lets you schedule your charging sessions. You can set it to keep your phone at a very low-stress 50% for most of the night, then have it automatically top up to 80% just before you wake up. This gives you the best of both worlds: smart timing combined with a precise charge limit.

Whether you stick with your phone's built-in features or grab a dedicated tool, automating your charging habits is the single most reliable way to extend your battery’s life and keep it performing like new for years to come.

Common Charging Mistakes Almost Everyone Makes

A multi-panel image displaying a fully charged phone, a phone during a video call, and a frayed charging cable.

Knowing how to care for your battery is one thing. Actually spotting our own bad habits? That’s where the real change happens. So many of us fall into charging traps without even realizing it, slowly wearing down our device's lifespan one day at a time.

These common mistakes often feel harmless, but their combined effect over time is what leads to a battery that just can't hold a charge anymore.

Let's look at a few classic examples you might recognize. By finding these patterns in your own routine, you can make simple changes that add years to your battery’s health.

The Dedicated Overnight Charger

This is probably the most common habit of them all. You plug your phone in at 10 PM, it hits 100% by midnight, and then it spends the next seven hours "trickle charging." It's constantly getting little top-offs to stay at that maximum level, which is incredibly stressful for the battery.

Keeping a battery at 100% creates high electrical pressure and heat. It’s like holding a muscle in a tensed position for hours on end—it causes unnecessary strain and makes it wear out faster.

While modern phones have safety features to prevent dangerous overcharging, they can't stop the gradual damage from being in a high-stress state for too long. If you want to learn more, you can read about why you should reconsider charging your phone overnight.

The fix is surprisingly simple. Use your phone's built-in "Optimized Charging" or "Adaptive Charging" features. For even better control, a smart charging device like Chargie that physically cuts the power at 80% is the best solution.

The Heavy-Duty Multitasker

We’ve all been there. You're on a long video call or deep into a gaming session when the low battery warning pops up. You plug in the charger and keep going, but your phone starts getting uncomfortably warm. This is a classic recipe for a high-heat situation that’s terrible for your battery.

When you use your device for intense tasks, the processor works hard and creates heat. At the same time, charging produces its own heat. Combining these two activities creates a perfect storm for battery damage.

Charge it or use it, but try not to do both heavily at the same time. If you absolutely must charge while using your phone, stick to lighter tasks like browsing or listening to music. Giving your device a break during charging is one of the easiest ways to protect its long-term health.

The Bargain Cable Shopper

It's so tempting to grab that cheap, no-name charging cable from the gas station or a random online seller. But honestly, using uncertified, low-quality chargers and cables is one of the riskiest things you can do. These products often lack the proper safety parts to control the flow of electricity.

This can lead to a whole host of problems:

  • Inconsistent Power: The charger might deliver a jumpy, unstable current that stresses the battery.
  • Overheating Risk: Poorly made chargers can overheat themselves and your device, creating a real fire hazard.
  • Port Damage: Flimsy connectors can physically damage the charging port on your phone or laptop over time.

The fix is straightforward: always use the original charger that came with your device or a high-quality, certified one from a brand you trust. Look for certifications like MFi (Made for iPhone), UL, or CE on the packaging. Spending a few extra dollars on a quality cable is cheap insurance for your expensive electronics.

To make it even clearer, here’s a quick rundown of some common charging mistakes and how to avoid them.

Troubleshooting Common Charging Problems

Common Mistake Why It's Harmful The Simple Fix
Leaving it plugged in at 100% for hours. High electrical pressure and heat speed up aging, reducing the battery's lifespan. Unplug once it's full, or better yet, use a tool to stop charging at 80%.
Using the device heavily while it's charging. This combines heat from the processor and heat from charging, cooking the battery. Let your device rest while it charges, especially during heavy tasks like gaming.
Draining the battery completely to 0%. Draining the battery completely puts a lot of strain on the battery cells. Try to plug in when your battery is around 20-30%.
Using cheap, uncertified cables and chargers. They can deliver unstable power, overheat, and even damage your device's port. Stick to the original charger or certified third-party brands (look for MFi, UL, CE).
Charging your phone in a hot car or direct sunlight. Outside heat sources add to the heat created during charging, which is a killer for battery health. Always charge your device in a cool, well-ventilated area.

By being mindful of these small habits, you can make a massive difference in how long your battery performs at its peak. It's not about being perfect, but about avoiding the worst mistakes.

Your Questions About Battery Charging, Answered

Even after getting the basics down, a few questions always seem to pop up when you're trying to figure out the best way to charge your specific phone, tablet, or laptop. Think of this as a final run-through, where we'll tackle the most common questions with simple, no-nonsense answers. The goal is to get you feeling completely confident in your new charging habits.

Let's clear up some of the most frequent questions we hear.

Is It Really That Bad to Leave My Phone Charging All Night?

Yes, it generally is. While modern phones are smart enough to stop pulling power once they hit 100% (so you don't have to worry about a dangerous "overcharge"), that's not the real problem. The real issue is stress.

When your battery stays at 100% for hours, it's held under high electrical pressure. This puts a constant strain on it, speeding up the aging process.

A much healthier approach is to use your phone's built-in optimized charging feature. This usually brings your battery up to around 80% and then cleverly waits to add the last 20% until just before you normally wake up. If your device doesn't have this feature, your battery will thank you for either unplugging it before bed or using a smart tool like Chargie to manage it for you.

Should I Let My Battery Drain to 0% Before I Plug It In?

Absolutely not. This is probably the most stubborn and damaging myth still around from the old days of different battery types. For the modern batteries in all your current gadgets, a deep dive to 0% is one of the most stressful things you can do to it.

Draining the battery completely can cause permanent damage, leading to a permanent drop in its total capacity. It's so much better to do frequent, shallow charges. Topping it up a bit here and there throughout the day keeps it in its happiest, healthiest state.

Key Takeaway: The "let it die completely" rule is officially dead. Avoid draining your battery to 0% whenever you can. A quick top-up when it hits 30% or 40% is always a better strategy for long-term health.

Does Fast Charging Ruin My Battery?

It won't "ruin" it in one go, but it definitely causes more wear and tear than slower charging. The main problem here is heat. Fast charging works by pushing a massive amount of power into the battery very quickly, which naturally creates a lot more heat. And as we've already covered, heat is the number one enemy of a healthy battery.

It’s perfectly fine to use a fast charger when you're in a pinch and need power now. But for your regular, everyday charging—especially the overnight session—sticking with a standard, slower charger is a much better choice. That gentle, cooler charge puts way less strain on the battery.

Do I Have to Use the Charger That Came in the Box?

While using the original manufacturer's charger is always the safest bet, you aren't strictly locked into it. High-quality, certified chargers from reputable third-party brands are perfectly fine and safe. The key word here is certified.

Steer clear of those super-cheap, unbranded chargers you find at a gas station or from a random online seller. These products often cut corners on safety features, which can lead to unstable power, damage your battery, or even become a fire hazard. Always look for safety certifications like UL (Underwriters Laboratories) or CE on the charger and its packaging.

Beyond just battery care, taking a broader approach to making your devices last longer is smart. For more on extending the overall usable life of your gadgets, exploring tips on maximizing the life of electronic devices can offer some great insights.


Ready to automate perfect charging and make your batteries last up to four times longer? The Chargie smart charging system gives you complete control, allowing you to set precise limits, schedule top-ups, and eliminate the battery stress caused by overnight charging. Protect your investment and reduce e-waste by visiting https://chargie.org to get yours today.

When to Charge iPhone: The Best Way to Keep Your Battery Healthy

If you’re looking for the simplest answer on when to charge your iPhone, here it is: try to keep the battery between 20% and 80%. Seriously. Avoiding the extremes—letting it die completely or leaving it plugged in at 100% for hours—is the single best habit you can adopt. It reduces stress on the battery, helping it live a much longer, healthier life.

The Ideal Charging Range for Your iPhone

An iPhone showing 50% battery life and a charging animation on a white table.

Think of your iPhone's battery like a muscle. You can push it to its absolute limit or run it until it's completely exhausted, but doing that over and over again causes a lot of strain. Eventually, that muscle gets worn down and just can't perform like it used to.

It’s the same story with the battery in your phone. It’s happiest and works best when it's not sitting at those extreme ends of its power. That 20% to 80% range is the "sweet spot" that slows down the aging process, helping your battery hold a strong charge for years, not just months.

And this isn't just some internet myth; it's based on how these batteries work. Research and user reports show that simply limiting your charge to 80% can slow down battery aging by a lot. That means a stronger battery for longer, just by changing when you plug in and unplug. As explained in this UNILAD article on battery technology, this small change pays off in a big way.

Why the 20 to 80 Rule Matters

Following the "20 to 80" rule isn't just a suggestion; it’s an active way to get the most out of your device. By making this a habit, you’re taking direct control over how well your battery ages.

Here's a look at some common charging habits and how they can impact your iPhone’s battery over time.

How Different Charging Habits Affect Your iPhone

Charging Habit Impact on Battery Health Our Recommendation
Charging to 100% and leaving it plugged in High. Keeping the battery at full charge for a long time causes stress and extra heat, which leads to a lot of wear. Avoid. Unplug once it hits 80-90% if you can.
Frequently draining to 0% High. Letting the battery die completely can mess up its internal parts, causing it to lose its strength quickly. Avoid. Start charging when it drops to around 20-30%.
Keeping it between 20-80% Low. This "sweet spot" reduces stress and heat, which slows down battery aging a lot. Highly Recommended. This is the ideal daily habit.
Small, frequent top-ups during the day Very Low. This is much gentler on the battery than one long charge from empty to full. Good Practice. Don’t be afraid to top up when it's easy to do.

Ultimately, adopting better habits is the key to preserving your device. Here’s why that 20-80 approach is so effective:

  • It Reduces Stress. When a battery sits at 100%, it's in a high-stress state that puts a strain on its internal parts. Capping the charge at 80% keeps it in a much more stable, less stressful condition.

  • It Prevents Deep Drains. Letting the battery fall below 20% too often can mess with its chemistry. Consistently running it down to 0% is one of the quickest ways to permanently weaken its ability to hold a charge.

  • It Minimizes Heat Buildup. Heat is the number one enemy of battery health. Charging from a very low level all the way to full generates a lot more heat than smaller, more frequent top-ups within that sweet spot.

Adopting the 20-80 rule is the single most effective change you can make to preserve your iPhone's battery. It’s a small adjustment to your daily routine that delivers significant long-term benefits.

Understanding Why Your iPhone Battery Gets Weaker

Ever notice how a brand-new iPhone feels like it could last forever, but a year or two down the line, you're constantly hunting for a charger? It's not in your head. Every rechargeable battery, including the one tucked inside your iPhone, slowly loses its ability to hold a full charge. This is called battery aging, and it's a completely natural part of its life.

The great news is that you have a surprising amount of say in how fast this happens. The secret is knowing what really stresses out your battery. Forget the complicated science for a second; let's use a simpler analogy.

A black iPhone is charging with a white cable, displaying a green battery icon on a dark grey surface.

The Rubber Band Analogy

Think of your iPhone's battery as a new, stretchy rubber band. When you charge it all the way to 100%, you're stretching that band to its absolute limit. Let it drain down to 0%, and you’re letting it go completely slack. While it can handle this, doing it over and over puts a ton of strain on the rubber band.

Eventually, it loses its stretchiness. It gets brittle, worn out, and just can't snap back like it used to. This is exactly what’s happening inside your battery. Consistently pushing it to the extremes of 0% and 100% dramatically speeds up its aging process, permanently reducing its ability to hold a charge.

Every time you charge and use up your phone's power, you complete what’s known as a "charge cycle." Each cycle adds a tiny, almost unnoticeable bit of wear. But how much you charge and drain it—how far you stretch that rubber band—is what really matters.

A small top-up, say from 40% to 70%, is like a gentle stretch. It causes very little wear. A full charge, from 0% all the way to 100%, is a massive pull that does way more damage. The real key to long-term battery health is simply to avoid those stressful extremes as much as you can.

Your Daily Habits and Battery Health

How you use and charge your phone every single day directly impacts how long its battery will perform at its best. It's not about one bad charge; it's the combined effect of hundreds of charging sessions over months and years.

Think about these common scenarios:

  • Leaving It Plugged in Overnight: Your phone hits 100% around 2 AM but stays connected to the charger for another five hours. This keeps that "rubber band" stretched tight, causing constant stress and generating heat—another major enemy of battery health.
  • Running It Until It Dies: You often use your phone until it shuts itself off. This is like letting the rubber band go completely limp, which can harm its internal parts over time.
  • Charging in a Hot Car: Leaving your phone to charge on the dashboard in the sun is like stretching the rubber band while also leaving it out in harsh weather. That combination of high heat and high stress is incredibly damaging.

Just like a rubber band, your iPhone's battery is healthiest when it's kept in a comfortable, relaxed state—not fully stretched and not completely slack. This is why the 20-80% rule is so effective; it avoids the points of highest stress.

What Is a Charge Cycle, Really?

Understanding charge cycles helps make sense of why these habits matter so much. Apple defines one charge cycle as using an amount equal to 100% of your battery’s power—but not necessarily all at once. For example, if you use 60% one day, charge it back up, and then use 40% the next, you’ve completed one full charge cycle over those two days.

Your iPhone battery is designed to hold up to 80% of its original power after 500 full charge cycles. Past that point, you’ll really start to notice a drop in how long it lasts. By avoiding deep drains and full charges, you make each of those cycles far less stressful, effectively slowing down that countdown to 500. This simple shift helps you get way more life out of your device before its performance starts to fade. The goal isn't to stop using your phone, but to start charging it smarter.

Busting the Big iPhone Charging Myths

When you ask how to best charge your iPhone, you're bound to get a ton of conflicting advice. A lot of what people think they know is actually ancient history, leftover from the days of flip phones and those chunky old batteries.

That old advice doesn't just miss the mark for modern iPhones; it can actually hurt their advanced batteries. It's time to clear the air and separate the myths from what really keeps your battery healthy.

Once you see where these myths came from and why they don't apply today, you'll be able to charge your phone with confidence, knowing you're doing it right.

Myth 1: You Have to Drain Your Battery to 0% Before Charging

This is probably the most common—and most damaging—myth out there. The whole idea of "training" your battery by running it completely dead comes from old batteries, which suffered from a strange "memory effect." If you didn't fully drain them, they'd start to "forget" they could hold a full charge.

Modern iPhone batteries have no memory effect. Zero. In fact, doing the opposite is what keeps them happy. Constantly draining your iPhone to 0% puts a massive amount of stress on its internal parts, which makes it age much faster.

Seriously, letting your battery die all the time is one of the fastest ways to weaken it. It's so much better to plug it in when it gets down to around 20-30%.

Myth 2: Charging Your iPhone Overnight Will Destroy the Battery

The fear of leaving your phone plugged in all night is a classic. You can just picture it overcharging and frying itself, right? While keeping a battery at 100% for hours isn't great for it, your iPhone is a lot smarter than people give it credit for.

iPhones have built-in safety features that stop the flow of power once the battery hits 100%. It doesn't keep cramming electricity in. The real enemy here isn't overcharging; it's the long time your battery spends in that high-stress, fully charged state.

Thankfully, Apple has a trick up its sleeve for this.

Your iPhone’s Secret Weapon: Optimized Battery Charging

Apple built a clever feature called Optimized Battery Charging to tackle this exact problem. Once you turn it on, your iPhone starts learning your daily routine. It’ll charge up to 80% relatively quickly and then just… wait. It pauses the charging process and only tops off that last 20% right before you usually wake up.

This little feature is a game-changer. It drastically cuts down on the time your phone spends sitting at that stressful 100% mark. Think of it as your phone’s own built-in defense system against overnight charging damage.

Here's why it works so well:

  • Less Stress: It keeps the battery out of that high-stress 100% state for most of the night.
  • Cooler Temps: Less time actively charging means less heat builds up, and heat is a major battery killer.
  • It’s Automatic: You just flip a switch in your settings, and it does the rest.

Myth 3: You Should Only Ever Use Official Apple Chargers

Look, using a certified charger is always a smart move, but you definitely don't have to stick only to Apple's own white bricks. What really matters is using high-quality cables and chargers that are MFi (Made for iPhone) certified.

MFi certification is basically Apple's seal of approval. It means the product has been tested to meet their safety and performance standards. Those super-cheap, no-name chargers you find at gas stations? That's where you get into trouble. They can deliver uneven power, lack proper safety controls, and potentially damage your iPhone’s charging port or even the battery itself.

So, the myth has a grain of truth—you absolutely should avoid junk chargers. But you’ve got plenty of great, safe options from other reputable brands. Just make sure you see that MFi logo on the box.

Finding Your Perfect Charging Rhythm

Knowing the science behind smart charging is great, but what really saves your battery is building a practical, real-world routine. Let's be honest, there's no single "best" time to charge your iPhone because everyone's day is different. The key isn't to become obsessed with your battery percentage, but to find a simple rhythm that keeps your device in that happy 20-80% zone without you even thinking about it.

The goal is to make smart charging an effortless habit, not another chore. So, let's get practical and see how different lifestyles can adopt a healthy charging rhythm. Just find the profile that sounds most like you, and you'll see how easy it is to fit these tips into your day.

The 9-to-5 Professional

If you spend most of your day at a desk with a charger nearby, you're in a great position to keep your battery healthy. Your environment gives you total control over when and how long you charge.

Your main goal is to stop leaving your phone plugged in at 100% all day. That constant, high-power state is a major source of battery stress. It's like holding a muscle in a tensed position for hours on end. Instead, try this:

  • Morning Coast: If you charged overnight, your phone is likely full. Let it run down naturally through the morning.
  • Post-Lunch Boost: By mid-afternoon, you might be hovering around 40-50%. Perfect. Plug it in for an hour or so until it hits about 75-80%, then unplug it.
  • Ride It Out: That single top-up should easily get you through the rest of the workday and your commute home.

For desk workers, the biggest hurdle is just remembering to unplug the thing. A simple timer on your phone or computer works wonders. Think of it as "charge snacking"—much gentler than leaving it plugged in for eight straight hours.

The On-the-Go Commuter

Always on the move? Whether you're driving for work, running errands, or just have a long commute, that car charger can feel like a lifeline. It’s convenient, for sure, but it requires a slightly different strategy to avoid constantly maxing out your battery.

Car chargers, especially the fast-charging kind, can generate a ton of heat—battery health's public enemy number two (right after being at full power). The trick is to use them for quick, strategic boosts, not as a permanent power source.

A quick 20-minute charge in the car can give you a 20-30% bump. That's usually more than enough to get you through the next part of your journey without over-stressing the battery.

Here’s a rhythm that works well for anyone who spends a lot of time on the road:

  • Charge Before You Go: If you can, give your phone a little juice before leaving home so you aren’t starting your trip in the red.
  • Use Drive Time Wisely: Don't leave it plugged in for the whole drive. Instead, charge in short bursts. Plug it in for 15-30 minutes, then let it be.
  • Avoid the Dashboard Sun-Bath: Never, ever leave your phone charging in direct sunlight on the dash. The combined heat from the sun and the charger is a recipe for battery damage.

The Power User

Are you a gamer, a content creator, or just someone who is glued to their phone for demanding tasks? Power users burn through their batteries way faster than average, which makes smart charging habits even more crucial. Your focus should be on frequent, small top-ups to keep up with your high usage.

Practically speaking, daily iPhone battery life has come a long way. Newer models like the iPhone 15 series can deliver 8 to 9 hours of typical use, but older models like the iPhone 8 were closer to 5 hours. As you can see from this data on how iPhone battery life has changed over the years on Vegerpower.com, a daily charging plan is essential for everyone, especially power users who need to stay above that 20% floor.

Here’s a practical schedule for the power user:

  • Plan Around Activity: Know you have a long gaming session coming up? Plug your phone in beforehand and get it to around 70-80%. And try to avoid gaming while it's actively charging—that combo creates a ton of heat.
  • Embrace "Opportunity Charging": Whenever you take a break, plug your phone in for just 10-15 minutes. These little micro-charges are perfect for keeping you in that ideal 20-80% range without needing a long, dedicated charging session.

Ultimately, your perfect rhythm comes down to your unique needs, and you might even switch between these profiles on different days. Once you get the core ideas, you can adapt on the fly. This is especially true when it comes to overnight charging. If you're wondering how to apply this thinking after dark, you can learn all about how to safely charge your iPhone overnight in our detailed guide.

Avoiding Heat: The Silent Battery Killer

Let's talk about something that kills iPhone batteries just as fast, if not faster, than bad charging habits: heat. Heat is the silent assassin of phone batteries. You can follow the 20-80% rule perfectly, but if your phone is constantly getting hot while charging, you're still doing serious damage.

Think of your battery like a person—it’s most comfortable at room temperature. When things get too hot, the chemical reactions inside go haywire, causing permanent harm to its ability to hold a charge. This is why knowing when to charge your iPhone is also about knowing where and how to charge it to keep things cool.

Common Heat Culprits During Charging

Most of the time, we’re the ones turning up the heat without even realizing it. A few simple, everyday habits can turn a normal charging session into a battery-destroying sauna.

Here are some of the biggest offenders:

  • Gaming While Plugged In: Firing up a powerful game makes your phone's brain work overtime, generating a ton of internal heat. Add the heat from charging into the mix, and you've created a perfect storm for battery stress.
  • Leaving it in a Hot Car: A car's interior can feel like an oven, especially in direct sunlight. Charging your iPhone on the dashboard is one of the quickest ways to cook its battery.
  • Using Bulky Cases: Many thick or poorly designed cases act like a winter jacket, trapping the heat that naturally builds up when you charge. This prevents the phone from cooling itself down properly.
  • Charging on Soft Surfaces: Tossing your phone on a bed, couch, or blanket while it charges is a bad idea. It blocks air from getting around the phone and traps heat right underneath it.

To figure out the best charging approach for your daily grind, this little flowchart can point you in the right direction.

A flowchart titled 'Your Lifestyle?' with branches for Office, Commuter, and Gamer.

As you can see, whether you're at a desk all day, constantly on the move, or a power user, your routine is the key to a smarter charging strategy.

What About Fast Charging and Wireless Charging?

Convenience usually comes with a catch. Fast charging and wireless charging are both fantastic, but they almost always generate more heat than a standard, slow-and-steady wired connection. This isn't to say you should ditch them entirely, but it's something to be aware of.

The impact of heat is a huge factor in battery aging. Studies show that high temperatures can dramatically speed up a battery's decline, while cooler conditions keep it healthy. Wireless charging, in particular, is known for generating extra heat, especially if the phone isn't lined up perfectly on the pad or is stuck inside a thick case.

Keeping your iPhone cool while it charges is just as important as managing the battery percentage. A cool battery is a happy, long-lasting battery.

The good news is that simple habits make a big difference. Take the case off before a long charge. Place your phone on a hard, flat surface like a desk. And for goodness' sake, keep it out of direct sunlight. The relationship between temperature and charging is a deep topic, and you can learn more about the deep impact of heat on battery degradation in our detailed analysis. By getting a handle on heat, you add another powerful tool to your battery-saving arsenal.

How to Automate Smarter Charging Habits

Trying to manually manage your iPhone’s battery can feel like just another chore on an already long to-do list. The good news is you don't have to. You can put smart charging on autopilot and let your phone and a few clever tools do the heavy lifting for you. It's never been easier to make great battery health a "set it and forget it" part of your routine.

Your first line of defense is built right into your iPhone. Apple gives you a couple of powerful, no-fuss features designed to protect your battery from the stress of sitting at full charge.

  • Optimized Battery Charging: This is Apple's clever, hands-off approach. It learns your daily habits, charges your iPhone to 80%, and then waits. It only tops it off to 100% just before it thinks you'll unplug it in the morning.
  • 80% Limit (iPhone 15 models): If you want more direct control, this setting is as straightforward as it gets. It simply tells your iPhone to stop charging once it hits 80%. Period. This keeps your battery out of that high-stress red zone.

Just by flipping on Apple's built-in features, you’re already taking a huge step toward better battery health without any extra effort. They just work quietly in the background, saving your battery from unnecessary wear and tear.

Taking Automation to the Next Level

Apple’s tools are a fantastic start, but what if you want more precise control over your charging schedule? This is where special hardware solutions come into play, offering a physical safeguard that works separately from your phone's software. One of the best-known tools for the job is Chargie.

For those who really want to get into the details, you can learn more about how Apple’s Optimized Battery Charging works in our detailed guide and see how it stacks up against external solutions.

This screenshot from the Chargie app shows you just how precise this kind of physical control can be.

You can see right in the app how you can set a specific percentage, and the hardware will physically cut the power once your phone reaches that level.

Unlike a software-only solution, a hardware device like this acts as a smart gatekeeper for the electricity itself. It doesn’t just tell the phone to stop; it physically stops the charge at your chosen level—say, 75%. This gives you a foolproof way to prevent your phone from sitting at 100% for hours. It’s a powerful guarantee that you’re always keeping your battery in its happy place, making smart charging truly effortless.

Alright, we've gone through the science behind your iPhone's battery and the best ways to charge it. Still, you probably have a few specific scenarios nagging at you. Let's tackle some of the most common questions I hear, so you can plug in with total confidence.

Is It Better To Charge My iPhone in Small Bursts?

Absolutely. Charging in smaller bursts throughout the day is one of the best habits you can adopt. Think of it as "topping up." This keeps your battery humming along in that ideal 20-80% range.

A quick boost from 40% to 70% puts way less strain on the battery than a marathon session from nearly dead to completely full. It's like snacking instead of eating one massive meal—it's just easier on the system. Modern batteries don't have a "memory effect," so these frequent, partial charges are actually great for their long-term health.

Should I Use a Fast Charger with My iPhone?

You can, but it's a trade-off: speed for a longer battery life. Fast charging is a lifesaver when you're in a pinch, but that extra power generates more heat, and heat is the number one enemy of a healthy battery.

For your daily routine or overnight charging, a standard, slower charger is the much gentler choice. If you do need to charge up quickly, just make sure your phone is in a cool place and you're not trying to run a graphics-heavy game at the same time.

Key Takeaway: Slow and steady wins the battery health race. Save the fast charger for emergencies and stick to slower charging for the day-to-day.

Does Leaving My iPhone Plugged in at 100% Damage the Battery?

It sure does. Holding your iPhone's battery at 100% for a long time is one of the most stressful things you can do to it. That high-power state speeds up its aging process. Your iPhone has built-in protections to stop it from overcharging, but just sitting at full capacity is damaging all on its own.

This is the exact problem Apple's "Optimized Battery Charging" feature tries to solve by pausing the charge at 80% for most of the night. But for the ultimate protection, it's always better to unplug it or, even better, use a tool that physically cuts the power at a healthier level.

How Can I Check My iPhone's Battery Health?

It’s super easy to get a report card on your battery's health right from your settings. Just a few taps:

  1. Open up the Settings app.
  2. Scroll down and tap on Battery.
  3. Choose Battery Health & Charging.

You'll see a "Maximum Capacity" percentage here. This number shows you how your battery is holding up compared to when it was brand new. If you see a number below 80%, it's a sign that it has worn down a lot. This is also where you can turn on "Optimized Battery Charging" to help slow down any more aging.


Want to take complete, automated control of your charging habits? That's what Chargie was built for. By physically stopping the charge at the perfect level, Chargie makes it effortless to extend your iPhone's battery life by up to 4x. Get your Chargie today and make battery worries a thing of the past.

How to Fix a Broken Charger Port: A Simple Guide

We've all been there. That dreaded moment when you plug in your phone, and… nothing. The little charging icon doesn't show up, and the battery percentage stubbornly refuses to climb. Before you panic and start Googling "phone repair near me," take a breath. Most of the time, the fix is way simpler and cheaper than you think.

Believe it or not, these basic checks solve the problem more than 70% of the time, no technical skills required.

What to Do When Your Device Stops Charging

So, your phone, tablet, or laptop is giving you the silent treatment when you plug it in. What's the first move? Don't assume the worst. The port itself is usually the last thing to fail.

Start with the easy stuff. Grab a different charging cable and wall plug that you know are working. Borrow one from a family member, or one from another device. If your gadget suddenly springs to life and starts charging, you’ve found your culprit. Cables and power bricks lead a hard life and break far more often than the ports they plug into.

Rule Out Software Glitches

Still no luck with a new cable? Don't give up just yet. The issue might not be physical at all. Sometimes, a simple software hiccup is all it takes to throw off the charging process.

The fix is as easy as it gets: a full restart. Power your device completely down, let it sit for a minute, and then turn it back on. This quick reboot forces the device's software to reset and can often clear up whatever was causing the charging jam. It’s a surprisingly effective trick that many people skip right over.

Inspect the Port for Obvious Issues

Alright, now it’s time to play detective. Grab a flashlight and get a good, close look inside the charging port. What do you see? It's amazing how much pocket lint, dust, and other gunk can get crammed in there over time. These ports are basically tiny vacuums for whatever is in your pocket or bag.

While you're looking, check for any bent or damaged pins. Those little metal contacts inside the port are delicate, and if one gets bent out of shape or broken, it can't make a solid connection. If the port looks clean and the pins seem straight, you can move on. But if you see obvious physical damage, that’s a pretty clear sign a more hands-on repair is in your future.

This visual guide breaks down these first crucial troubleshooting steps.

A visual troubleshooting guide showing steps to check cable, restart device, and clean port.

Walking through this logical process—cable, software, then a physical look—is the most efficient way to figure out what's really going on.

If you’ve gone through these steps and determined the problem lies with your accessories, our guide on what to do when your charger is not working can give you some more detailed pointers. By ruling out the easy stuff first, you'll know for sure whether the charger port itself is the real problem.

Safely Cleaning Debris from Your Charging Port

A person's hands connecting a phone charger to a smartphone with low battery display.

It’s an incredibly common scenario: you plug your phone in, and nothing happens. Before you panic and assume the port is fried, consider a much more likely culprit. Over time, your charging port becomes a magnet for pocket lint, dust, and all sorts of tiny gunk. It gets packed in there so tightly that the cable can't make a solid connection anymore.

The good news? A careful cleaning is often all it takes to bring a "broken" port back to life. But I have to stress the word careful. The inside of that port is delicate, and grabbing the wrong tool can quickly turn a simple fix into a much bigger, more expensive problem.

Gathering the Right Tools for the Job

Your mission is to gently remove the debris without scratching or shorting out the sensitive electronics inside. That means you need to resist the urge to grab the nearest pointy metal object. I’m looking at you, paperclips and safety pins.

Metal conducts electricity and is very hard—a terrible combination for this job. You could easily cause a short circuit or permanently bend the contact pins, landing you right where you didn't want to be: needing a professional replacement.

Instead, you want to stick with things that don't conduct electricity and are softer. Here's your go-to toolkit:

  • A Wooden or Plastic Toothpick: This is your main tool for gently scraping out the packed-in gunk. Wood or plastic is soft enough not to damage the delicate metal contacts.
  • A Can of Compressed Air: Perfect for blasting out loose dust before and after you get in there with the toothpick. Just remember to use short, sharp bursts.
  • A Small, Soft-Bristled Brush: A clean, dry toothbrush or a special anti-static brush is great for sweeping away any fine particles left behind.

Crucial Safety Tip: Before you even think about sticking anything in that port, power your device completely off. This is a must. It eliminates any risk of a short circuit, even when you're using the right tools. It's a simple step that could save your device.

The Gentle Cleaning Process

With your device powered down, find a spot with good lighting. Use a flashlight to peek inside the port—you might be surprised by what you see. This quick look helps you see where the gunk is.

First, grab the compressed air. Hold the can upright a few inches away and give the port a couple of quick blasts. This will clear out any loose stuff sitting on the surface and prevent you from accidentally pushing it deeper.

Now, take your wooden toothpick and gently slide it into the port. Your goal is to carefully trace the inside walls, scooping the debris out, not pushing it in. Think of it less like digging and more like a gentle sweeping motion. Work your way around the edges, and you'll probably pull out a shocking amount of lint.

Once you’ve pulled out the main clumps, give it another quick blast of compressed air to get rid of anything you loosened up. For a final polish, a gentle sweep with a dry, soft-bristled brush will take care of any lingering dust.

If you want a more detailed look at different techniques, there are some great guides out there on effective charging port cleaning.

Now for the moment of truth. Power your device back on and plug in the charger. Chances are, you'll see that familiar charging icon pop right up.

DIY Cleaning Toolkit: What to Use and What to Avoid

To make it even clearer, here’s a quick reference guide for what you should—and shouldn't—be using to clean out your charging port.

Tool Recommended Use Why it's Safe (or Unsafe)
Wooden/Plastic Toothpick Gently scraping out packed-in debris. Doesn't conduct electricity and is soft enough not to scratch internal pins.
Canned Compressed Air Blowing out loose dust and particles. Touch-free and effective, but must be used in short bursts.
Soft, Dry Brush Sweeping away fine dust after cleaning. Soft bristles won't damage delicate parts.
Metal Paperclip/Pin Never use. Unsafe: Conducts electricity, can cause short circuits and permanently scratch/bend pins.
Your Breath Avoid. Unsafe: Contains moisture that can lead to rust and damage electronics.
Water or Alcohol Never use. Unsafe: Liquids can seep inside and cause irreversible water damage.

Sticking to the safe tools on this list is the best way to ensure your DIY cleaning session is a success, not a disaster.

Deciding on Your Repair Options and Costs

Close-up of a hand using a wooden pick to clean lint from a smartphone's charging port.

If a good, thorough cleaning didn't bring your device back to life, the problem is almost certainly deeper—something is physically broken inside the port. From here, you’re looking at three main paths, and the right one for you comes down to your budget, how fast you need your device back, and your comfort level with taking things apart.

Your choices are pretty straightforward: go to an authorized service center (like the Apple Store), find a local third-party repair shop, or try to fix it yourself. Knowing the real-world differences between them is the key to making a smart call that doesn't waste your time or money.

Authorized Service Centers: The Official Route

Taking your device back to the manufacturer or one of their certified partners is always seen as the safest play. They use genuine, official parts, meaning the new port is a perfect match for the old one. The technicians are specially trained, and you’ll usually get a warranty on the repair work itself, which is great for peace of mind.

Of course, that quality and assurance come with a bigger price tag. Authorized repairs are almost always the most expensive option. You might also have to wait longer if your device has to be mailed out to a central repair location.

Still, if your device is under its original warranty, this is the only path to take. Going anywhere else will likely cancel it.

Local Third-Party Repair Shops: The Sweet Spot of Cost and Convenience

For most people with devices no longer under warranty, a good independent repair shop is the answer. They're almost always cheaper than the official centers and can often finish the repair the same day—sometimes in just an hour or two. That speed is a lifesaver when you can't be without your phone or laptop.

The main trade-off is with the parts and the skill of the person doing the repair. Many shops use high-quality parts that work just fine, but they aren't "official." That’s why it’s so important to pick a shop with a solid reputation and plenty of good reviews. Always ask about their warranty on repairs; any decent shop will stand by their work.

Key Takeaway: The quality of local shops varies wildly. Hunt for businesses with a proven track record, glowing customer reviews, and clear, upfront pricing. A good local tech is a valuable person to know.

When figuring out how to fix a broken charger port, cost is obviously a massive factor. Prices can swing dramatically depending on your device and where you take it. Third-party shops typically charge somewhere between $40 and $150. Cheaper Android phones will be on the low end, while top iPhones or Samsung Galaxy models push the higher end. For those same premium phones, an authorized service center can easily run you $100 to $250. Laptops and tablets can climb even higher, sometimes topping $250 for a professional fix. You can find a more detailed cost breakdown over at computeremergencyroom.com.

The DIY Approach: For the Brave and the Skilled

Your final option is to roll up your sleeves and do it yourself. You can find DIY kits online for $20 to $50 that come with the replacement part and some basic tools. It's by far the cheapest way to go, but it also carries by far the most risk.

Modern gadgets are incredibly dense and delicate. Swapping a charging port often requires special tools, a steady hand, and sometimes even tiny soldering skills—the kind of work done with small parts under a microscope.

Before you even think about ordering a kit, ask yourself this:

  • Is it Soldered or a Flex Cable? Some ports are on a simple ribbon cable that's relatively easy to unplug and replace. Others are soldered directly to the main circuit board, which is a job for an expert.
  • What's the Risk of More Damage? One tiny slip with a hot soldering iron can fry the main board, turning a simple fix into a dead device. It happens all the time.
  • Who Helps You If It Goes Wrong? When you do it yourself, there's no warranty. If you mess it up, you’re on your own.

Honestly, unless you have real experience with electronics repair and have the right gear, the DIY route is a bad idea for something as vital as a charging port. The potential savings just aren't worth the very real risk of causing permanent, expensive damage.

When to Call in a Professional

Knowing your limits is a skill, especially when you’re dealing with the insides of modern electronics. While a good cleaning can solve a surprising number of charging issues, there are definite red flags that mean it's time to put the tools down and call a pro. Pushing forward when you're in over your head is the fastest way to turn a small, fixable problem into a much bigger, more expensive one.

One of the biggest tell-tale signs is a physical one. If you plug in your cable and the port itself feels loose, wobbly, or shifts around inside the frame, that’s a major warning. It means the parts holding the port in place have broken, and it’s no longer securely connected to the main circuit board. No amount of cleaning is going to fix a physically broken mount.

Likewise, if you see any signs of that greenish or whitish crusty buildup, you're likely dealing with rust from water damage. Trying to fix this yourself without the right equipment can easily cause further short circuits and fry the board.

The Dangers of DIY on Soldered Ports

The real game-changer in modern device repair is how the charging port is attached. In older gadgets, the port was often on a separate, flexible cable that you could unplug and replace with relative ease. Those days are pretty much over.

Today, most charging ports are soldered directly onto the main circuit board (or motherboard). This is the brain of your device, and the connections are microscopic. Replacing a soldered port isn't a simple swap; it requires special tools and an incredibly steady hand.

Here’s a peek into what a technician's workbench looks like for this kind of job:

  • Hot Air Rework Station: To melt the old solder without cooking the tiny parts nearby.
  • Microscope: Because the solder points are often completely invisible to the naked eye.
  • Precision Soldering Iron: For applying new solder with pinpoint accuracy.
  • Anti-Static Equipment: To prevent an accidental static shock from killing the entire board.

Trying this at home with a standard soldering iron from the hardware store is a recipe for absolute disaster. You can easily overheat the board, damage the delicate connection points, or create a solder "bridge" that shorts out important parts. A failed DIY attempt on a soldered port can permanently destroy the main board, turning an inexpensive port repair into a bill for a whole new device.

Why Professional Repair Is Often the Smarter Choice

Charging port repair is one of the most common—and most technically demanding—jobs a technician sees. While the replacement part itself might only cost a few dollars, what you're really paying for is the technician’s skill and expensive equipment. They have the experience to spot related issues, like a battery that might have been stressed by the faulty port.

Expert Insight: A damaged charging port can indirectly wreck your battery by feeding it an inconsistent power flow. A good technician will often test the battery's health during a port repair to head off future problems like bulging or reduced battery life, ensuring a truly complete fix.

If you're facing a complex issue or just aren't comfortable attempting a DIY fix, finding a service that specializes in professional battery charging port repair is your best bet. The cost is a small price to pay for the peace of mind that the job is done right, without risking the life of your entire device.

While you're waiting for a repair, a temporary workaround can be a lifesaver. Check out our guide on how to use a power bank to keep your device up and running in the meantime.

You’ve gone through the hassle of fixing your charging port—the last thing you want is a repeat performance. Keeping that tiny port healthy is all about small, consistent habits. Think of it as preventative care for your phone, tablet, or laptop.

These little adjustments can make a huge difference, saving you from future headaches and repair bills. After all, the charging port is a high-traffic area for your device. Every time you plug and unplug, you're causing a tiny bit of wear and tear. Over thousands of times, that adds up.

Master the Art of Plugging and Unplugging

This might sound almost too simple, but how you connect and disconnect your cable matters. A lot. Most people just yank the cord at whatever angle is convenient. That puts a ton of stress on both the cable head and the delicate pins inside the port, which is a fast track to a loose, wobbly connection.

Instead, just remember two things:

  1. Grip the Plug, Not the Cable: Always grab the hard plastic or metal part at the end of the cable. This gives you direct control and stops you from straining the fragile wires where they meet the plug.
  2. Pull Straight Out: Make a conscious effort to pull the cable directly away from the device—not up, down, or sideways. A straight, gentle pull lets the internal pins release cleanly without getting bent out of shape.

Honestly, this one habit is probably the most effective way to prevent physical damage. It takes just a second of thought but can add years to your port's lifespan.

Choose Your Charging Accessories Wisely

Not all chargers are created equal. I've seen countless ports wrecked by cheap, uncertified cables and power bricks. These knock-off accessories often have poorly made connectors that don't fit snugly, causing that dreaded wobble that wears down the internal contacts over time.

Even worse, they can lack proper voltage control, sending unstable power that can fry not only the port but also the battery and other sensitive electronics. Stick with chargers from your device’s manufacturer or from reputable third-party brands that are properly certified.

A Proactive Approach to Longevity: It’s like getting an oil change for your car. Using quality accessories is simple preventative care for your electronics. A small upfront investment now can easily save you from a costly repair down the road.

Keep Your Environment Clean

Where you charge your device plays a bigger role than you’d think. Dusty, dirty, or damp places are a charging port’s worst enemy.

  • Dust and Debris: If you work in a workshop, on a construction site, or just have a habit of tossing your phone into a bag full of crumbs and lint, that port is at risk. Tiny particles get packed inside and block the connection.
  • Moisture and Humidity: Try to avoid charging in a steamy bathroom or right next to an open window on a rainy day. Moisture leads to rust on those delicate metal pins, causing spotty charging or outright failure.

If you’re often in messy environments, a simple dust plug is a fantastic, cheap investment. These tiny silicone or plastic covers slide right into the port when you're not charging, creating a physical barrier against all that gunk.

Introducing Chargie—A Smarter Way to Charge

Beyond physical damage, the way you charge also impacts your device's health. Leaving your phone plugged in all night, every night, forces the battery to sit at 100% for hours. This puts a ton of stress on the battery and the entire charging system. That stress generates heat, which is the enemy of all electronics, especially the delicate solder points holding your charging port in place.

This is where a little gadget like Chargie comes in handy. It’s a small device that sits between your charger and your cable, letting you control the charging process through an app. You can set it to automatically stop charging at a healthier level, like 80%, which drastically reduces heat and slows down battery aging. It’s a smart way to protect the whole system, from the port to the battery itself.

Taking these preventative steps doesn't just help you avoid another round of figuring out how to fix a broken charger port; it also helps you be more sustainable. The global smartphone repair market is projected to hit a staggering USD 45.52 billion by 2035, driven by our ever-growing collection of complex gadgets. You can dig into the numbers yourself in this detailed smartphone repair market report.

By taking better care of our devices, we extend their lifespan, save money, and shrink our environmental footprint. Preventing common issues like port damage contributes to the larger goal of keeping electronics out of landfills. If you're interested, you can learn more about how to reduce electronic waste and make a real difference.

Got Questions About Your Charging Port? Let's Clear Things Up.

When you’re staring at a phone that won't charge, a million questions can run through your head. It's frustrating, and it's easy to get lost in conflicting advice. Let's cut through the noise and get you some straight answers to the most common questions I hear.

A smartphone with a white dust plug inserted into its charging port, next to a braided USB cable.

If My Port Is Busted, Can I Just Use a Wireless Charger?

You bet. If your device can be charged wirelessly, grabbing a certified charging pad is a brilliant and immediate workaround. This method completely bypasses the broken physical port, letting you power up without rushing into a repair. It's a lifesaver when you just need to get your phone working again.

For some people, this can even become a permanent solution, especially if you rarely use the port for things like data transfers. Just keep in mind that wireless charging is generally a bit slower than plugging in, but the convenience is often a worthy trade-off.

Is It Even Worth Fixing the Port on an Older Phone?

This one is all about the math. Your first move should be to get a repair quote from a shop you trust. Once you have that number, compare it to what your phone is actually worth today.

Here's my rule of thumb: if the repair costs more than half the phone's current value, you're probably better off putting that cash towards a new device. But if your old phone still does everything you need it to do, and you want to keep it around, a repair is almost always a smarter financial choice than buying a whole new one.

Think of it this way: You wouldn't sink $2,000 into an engine for a car that's only worth $1,500. The same logic applies here. If the fix is just a fraction of its value, it's a sound investment.

Why Does My Charging Cable Feel So Loose All of a Sudden?

That wobbly, loose connection is the classic sign of a worn-out charging port. It's the result of wear and tear from plugging and unplugging your cable thousands of times. Over time, the tiny metal pins and retaining clips inside the port bend, weaken, and just plain wear out.

But before you jump to conclusions, give that port a really good cleaning. A surprising amount of pocket lint and gunk can get packed in there, preventing the cable from clicking in securely. If it's still loose after you've cleared out any debris, then the port itself is likely damaged and will need to be replaced by a pro.

Can a Bad Charging Port Actually Damage My Battery?

Yes, and it's a risk you shouldn't ignore. A faulty port can feed your battery an unstable or inconsistent stream of power. This chaotic charging cycle puts a lot of stress on the battery, which can absolutely shorten its lifespan.

While modern phones have safety features to prevent disaster, a short circuit in a damaged port could, in rare cases, lead to bigger electrical problems. Getting that port fixed isn't just about convenience; it’s a crucial step in protecting the long-term health of your battery and the rest of your device. You want the whole charging system working together properly.


Of course, the best strategy is to prevent damage from happening in the first place. This is where the Chargie smart charging system comes in. It actively reduces the heat and stress on your device's entire charging circuit—port and battery included. By intelligently managing your charge levels, it extends the life of your electronics, potentially saving you from these kinds of repairs down the road. You can see how it works at https://chargie.org.

iPhone Not Charging When Plugged In: Why Your iPhone Won’t Charge

That sinking feeling when you plug in your iPhone and… nothing happens. The little battery icon stays stubbornly empty. It’s a moment of tech-panic we’ve all been through.

Before you jump to conclusions about a dead battery or a busted phone, take a deep breath. Most of the time, the fix is surprisingly simple. The issue is often just a minor software glitch or a problem with the power source itself, not a major phone problem.

So, let's walk through the easy stuff first. We're going to start with the basics that solve the problem for most people.

Your Quick Fix Checklist When Your iPhone Is Not Charging

We'll begin with the simplest and most effective solution: a good old-fashioned restart. It’s like giving your phone’s brain a quick reboot, which can instantly clear out weird software glitches that might be blocking it from recognizing the charger. After that, we’ll double-check your power source.

Here's a quick rundown of the first things to try. Running through this table can often get you back up and running in just a few minutes.

Initial Troubleshooting Checklist

Action to Take Why It Works Time to Complete
Plug into a different wall outlet Rules out a dead or faulty outlet as the cause. < 1 minute
Try another USB port on your computer Some USB ports, especially on older computers or keyboards, don't provide enough power. < 1 minute
Bypass any power strips or extension cords A faulty or overloaded power strip can prevent a good connection. < 1 minute
Perform a force restart on your iPhone Clears temporary software bugs that can mess with the charging process. 1-2 minutes

These quick checks are your first line of defense and solve more charging problems than you'd think.

Check Your Power Source

Let's look at your power source. It sounds almost too obvious, but you’d be surprised how often the wall outlet or the USB port is the real problem. I once spent an hour convinced my phone was broken, only to realize the power strip I was using was switched off. It happens to the best of us.

To make sure your power source isn't the issue, give these a shot:

  • Try a completely different wall outlet. The best way to test this is to plug into a socket you know is working—one that’s currently powering a lamp or another device.
  • Switch up your USB ports. If you're charging from a laptop or desktop, try a different port. Ports on the back of a desktop computer often provide more reliable power than ones on the front.
  • Go direct. Plug your charging adapter straight into the wall, completely bypassing any extension cords or power strips.

This simple decision tree is a great way to visualize these first crucial steps.

Flowchart illustrating troubleshooting steps for an iPhone not charging: restart, power adapter, new outlet.

Before you start worrying about a frayed cable or a damaged phone, you always want to rule out the simple things first. A software glitch or a bad outlet is a much easier fix.

Perform a Force Restart

If you’ve tried a few different power sources and still have no luck, a force restart is your next best move. This is a deeper reboot than just turning your phone off and on again. It’s much better at clearing out stubborn software bugs that can mess with charging.

Don't worry—a force restart won't erase any of your data. It's a completely safe and powerful way to refresh your iPhone's system when it gets stuck on something, like a bug that stops it from charging.

By quickly ruling out these common issues, you can move on to the next steps—like checking your cable and cleaning out the charging port—with more confidence.

If your wall outlet is fine but the iPhone still refuses to charge, it's time to look at the accessories you handle every single day: the charging cable and the power adapter.

Let's be honest, we put these things through a lot. They get twisted, yanked, stepped on, and crammed into bags without a second thought. All that daily abuse adds up, causing hidden damage that can stop the connection, even if the cable looks perfectly fine from the outside.

A smartphone charges on a wooden nightstand next to a bed, showing a green battery icon.

This constant physical stress is the number one killer of charging cables. I've seen it countless times. The weakest part is always where the flexible cable meets the hard plastic connector. The tiny wires inside just can't handle being bent back and forth forever and eventually, they break.

Looking at Your Charging Gear

Your first move should be a quick visual check of your gear. Start with the cable and pay close attention to the ends, as that's where trouble usually starts.

  • Frayed Wires: Do you see any exposed or frayed wiring near the connector heads? Even a tiny break in the outer rubber cover is a major red flag.
  • Bent or Damaged Pins: Grab a light and look closely at the Lightning or USB-C connector. The gold pins should be perfectly straight, clean, and shiny. If anything looks bent, dirty, or discolored, you've likely found your problem.
  • Loose Connectors: Gently wiggle the connector head. If it feels wobbly or loose, the connections inside are probably broken.

Now, give your power adapter—the little brick that plugs into the wall—the same treatment. Check for bent prongs, cracks in the plastic, or any strange discoloration or burn marks around the USB port. These are all dead giveaways that the adapter has failed and needs to be replaced.

If you want to learn more about adapters, our guide on the best Type C adapter is a great resource.

The Risk of Uncertified Accessories

It's tempting to grab that super cheap charging cable from the gas station or a random online seller, but trust me, it’s almost always a bad idea. Apple has a certification program called MFi (Made for iPhone) for a reason. It ensures that other companies' accessories meet their strict safety and quality standards.

Those uncertified, knock-off chargers often skip the essential internal parts needed to manage power correctly.

Using uncertified gear isn't just unreliable—it can be downright dangerous. These accessories can feed your iPhone inconsistent power that slowly damages the battery or, in rare cases, even pose a safety risk.

This is a massive problem globally. In growing markets like India, Indonesia, and Brazil, a shocking 27% of iPhone users had a total charging failure in the last 18 months. And get this: a staggering 68% of those cases were traced directly back to using cheap, uncertified cables and adapters.

The Swap Test: An Easy Way to Check

The absolute easiest way to figure out if your cable or adapter is the problem is with a simple swap test. Find a cable and adapter that you know for a fact are working—borrow one from a family member or grab a spare you trust.

First, try charging your iPhone using the known-good cable with your original adapter. If it lights up and starts charging, you know your old cable was the issue.

Still no luck? Okay, keep the good cable plugged in, but swap out your adapter for the one you know works. If it starts charging now, your adapter was the faulty part all along. This simple process can save you a ton of frustration and guesswork.

If you’ve ruled out the cable and the power adapter, the real culprit is probably hiding in plain sight. Take a look at your iPhone’s charging port. It’s a magnet for pocket lint, dust, and all sorts of tiny gunk.

Every single time you plug in your cable, you're unintentionally packing that debris down tighter and tighter. After a few months, this buildup can physically block the metal contacts, and it's one of the most common reasons an iPhone is not charging when plugged in. The good news? It’s also one of the easiest problems to fix yourself.

Think of it like trying to plug a lamp into an outlet that’s already full of dirt. When the charging cable can't make a solid, clean connection with the pins inside the port, no power gets through. Nothing happens.

White USB-C and HDMI cables connecting a laptop and smartphone on a wooden desk, with 'CHECK CABLE' text.

This isn't some rare fluke; it's incredibly common. Repair technicians see this all the time. In fact, an analysis by iFixit and various repair networks revealed that dust and lint in the charging port were responsible for nearly 60% of port-related charging failures. Better yet, over 40% of these cases were solved with nothing more than a careful cleaning. You can read more about how common these hardware issues are in this analysis of smartphone shipments.

The Right Tools for the Job

Before you start poking around in there, let’s talk tools. It’s critical to use the right ones. Your first instinct might be to grab a metal paperclip, a safety pin, or even your SIM ejector tool. Don't do it. This is a huge mistake.

The charging port is lined with delicate contact pins that you can easily scratch, bend, or short-circuit with anything metal.

Important Safety Tip: Never, ever use metal objects to clean your iPhone’s charging port. Sticking metal inside can cause permanent damage to the charging contacts or even short out parts on the phone's main board. You could turn a simple fix into a very costly repair.

Instead, you need to stick with non-metal and softer materials. Here’s what works:

  • A wooden toothpick: The soft wood is perfect for gently scraping and digging out packed-in lint without harming the metal pins.
  • A soft-bristled brush: An old, clean toothbrush or a small anti-static brush is great for sweeping out looser dust.
  • Canned air (with caution): A quick, angled blast can push out stubborn debris. Just never hold it too close or spray directly into the port—the force and moisture can cause damage.

How to Clean the Port Without Breaking Anything

Ready to clear out all that gunk? Find a well-lit area and follow these simple steps to safely clean your charging port.

  1. Power Down Your iPhone. Seriously. Always turn your iPhone completely off before you start. This removes any risk of an electrical short.
  2. Get a Good Look Inside. Grab a flashlight and shine it into the port. You might be shocked at how much lint is packed in there. It often looks like a gray, fuzzy mass stuck at the very bottom.
  3. Gently Scrape with a Toothpick. Take your wooden toothpick and carefully insert it. The key is to scrape along the inside walls of the port—the flat sides—to loosen everything up. Work around the middle block of contact pins, not directly on top of them.
  4. Scoop It All Out. Now, use the toothpick to gently scoop out the lint you've loosened. You’ll probably have to do this a few times to get it all.
  5. Finish with a Brush or Air. Once the big stuff is gone, use a soft brush to sweep out any remaining dust. Or, give it a short, angled puff of canned air from a safe distance.

Once the port looks totally clean, power your iPhone back on and try plugging it in again. More often than not, you'll feel the cable click firmly into place, and your phone will finally start charging.

If you've checked all the hardware and everything seems fine, the next place to look is inside your iPhone's brain: the software. It’s a common misconception that charging is just a simple electrical process. In reality, your iPhone is running complex code to manage power safely, and sometimes a tiny bug in iOS can throw a wrench in the works.

When a software update has a minor glitch or a background process gets stuck, your iPhone might mistakenly block charging as a false safety measure. It’s more common than you’d think, but the fix is often surprisingly simple.

A close-up of a toothbrush cleaning the charging port of a grey iPhone, with a laptop in the background and 'CLEAN PORT' text overlay.

Installing the Latest iOS Updates

Apple is constantly squashing bugs, and those frequent "bug fixes and performance improvements" you see in iOS updates often include patches for weird power management issues. A glitch that’s preventing your phone from charging in one version could very well be fixed in the next.

It's a quick check. Just go to:
Settings > General > Software Update

If an update is waiting for you, go ahead and install it. Just make sure you have a decent amount of battery left and a solid Wi-Fi connection. You’d be surprised how often this alone gets things moving again. If you're curious about how developers catch these kinds of issues before they get to you, it's worth looking into the principles of software testing.

Understanding Optimized Battery Charging

Have you ever plugged your iPhone in overnight and woken up to find it stuck at 80%? That’s not a bug. It’s actually a clever feature called Optimized Battery Charging. Apple introduced this to help your battery live a longer, healthier life by reducing the time it spends sitting at a full 100% charge, which is stressful for the battery.

Your iPhone actually learns your daily routine. It charges up to 80% and then waits, timing the final 20% to finish right before you usually wake up. It’s brilliant for battery health but can definitely be confusing. You can find the switch for it here:
Settings > Battery > Battery Health & Charging

If you need a full charge right away, you can just turn it off temporarily.

Key Takeaway: If your iPhone pauses charging at 80%, don't panic. It's likely just protecting its own battery. While great for the long run, you always have the option to turn it off when you need to.

Checking Your Battery's Health

Finally, the problem might just be an old, tired battery. Every battery has a limited lifespan. As they age, their ability to hold a charge simply fades. Your iPhone actually has a built-in tool that tells you exactly where it stands.

Head over to Settings > Battery > Battery Health & Charging and look for "Maximum Capacity." A new iPhone should be at 100%. Over time, that number will drop. Once it dips below 80%, you’ll likely see a service message, and that’s a clear sign the battery is on its way out. A worn-out battery will struggle to charge properly, no matter how perfect your cable and charger are. We cover this in much more detail in our guide on how to check battery health.

Advanced Fixes and When to Call a Professional

So, you’ve restarted your iPhone, swapped out the cable and charger, and even carefully cleaned the charging port. You’ve checked for software updates, and still… nothing. If your iPhone is stubbornly refusing to charge, you’ve likely moved beyond the simple fixes and are now facing a more serious hardware problem.

This is the point where you have to be honest with yourself. Continuing to poke and prod on your own could easily do more harm than good. Recognizing when you've hit your limit is the key to getting a proper, safe repair without turning a fixable issue into an expensive paperweight.

When charging problems won’t go away, the trail usually leads to one of three culprits: a failing battery, a physically damaged charging port, or a much deeper issue with the phone's main circuit board (the logic board).

Identifying Deeper Hardware Problems

Let's start with the charging port. It takes a lot of abuse. If the port feels loose when you plug in the cable, or if you have to jiggle the connector just right to get that little lightning bolt to appear for a split second, the internal pins are probably worn out or broken. No amount of cleaning can fix that kind of physical damage. For a closer look at what goes wrong inside, a complete guide to iPhone charging dock repair can shed more light on the mechanical side of things.

The battery itself is another prime suspect. All batteries age, and once your iPhone’s battery health drops a lot (Apple flags anything below 80%), it can start refusing a charge. Telltale signs of a dying battery include the phone dying way too fast, shutting down out of nowhere even with charge left, or getting uncomfortably hot.

The most complex and serious hardware issue is a problem with the logic board—the brain of your iPhone. Damage here is not a DIY job; it often requires microscopic repair by a specialist.

A Final Software Resort: The DFU Restore

Before you give up on software completely, there is one final, drastic step you can try: a Device Firmware Update (DFU) restore. Think of it as the nuclear option. This isn't your standard iTunes restore; it's a deep system wipe that reinstalls every single bit of your iPhone’s software from scratch. On rare occasions, it can fix incredibly stubborn, deep-level bugs that are blocking the charging process.

But I can't stress this enough: a DFU restore should be your absolute last resort.

  • It erases everything. All your photos, messages, and data will be gone for good if you don't have a backup.
  • It can fail. If the process gets interrupted for any reason, it can "brick" your iPhone, leaving it completely unusable.
  • It won't fix hardware. If the problem is a broken port or a dead battery, a DFU restore will do nothing but waste your time and delete your data.

Knowing When to Get Professional Help

So, how do you know it’s time to call in the pros? It's time to contact Apple Support or find a reputable repair shop if you see any of these red flags:

  • The charging port is visibly damaged, or the cable feels wobbly and loose inside it.
  • Your iPhone only charges when you hold the cable at a very specific, magical angle.
  • The device gets extremely hot to the touch when you try to charge it.
  • You've tried multiple certified cables, power adapters, and outlets, and nothing works.
  • Your iPhone is completely dead and won't turn on, even after being plugged in for hours.

At this stage, an expert technician can run tests to figure out if it's the battery, the port, or the logic board. They have the right tools to perform a safe repair without risking further damage to your device.

Proactive Tips to Prevent Future Charging Issues

Alright, now that your iPhone is back to charging properly, let's talk about how to keep it that way. The last thing you want is to go through all that troubleshooting again. A few simple habits can make a world of difference, not just in preventing charging problems but in extending your battery's overall life.

The biggest enemy of your iPhone's battery is extreme charging. Constantly running it down to 0% before plugging it in, or leaving it on the charger at 100% for hours on end (like overnight), puts a ton of stress on the battery. Think of it like a muscle – you don't want to constantly push it to total exhaustion or keep it tensed for hours. A good rule of thumb is to keep your battery somewhere in the 20% to 80% sweet spot as much as possible.

Smart Charging for Long-Term Health

Of course, nobody wants to babysit their phone's battery percentage all day. That’s where smart charging tools come in. A little device like Chargie, for example, is a game-changer. It physically stops the charging process once your iPhone hits a level you set, so you can plug it in overnight without worrying about it sitting at 100% for hours and slowly cooking the battery.

As you can see on their site, tools like this are built to automate those healthy charging habits, which can have a huge impact on how long your battery stays in good shape.

Another simple trick is to get into the habit of checking your charging port for lint or debris before it gets packed in there. Just a quick peek with a flashlight every few weeks can save you a lot of trouble down the road. For a deeper dive, you can find more great iPhone battery saving tips to really maximize your device's health.

By treating your battery and charging port with a little care, you're not just avoiding a charging issue—you're preserving the long-term health and value of your device.

A Few Common Questions We Hear All the Time

If your iPhone is giving you charging headaches, you're not alone. It's a frustrating spot to be in, and naturally, you've probably got a few questions. Here are the simple, straight-up answers to the ones we get asked most often.

"Why Does My iPhone Stop Charging at 80 Percent?"

Nine times out of ten, this is Apple's Optimized Battery Charging feature doing its job. Your iPhone is pretty smart—it actually learns your daily routine. To keep the battery from aging too quickly, it intentionally hits pause at 80% and then tops it off just before it thinks you’ll need it.

The only other common reason is heat. If your iPhone gets a bit too toasty, it will stop charging as a safety precaution. You can always check or disable this feature yourself under Settings > Battery > Battery Health & Charging.

"Can I Use Just Any Charger for My iPhone?"

While a lot of chargers might seem to work, it's always best to stick with ones that are MFi-Certified (that stands for Made for iPhone). Using a cheap, uncertified charger is a gamble—it might charge agonizingly slow, die on you unexpectedly, or worse, send unstable power to your phone and cause real, long-term damage to the battery.

A little pro tip: Always look for that MFi logo on the box. It’s a small detail, but it’s your best guarantee for safety and knowing the thing will actually work reliably.

"Is It Normal for My iPhone to Get Hot While Charging?"

A little bit of warmth is totally normal, especially when you first plug it in. But if it gets so hot you can barely hold it, that's a red flag. Your iPhone's software is designed to protect the internal parts, so it might slow down or stop charging completely if it senses things are getting out of hand.

If this happens, the first thing to do is take the case off and move the phone somewhere cooler. If the heat still feels like way too much, unplug it right away and get it checked out.


Honestly, the best way to dodge future charging problems is to take care of your battery from the get-go. With a gadget like Chargie, you can put healthy charging habits on autopilot, seriously extending your battery's lifespan. It's all about making sure your iPhone is ready to go when you are. Learn more about it at https://chargie.org.

Why Is My Charger Not Working? A Practical Fix Guide

When your phone or tablet just won't charge, that sinking feeling is all too familiar. It’s easy to jump to the worst conclusion—a dead phone. But more often than not, the reason a charger isn't working is surprisingly simple.

The issue usually comes down to one of three things: a problem with the wall outlet, a damaged cable, or a loose charging brick. Before you start worrying about expensive repairs, a few quick checks can often solve the problem in just a few minutes.

Your Quick Guide to Common Charging Problems

That moment of panic when you see your battery icon isn't responding is universal. But trust me, the cause is rarely as dramatic as a completely broken device. My experience has shown that the problem is almost always in one of the simple parts we handle every day: the outlet, the power brick, and the charging cable itself.

Think of this as a process of elimination, starting with the easiest and most obvious things first. You don't need any special skills—just a step-by-step approach to rule out the usual suspects.

Start with the Simple Stuff

Let's walk through the basics that fix this for most people. These steps are incredibly simple and can save you a ton of time and unnecessary stress.

  • Check the Wall Outlet: Is it even working? This sounds obvious, but it’s a common mistake. Plug in a lamp or another small appliance you know works to confirm the outlet has power. A tripped circuit breaker could be the real problem, having nothing to do with your charger.
  • Inspect the Power Adapter: The little block that plugs into the wall can easily get knocked loose. Make sure it's pushed firmly into the outlet. While you're at it, unplug and plug the USB cable back into the block to ensure a solid connection.
  • Examine the Cable: Give your cable a quick look. Look for any clear signs of damage—frayed wires near the ends, sharp kinks, or bent metal parts are all dead giveaways. Even tiny, barely visible damage can stop electricity from flowing.

Before you go any further, running through a quick checklist can help you find the issue without any guesswork.

5-Minute Charger Health Checklist

Use this checklist to quickly run through the most common points of failure when your charger stops working.

Part to Check What to Look For Quick Fix
Wall Outlet Is it supplying power? Test with another device, like a lamp.
Power Adapter Is it firmly plugged in? Unplug and securely plug it back in.
Cable-to-Adapter Is the USB connection tight? Disconnect and reconnect the cable.
Charging Cable Any frays, kinks, or bent pins? Inspect the entire length, especially the ends.
Cable-to-Device Is it securely in the port? Unplug, check for dirt, and plug it back in.

This simple process of checking each point of connection will often reveal the weak link in the chain.

Why Compatibility Matters More Than You Think

Here’s one that catches a lot of people off guard: a mismatch between the charger and the device. This isn't just about the plug fitting; it’s about power. In fact, a surprising 62% of users run into compatibility issues with their phone chargers, making it a leading cause of charging failures.

This happens when a charger’s power output doesn't match what your device needs. The result? Frustratingly slow charging, or worse, no charging at all. If you want to dive deeper, you can learn more about how charger compatibility issues work and find other revealing cell phone charger statistics.

Remember, the goal here is to find the problem. By testing each part—the outlet, the adapter, and the cable—you can quickly figure out what’s wrong without assuming the worst.

Finding the Problem: A Part-by-Part Test

If the quick checks didn't get your phone charging again, it's time to play detective. I've found that when a charger stops working, the problem almost always boils down to one of three things: the wall outlet, the power adapter (the brick), or the charging cable itself. The trick is figuring out which one is the culprit without just buying a whole new setup.

A step-by-step approach is your best friend here. By testing each part one by one, you can confidently find the exact source of the failure. This process of elimination saves you from guessing games and the cost of replacing perfectly good parts.

Start with the Power Source: The Outlet

First things first, let's make sure the wall outlet is even working. This is the simplest test you can do, and it instantly rules out a major problem.

Find something small you know for a fact works, like a desk lamp or a radio. Unplug your charger and plug that appliance into the same socket. If it turns on, the outlet is fine, and we can move on to the charging gear. If it stays dark, you've found your issue—it’s the outlet, not your charger. Your next step should be checking the circuit breaker for that room.

Next Up: Test the Cable and Adapter

With the outlet confirmed as working, the focus now shifts to your charging equipment. The easiest way to test the cable and adapter is to use a "known good" substitute for each part, one at a time. This is how you find the faulty part.

  • Test the Cable: Your USB cable is usually the most fragile part of the system, taking all the bends and twists. To test it, leave your power adapter plugged into the wall and simply swap the current cable for one you know works. If your device starts charging, you've found the problem—a bad cable. Easy fix.

  • Test the Adapter: If a new cable doesn't solve it, the power adapter might be the issue. Take that new, working cable and plug it into a different power adapter. If charging kicks in, your original adapter has likely died.

This simple process helps you narrow down the possibilities, guiding you from the wall to the cable and finally to the adapter itself.

Process of connecting a USB cable to a white charger with icons for plug, port, and phone.

By methodically checking each link in the chain, you can avoid tossing a perfectly good charger and only replace the part that's actually broken.

A Different Angle: Testing with a Computer

Don't have a spare adapter or cable handy? No problem. A laptop or desktop computer can be a great testing tool.

Plug your original charging cable directly into a USB port on your computer. If your device starts charging, that's a strong clue your power adapter is the problem. If it still won't charge, the fault is almost certainly with the cable or, as we'll explore next, the charging port on your device.

By swapping parts one by one, you create a simple, effective test. If you change one thing and the problem gets fixed, you've found the cause. From my experience, this step-by-step process is the fastest way to solve the "why is my charger not working?" puzzle.

Checking Your Device: The Overlooked Culprit

A wooden tool cleaning the charging port of a black smartphone on a wooden surface.

So, you've checked the outlet, the adapter, and the cable. Still nothing. It’s easy to get frustrated at this point, but what if the problem has nothing to do with your charger at all? From my experience, the issue is often hiding in plain sight: the charging port on your device. It’s the one thing most people completely forget to check.

Think about where your phone goes all day—pockets, bags, dusty desks. Its charging port acts like a tiny magnet for lint, dust, and all sorts of gunk. Over time, this buildup gets so packed in that it physically stops the charging cable from making a solid connection.

The good news? A little careful cleaning is often all it takes to fix it.

Safely Cleaning Your Device's Charging Port

Before you grab the nearest pointy object, hold on. It’s very important to use the right tool for the job. Never use anything metal, like a paperclip or a pin. Metal can easily scratch the delicate connectors inside the port or, even worse, cause an electrical short that could permanently damage your device.

Here’s a much safer way to do it:

  • Find the Right Tool: A wooden or plastic toothpick is perfect. A can of compressed air is also great for blowing out loose debris first.
  • Power Down Your Device: This is a must. Always turn your phone or tablet completely off before you start cleaning.
  • Gently Scrape and Loosen: Carefully insert the tip of the toothpick into the port. Gently scrape along the bottom and sides—you’re just trying to knock the packed lint loose, not scrub the port clean.
  • Clear the Debris: As you loosen the gunk, carefully scoop it out. You might be shocked at how much lint and dust comes out. A few quick puffs from the compressed air can help clear out the rest.

Once you're done, power your device back on and plug it in. Nine times out of ten, you’ll feel the cable click firmly into place and see that beautiful charging icon pop up.

A blocked charging port is one of the most common reasons a charger seems broken. A quick, careful cleaning with a non-metallic tool like a toothpick often solves the problem in under a minute, saving you the hassle and cost of a new charger.

When the Problem Is Software, Not Hardware

What if the port is spotless and it still won't charge? The issue might be a simple software glitch. Your phone is a mini-computer, and just like a PC that starts acting strange, sometimes all it needs is a simple reboot to clear out any bugs. A forced restart can often fix minor issues that mess with the charging process.

The exact steps for a forced restart can be different for each device:

  • For iPhones (8 and newer): Quickly press and release Volume Up, then Volume Down. Now, press and hold the Side button until you see the Apple logo.
  • For Android Devices (Samsung, Google, etc.): The most common method is to press and hold the Power button and the Volume Down button together for about 10-15 seconds until the device restarts.

This action doesn't delete your data but resets the parts of the software that control power. If your device starts charging again, you know it was just a software hiccup. While this solves the immediate problem, if it keeps happening, it might point to a deeper issue. It’s always a good idea to learn how to check your phone's battery health to see if something more serious is going on.

Wait, Why Isn't This Charger Working?

We’ve all been there. You grab a random charger from a drawer, plug in your phone, and… nothing. Or worse, it charges at a snail's pace. It’s a super common frustration, but the reason is pretty simple: not all chargers, cables, and devices are made to work together.

For everything to work right, your power adapter, your cable, and your device need to speak the same language. If they can't communicate, you've got a problem.

Things used to be a lot simpler. But now, with fast charging technologies, the whole situation has gotten complicated. These newer systems need a digital "handshake" between the charger and the device to figure out the right amount of power to send.

If any single part of that chain—the brick, the cable, or the phone—doesn't support the right standard, the whole system drops to the slowest, safest speed. It’s a built-in safety measure. This is exactly why that cheap gas station charger can’t keep up with your brand-new, power-hungry smartphone.

Not All Cables Are Created Equal

It's tempting to think a USB-C cable is just a USB-C cable, but that’s a huge mistake and a common source of charging headaches.

Some cables are just built for slow, basic charging. Others are made with much thicker internal wires and special chips specifically to handle the high power needed for fast charging.

Using a flimsy, low-quality cable with a powerful fast-charging adapter is like trying to put out a huge fire with a garden hose. It just can't deliver enough power. The cable itself becomes the bottleneck, stopping your device from charging as fast as it can.

Match Your Adapter to Your Device

The power adapter—the "brick" that plugs into the wall—is the brains of the whole operation. It’s what decides the maximum power it can send out.

So, if you plug a brand-new phone that supports 45W fast charging into an old 5W adapter from a decade ago, it's going to charge incredibly slowly. The adapter simply doesn't have the power your device is asking for.

This mismatch is one of the most frequent reasons people think their charger is broken. Technically, it's working, just not very well. This is even more important for bigger devices; you can check our guide on how many watts are needed to charge a laptop to see just how specific those power needs can be.

Beyond the charger itself, it’s always a good idea to have a basic grasp of your home's electrical system to stay safe. Brushing up on understanding electrical safety is a great way to ensure all your gadgets operate safely and you avoid bigger problems down the line.

When to Repair and When to Replace Your Charger

A damaged braided Lightning cable and a white USB-A cable, with a 'REPLACE CHARGER' text overlay.

Alright, you’ve done the detective work and found the problem. Now you have a decision to make: is this something you can fix, or is it time to toss it?

A bit of lint in the charging port is an easy fix. But some problems are more than just a simple issue—they're giant, waving red flags telling you that your charger is done for.

Getting this right isn't just about getting a charge. It's about protecting your phone, your home, and yourself. A faulty charger can cause a lot more trouble than just a dead battery.

Definite Signs You Need a New Charger

Some issues mean the charger is beyond repair. If you spot any of these, stop using the charger immediately and get a new one. Seriously. Trying to patch these up isn't worth the risk.

Here’s what to look for:

  • Frayed or Exposed Wires: As soon as you see the thin, colorful wires showing through the outer plastic, that cable's life is over. It’s a serious fire and shock hazard.
  • A Strange Smell or Overheating: Does the power brick smell like burning plastic? Is it very hot when you touch it? Those are clear signs of failing internal parts that could short out at any moment.
  • Buzzing or Whining Sounds: Your power adapter should be silent. If it starts buzzing, humming, or making any other weird noises, something inside is seriously wrong.
  • Bent or Damaged Connector: That little metal tip is more delicate than it looks. If it’s bent, wiggly, or has broken pins, it could ruin your device’s charging port—and that’s a much more expensive problem to solve.

In my experience, trying to "fix" a physically damaged charger with electrical tape is a bad idea. You're just putting a flimsy bandage on a ticking time bomb that could damage your phone or, worse, start a fire.

Why Quality Matters When Replacing Your Charger

So, it's time for a new charger. It’s tempting to hop online and grab the cheapest one you can find, right? I get it, but this is one area where "saving" money now will absolutely cost you later.

Those super-cheap, uncertified chargers are a huge reason people end up wondering, "why is my charger not working?" all over again.

They often skip the essential safety features that protect your phone from power surges and overheating. Over time, they can damage your battery, shortening its lifespan and forcing you to replace it way too soon.

When you buy a certified charger from a brand you trust, you're paying for peace of mind. You know it meets strict safety and performance standards, which means it will charge your device safely and reliably for years. Making a smart choice here not only protects your phone but also helps you learn how to reduce electronic waste—which is better for both your wallet and the planet.

Got More Charging Questions? Let's Clear Them Up.

Even after trying everything, a few nagging questions can stick around. That's totally normal. We've been there. So, I've rounded up some of the most common things people ask when a charger acts up, with some straight-to-the-point answers to give you that final piece of the puzzle.

Think of this as your quick-hit guide for those tricky "what if" moments.

Can a Charger Just… Die?

Absolutely, and it happens more than you'd think. One minute it's working fine, the next, it's useless. This is almost always a tiny internal part in the power adapter failing, maybe from a small power surge or just plain old wear and tear.

Cables are just as guilty. One too many bends, and a delicate wire inside finally snaps. You won't always see any damage on the outside before it quits on you.

Why Does My Charger Work on One Thing but Not Another?

This is a classic compatibility problem, and it's become super common with all the different fast-charging technologies out there. When you plug in your phone, the charger and device have a quick digital "handshake" to agree on how much power to send. If your phone needs a specific type of power and the charger can't provide it, the handshake fails. No power flows.

It’s really a safety feature to stop your gear from getting damaged, but it can be confusing. The charger isn't broken; it just can't communicate properly with that specific device.

I see this all the time: an old 5-watt charger can power up a simple Bluetooth speaker just fine, but it can't deliver enough juice for a new, power-hungry smartphone. The charger is technically working, just not powerfully enough for everything you own.

Is It a Bad Idea to Leave My Charger Plugged In 24/7?

Leaving the power brick itself plugged into the wall, even without a phone connected, uses a tiny amount of "phantom power." It's not really harmful to the charger, but it's not great for your electricity bill over the long run.

The real problem is leaving your phone plugged in, especially overnight. This is the big one. Keeping a modern battery at 100% charge for hours on end is the single worst thing you can do for its health. This puts a ton of stress on the battery, causing it to lose its ability to hold a charge way faster than it should. Before you know it, you're looking at a phone that can't make it through the day, forcing an expensive replacement.


Protecting your battery from this kind of silent damage is the best thing you can do to make your phone last longer. This is exactly why we built Chargie. It acts like a little guardian for your battery, intelligently managing the charge overnight. It stops the power at a healthy level and then just tops it off right before you wake up. It’s a simple idea that can literally add years to your phone's life, saving you money and cutting down on e-waste. You can learn more about how to extend your battery's life at https://chargie.org.

Charging Stations for Multiple Devices Explained

If your desk looks like a tangled mess of cables, you're not alone. But the fix is much easier than you might think. A charging station for multiple devices is a central hub designed to power up all your gadgets—phones, tablets, laptops, and more—all from a single wall outlet. They're the secret to turning a cluttered space into a clean, organized power zone.

Taming the Chaos of Cords

Desk organizer with multiple electronic devices charging, including a tablet, phone, AirPods, and smartwatch.

It happens slowly, then all at once. First, it’s just the one charger for your phone. Then you add another for a tablet, one for your headphones, and maybe one for a smartwatch. Before you know it, every outlet is taken, and a web of wires has taken over your desk.

This isn't just about looks; it's a real pain. Hunting for an open outlet or the right charging block becomes a daily frustration. Devices end up scattered all over the house, making it way too easy to forget where you left something charging. This is the modern clutter we're all trying to escape.

The Rise of the Centralized Power Hub

Fortunately, there’s a simple way to get your space—and your sanity—back. A multi-device charging station acts like a command center for all your electronics. Instead of juggling half a dozen power bricks, you get one clean solution that genuinely simplifies your daily routine.

The whole idea is to bring everything together. By putting all your charging needs in one spot, you get a bunch of benefits that go way beyond just being tidy. These hubs are built to handle the power demands of modern life without any trouble.

The real magic of a charging station isn't just getting rid of cords; it's about creating a dedicated, reliable home for your tech. That simple shift clears up mental clutter and makes your day run a lot smoother.

Key Benefits of a Multi-Device Station

Switching to a dedicated charging solution does more than just clean up your desk. It brings some real, practical improvements to how you manage your essential gadgets.

  • Declutter Your Space: The most obvious win is getting rid of that nest of tangled cords. Your space instantly looks cleaner and feels more organized.
  • Ultimate Convenience: All your devices are in one predictable spot, fully charged and ready to go when you are. No more frantic searches for a misplaced phone or a dead tablet.
  • Save Outlet Space: A single station can power 5 or more devices while only taking up one wall outlet. That frees up your other sockets for lamps, monitors, or anything else.
  • Improved Device Management: In a family or office, a central station means everyone knows where to charge their gear. It cuts down on the "who stole my charger?" arguments and lost cables.

This guide will walk you through everything you need to know, from the different types of stations out there to understanding the power specs that actually matter. The goal is to give you the confidence to pick the perfect charging hub for your home, office, or even your car.

Finding Your Perfect Charging Hub

A modern multi-device charging hub organizing a laptop, tablet, and smartphone on a wooden desk.

Choosing a charging station isn't just about plugging things in. It's about picking the right tool for the job. You wouldn't use a sledgehammer to hang a picture, right? The same idea applies here—you don't need a huge industrial unit for your bedside table.

The trick is to match the station to your actual daily life. A good one solves the cable clutter problem without creating new headaches. Let's break down the main types of charging stations for multiple devices with some simple comparisons to help you find the perfect fit for your home or office.

The Desktop Dock: The Tidy Parking Garage

Think of a desktop dock as a neat little parking garage for your most-used gadgets. These are the stations with slots and stands that hold your phone, tablet, and maybe a smartwatch upright and organized. It's all about giving your daily devices a proper, easy-to-reach home.

The real win here is organization. Instead of a jumble of electronics on your counter, each device gets its own spot. Many of these docks cleverly hide the power block and messy cables inside the base, leaving you with a clean, simple look.

A desktop dock is more than just a charger; it's a piece of furniture for your technology. It turns a messy pile of devices into a neat display, making it perfect for the kitchen counter, living room, or your personal desk.

These are perfect for families or anyone wanting to keep their essential devices in one central, easy-to-find spot. If your main goal is to charge a phone, a tablet, and a few accessories while keeping things looking sharp, a dock is a fantastic choice. For those who want to take tidiness to the next level, it's worth exploring the best wireless charging stations for your devices.

The USB Hub: The Power Strip For Your Tech

If a desktop dock is a parking garage, then a USB hub is like a power strip. It's usually a small block that gets rid of the dividers in favor of packing in as many charging ports as possible. Its one job is to deliver a lot of power from a small box.

USB hubs are the best choice in situations where space is tight, and you just need more outlets for your gear. They're very versatile—put one on your desk, tuck it in a drawer, or even mount it under a tabletop to make all the cables disappear.

A few things to love about USB hubs:

  • Lots of Ports: You'll often find 6, 8, or even 10 ports squeezed into a very small package.
  • Easy to Carry: Their small size makes them great for travel or for setting up a quick charging spot wherever you need it.
  • Flexibility: You're not limited to phones and tablets. You can charge anything with a USB cable, like cameras, power banks, and gaming controllers.

These hubs are a lifesaver for people with a lot of tech, busy offices, or conference rooms where many people need to power up at once. They're all about raw charging power, not fancy organization.

Carts and Lockers: The Secure Armory

When you're dealing with dozens of devices in a school, hospital, or large business, you need something much more heavy-duty. That's where charging carts and lockers come in. Think of them as a secure storage unit for technology—big, often mobile units built to store, charge, and protect a whole fleet of devices.

Charging carts are basically wheeled cabinets filled with shelves and built-in power strips, letting you charge and move 20 to 40 laptops or tablets at the same time. Lockers go a step further, offering individual, locked compartments so people can securely charge their personal devices.

These large-scale solutions are built to solve three big problems:

  1. Mass Charging: Powering up an entire classroom or department from just a few wall outlets.
  2. Security: Locking doors and compartments prevent theft and keep devices safe.
  3. Distribution: Carts make it easy for staff to hand out and collect devices efficiently.

While they're definitely too much for your living room, these stations are the backbone of device management in any large school or business.

Trying to figure out which of these is for you? This quick table should help.

Which Charging Station Fits Your Life?

A quick comparison to help you match your daily needs with the best type of charging station.

Station Type Best For Common Use Case Key Feature
Desktop Dock Home users, families Kitchen counter, nightstand, home office desk Organization and looks
USB Hub Power users, travelers Desks, conference rooms, travel bags Many ports in a small space
Carts & Lockers Schools, businesses Classrooms, IT departments, offices, hospitals Mass charging, security, and mobility

Ultimately, whether you need a sleek "parking garage" for your daily tech or a powerful "power strip" for all your gadgets, there's a solution out there that fits perfectly.

Understanding Power Without the Headache

Diving into the world of multi-device charging stations can feel like you need an engineering degree. You see terms like watts, amps, and volts on the box, but what does any of that actually mean for you? Let's cut through the confusing terms and make sense of it all.

Think of wattage (W) as the power of your charger. A more powerful engine gets a car up to speed faster, and higher wattage generally means a faster charge. A basic phone charger might be slow at 5 watts, while a powerful laptop charger could be very fast with 100 watts or more.

But it’s not just about raw power. The charger and your device need to work together to use that power safely. This is where modern "smart charging" comes in, making sure your gadgets get the perfect amount of power every single time.

The Smart Fuel Pump in Your Charger

Imagine your device's battery is a fuel tank and the charger is the pump at the gas station. An old, "dumb" charger is like a pump that flows at one constant, slow speed. It gets the job done, but it's not very efficient.

Modern chargers, especially those with Power Delivery (PD), are like a smart fuel pump. This technology lets your charger and device have a quick conversation the second you plug them in.

Your phone might say, "Hey, I'm almost empty and can take a lot of power right now!" The charger responds, "Great, here's a fast flow to get you filled up quickly!" As the battery gets closer to full, the phone tells the charger to slow down to protect its long-term health. This smart communication is what makes fast charging both possible and safe.

Power Delivery isn't just about speed; it's about being smart. It's the technology that lets a single powerful charging station safely power both a tiny pair of earbuds and a big laptop, giving each one exactly the energy it needs without any risk of damage.

This communication is very important. Without it, a powerful charger could easily damage a smaller device. PD acts as a smart go-between, making sure every device gets a custom charge—a must-have for any station built for multiple devices.

What is Power Sharing?

Now, let's talk about a key feature of multi-device stations: power sharing. This is how a station divides its total power among all the connected devices. To understand it, picture the charger's total power as the water flowing through a big pipe.

Each port on the station is like a tap connected to that main pipe. If you only turn on one tap (plug in one device), it gets the full, powerful flow. But what happens when you turn on several taps at once?

The total flow of water has to be split among them. Each tap might get a little less pressure than it would on its own. Power sharing works the exact same way. A station might have a total of 100W, but that power gets divided when you start plugging in multiple gadgets.

For example, plug in a laptop that needs 65W, and it'll get that full amount. But if you then plug your phone into another port, the station might smartly share the power—maybe giving 65W to the laptop and 20W to the phone. The key is that the total power used doesn't go over the station's 100W limit.

It's important to understand how a specific model handles this. Some stations have set power per port, while others move power to where it's needed most. You can learn more about figuring out the right amount of power in our guide on how many watts it takes to charge a laptop.

Reading the Fine Print on Power

So, how do you use this knowledge when you're shopping? When you look at a charging station, keep an eye on two key numbers:

  1. Total Wattage: This is the station's maximum power output, like the 100W in our example. It tells you the total power the charger has available. A bigger number is generally better, especially if you plan on charging power-hungry devices like laptops.
  2. Per-Port Wattage: Check the maximum power each individual port can deliver. A station might have a 100W total output but limit each port to 30W. This means it can charge multiple phones quickly, but it won't be able to fast-charge a 65W laptop.

By understanding these simple power concepts, you're ready to choose a charging station that truly has enough juice for all your gadgets, making sure everything from your smartwatch to your laptop gets powered up efficiently and safely.

Why Your Cables and Ports Matter

Think of your new multi-device charging station like a powerful engine. It’s got all this power, ready to go. But without the right "fuel line," all that potential just sits there. Your cables and ports are that fuel line, and they’re just as important as the charger itself.

A strong charging station is only half the story. The connectors you use can either let that power flow freely or create a bottleneck that slows everything down. Getting the simple stuff right—the cables and ports—is the key to getting the fast, safe, and reliable charging you paid for.

The type of port on your station determines which cables you can use and how much power can flow through them. For a long time, the rectangular USB-A port was the most common type. It’s still around and reliable for basic tasks, but it wasn't built for the high-power needs of modern gadgets like laptops or tablets.

The new champion is the oval-shaped USB-C port, and for good reason. It’s a true powerhouse, able to handle much more power, which is essential for fast-charging technologies like Power Delivery (PD). Best of all, it's reversible, so you can finally say goodbye to fumbling around trying to plug it in the right way.

This diagram helps show how everything—from raw power to smart charging tech—comes together to power up your gear.

Diagram illustrating power flow from wattage and charger power to smart charging.

As you can see, a modern charging setup isn't just about brute force (wattage). It's about a smart combination of total power, intelligent sharing, and how that power is delivered across all your connected devices.

Why a Quality Cable is Non-Negotiable

I get it. It’s tempting to grab the cheapest cable you can find. But this is one area where cutting corners can cause real problems. A low-quality cable is like trying to fill a swimming pool with a flimsy drinking straw. Even if your station is pushing out a ton of power, a cheap cable just can't handle the flow. The result? Painfully slow charging.

Even worse, a poorly made cable can be a real safety risk. They often skip the proper wiring and internal protection needed to manage heat and power surges. That creates a very real risk of overheating, which could damage your expensive phone, tablet, or laptop.

Investing in a certified, high-quality cable isn't just an extra cost; it's an insurance policy. It guarantees that the power from your station reaches your device safely and at top speed, protecting your gear and giving you peace of mind.

Certified cables from brands you trust have been tested to meet strict safety and performance standards. They’re your ticket to getting the full benefit of your charging station’s power without the risk. If you want to dive deeper, there's a great guide on the different kinds of Type-C adapters and their capabilities that breaks it all down.

Simple Tips for Choosing and Organizing Cables

You don't need to be an expert to pick the right cables. Just keep a few simple things in mind to keep your setup running smoothly and looking tidy.

  • Match the Cable to the Task: For power-hungry devices like a MacBook or an iPad, make sure you're using a high-power, PD-rated USB-C cable. For smaller accessories like headphones or a mouse, a standard cable is perfectly fine.
  • Look for Certification: Good cables will often mention certifications like USB-IF on their packaging. That's a solid sign they’ve been properly tested for both safety and performance.
  • Keep Things Tidy: A little organization goes a long way. Use simple Velcro ties, cable clips, or sleeves to manage your cords. It not only looks cleaner but also prevents them from getting tangled, twisted, and damaged over time.

By paying just a little attention to your ports and cables, you ensure your charging station for multiple devices actually works like it's supposed to—delivering fast, safe, and organized power to every gadget you own.

Putting Safety and Device Health First

https://www.youtube.com/embed/R3JE_aAFuos

A great multi-device charging station does more than just fill up your batteries; it acts like a bodyguard for your expensive electronics. When you invest in a quality, certified charger, you're really investing in peace of mind and protecting your gear for the long run.

Ever notice those logos on electronics packaging, like UL, CE, and FCC? They're not just random letters. They’re a seal of approval from safety experts, confirming that a product has passed many tests for electrical safety. It's a promise that it won't be a fire or shock hazard.

Choosing a station with these certifications is the single most important step you can take. It tells you the manufacturer didn’t cut corners and built a product that meets tough safety standards. For anything you plug into a wall, this is a must-have.

Keeping Cool Under Pressure

Have you ever picked up a charger and felt it was uncomfortably hot? That intense heat is just wasted energy, and too much of it can damage both the charger and whatever’s plugged into it. This is where thermal management comes in—a simple way of saying it prevents things from overheating.

Think of it like the cooling system in your car. An engine generates a lot of heat, and the radiator's job is to pull that heat away so everything keeps running smoothly. A well-designed charging station does the same thing, using a smart design and better parts to get rid of heat before it becomes a problem.

Good heat management comes down to a few key things:

  • Quality Components: Higher-grade internal parts are more efficient and create less waste heat from the start.
  • Smart Ventilation: The physical design itself allows air to move around, preventing hot spots from building up inside the unit.
  • Intelligent Power Control: The charger can sense when it's getting too hot and will automatically slow down the power flow to protect itself and your devices.

This is the kind of built-in protection that separates a reliable charger from a cheap, risky one.

Extending Your Battery Lifespan

The other side of device health is all about taking care of your battery. Lithium-ion batteries—the kind in pretty much all of our gadgets—don't like being stressed. Their two biggest enemies are too much heat and, surprisingly, being kept at 100% charge for long periods.

When you leave a device plugged in all night, every night, you force its battery to constantly "top off" from 99% to 100%. This constant small charging creates heat and puts a lot of strain on the battery, causing it to wear out much faster. Over time, that's what turns a battery that once lasted all day into one that's dead by lunch.

A battery is happiest when it's not at its extremes. The sweet spot for long-term health is generally keeping the charge level between 20% and 80%, avoiding the stress of being fully charged or completely drained.

This is where smart charging habits—and some handy tools—can make a massive difference. By simply unplugging your device before it hits 100% or using a system to do it for you, you can greatly extend its usable life.

Tools and Habits for a Healthier Battery

You can take control of your device’s battery health with just a few simple changes. Instead of charging overnight, try plugging in your devices when you get home from work and then unplugging them before you go to bed.

For a more automated, set-it-and-forget-it approach, tools like Chargie are fantastic. It's a small device that fits between your charger and your cable, letting you use an app to decide when charging starts and stops. You can set it to stop the charge at 80% or 90%, completely eliminating the damage caused by overnight charging.

Protecting your gear goes beyond just plugging it in. To really ensure a long and safe life, it helps to understand a bit about the technology and adopt safe charging practices and buying tips for various battery types. When you combine a certified, high-quality charger with smarter habits, you'll learn how to properly charge your lithium-ion battery for a longer life. This smart approach keeps your tech safe and performing at its best for years to come.

How to Set Up Your Charging Station

A clean desk setup with smart plugs in a wall outlet, a multi-port charging station, and a plant.

Alright, let's talk about setting up a charging station that actually works for you, not against you. The real goal here is to make powering up your gear totally effortless and organized, whether you're at home, in a busy office, or on the road. A little bit of planning upfront can save you from a lot of frustration, like tangled cords or running out of battery at the worst possible time.

Every place has its own needs. A home setup needs to be family-friendly and not look like a tech mess in your living room. An office setup? That’s all about security and making sure it can handle everyone's devices.

I've put together a few simple checklists to help you think through your own setup and create a charging space that just works.

The Home Setup Checklist

Creating a central charging hub for the family can finally put an end to the daily "who took my charger?!" chaos. It's all about finding that perfect balance between pure convenience and something that looks good in your home.

  • Pick a Central Spot: Think about a busy area, like the kitchen counter or a side table in the living room. This makes it a natural spot for everyone to drop off their devices.
  • Do a Headcount: Count up all the devices your family uses regularly—phones, tablets, headphones, smartwatches, and more. Get a station with enough ports for today, and maybe add one or two extra for when guests come over or for that new gadget you know is coming.
  • Tame the Cable Monster: Use short cables or look for a station with built-in dividers and organizers. A clean setup is one you'll actually want to use.
  • Think About Bedside Manners: If you're putting a station in a bedroom, find a model with dim indicator lights or none at all. Blinking lights can ruin a good night's sleep.

A well-placed charging station for multiple devices can really transform a cluttered countertop into an organized command center.

The Office Deployment Checklist

In an office, a charging station isn't just a nice extra; it's a real productivity tool. But here, security and safety have to be the top priorities.

  1. Check Your Needs: Start by figuring out how many employees you have and where the common areas are. It's always a good idea to pick a system that can grow with your team.
  2. Lock It Down: For shared spaces, charging lockers with individual keypads or keys are a fantastic idea. This stops any "accidental" device swaps and keeps everyone's gear safe while it powers up.
  3. Put Safety First: Make sure the station is UL-certified or meets local safety standards. You'll also want to place it in a well-ventilated area, far from anything that can catch fire, to follow workplace rules.
  4. Label Everything: Clearly mark the charging area and maybe even provide simple instructions. A label maker is your best friend here—labeling cables can prevent mix-ups and reduce damage to company property.

On the Go: Vehicle and Fleet Considerations

Charging stations aren't just for buildings. When you're setting up a vehicle—whether it's the family minivan or a whole fleet of work trucks—durability is the most important thing.

For any mobile setup, stability is everything. You need to look for stations that are rugged, can handle constant vibrations, and can be securely mounted so they aren't sliding all over the place. This is about both safety and making sure you get a reliable charge on the road.

This need for strong and easy-to-access power is growing everywhere. Just look at the electric vehicle market for a sneak peek into the future. Experts are predicting the number of EV charging ports worldwide will climb to over 206 million by 2040, growing at a steady 12.3% each year. If you want to see how power access is changing, you can explore more about these trends in public charging.

A Few Common Questions, Answered

Jumping into the world of multi-device charging stations can bring up some practical questions. Let's clear up a few of the most common ones so you can feel confident you're making the right choice.

Can I Really Charge My Laptop with One of These?

Sometimes, but you have to pick the right one. Laptops are thirsty for power and need a charging station with high-power ports—think 45W or higher—that specifically support Power Delivery (PD).

Look for a port clearly labeled "PD" or "Laptop." A standard USB port just won't have enough power to get the job done, so always double-check the details before you buy.

Is It Okay to Leave My Devices Plugged in All Night?

You can, but it’s not the best thing for your battery's long-term health. Think of it like holding a muscle in a tense position for hours—it causes stress. Keeping a battery topped off at 100% for that long does the same thing, causing it to wear out faster over time.

For a healthier battery, it's best to unplug your devices once they're full. Or, even better, use a smart gadget that automatically cuts off the charge at a healthier level, like 80%.

Will a Multi-Device Station Charge Everything Slower?

It all comes down to the station's total power and how it shares that power. A strong station with 100W or more can easily fast-charge several devices at once without any problems.

On the other hand, a lower-power station might start to slow down if you plug in too many hungry gadgets at the same time. It has a limited amount of power and has to split it among all the connected devices, which can slow things down.

The takeaway is simple: Match the station's total power to what you plan to charge. More power means you won't have to compromise on speed.

Charging three phones at once is usually no problem. But if you want to charge up a laptop, a tablet, and a phone—all at top speed—you'll need a much more powerful station. A quick look at the total power on the box will tell you if it's up to the task.


Ready to stop worrying about your battery's health and make it last longer? Chargie is a clever little device that prevents the damage caused by leaving your phone plugged in all night. Protect your investment and cut down on e-waste by heading over to https://chargie.org to see how it works.

How to Save Your iPhone Battery Today

If you want to get more life out of your iPhone battery without a lot of trouble, the best things to do are often the simplest. Things like turning down your screen brightness, switching on Low Power Mode when you're running low, and being a bit stricter about which apps can run in the background can make a huge difference. Honestly, these little changes can add hours to your day.

Quick Wins for a Longer Lasting iPhone Battery

When you're staring at that low-battery warning, you don't have time to look through lots of settings. You need fixes that work right now.

The good news? Some of the biggest battery drainers on your iPhone are also the easiest to fix. These are the quick wins—the emergency tools for your battery that can get you through the rest of the day.

Control Your Screen Brightness

Your iPhone's beautiful screen is, without a doubt, the part that uses the most power. It's a simple fact: the brighter the screen, the faster your battery drains. The quickest way to save power is to just swipe down to open the Control Center and manually lower the brightness.

For an easier approach, let your iPhone handle it by turning on Auto-Brightness. This feature uses a light sensor to adjust the screen's brightness for you, keeping it easy to read without wasting power. It’s a classic "set it and forget it" solution. Based on real-world tests, just lowering your screen brightness from 100% to 50% can make your battery last up to 30% longer during heavy use. You can see the full details of these iPhone battery performance tests on reboxed.co.

Use Wi-Fi Whenever Possible

Ever notice how your battery dies quickly in places with bad cell service? That's your iPhone working extra hard, constantly searching for a good signal. It's a surprisingly fast way to drain your battery.

A simple yet powerful habit to build is connecting to a trusted Wi-Fi network whenever you can—at home, the office, or your favorite coffee shop. Wi-Fi uses much less power than cellular data, making it one of the easiest battery-saving tricks in the book.

These are just a few of the basic tips, but they're very effective. The picture below sums up the key areas to focus on for a quick improvement.

A visual guide illustrating three steps to save iPhone battery: lower brightness, manage apps, and use Wi-Fi.

It really comes down to managing your screen, your apps, and how you connect. Get those right, and you're on your way to better battery life.

If you're short on time, here are the five most helpful changes you can make right now.

Top 5 Quick Battery Saving Actions

Action What It Does Estimated Battery Savings
Enable Low Power Mode Reduces background activity, email checking, and fancy visuals. Up to 50%
Lower Screen Brightness Reduces the power used by the display. Up to 30%
Switch to Wi-Fi Uses less power than cellular data for internet. 10-20%, depending on signal
Disable Background App Refresh Stops apps from updating content when you're not using them. 5-15%
Turn Off Push Mail Stops your phone from constantly checking for new emails. Up to 10%

Doing even a couple of things from this list will give you an immediate and noticeable boost in how long your iPhone lasts between charges.

Tweak These Settings to Stop Battery Drain

Besides the obvious stuff, your iPhone is running dozens of tasks in the background. A lot of these features are made for convenience, but that convenience costs you battery life. They're constantly sipping power, all day long.

The good news is you can go into your Settings app and make a few specific changes that have a huge impact. This isn't about turning your powerful smartphone into a basic phone; it's about making it work smarter, not harder. You'll probably be surprised by how many of these power-hungry features you can easily live without.

A hand holds an iPhone wirelessly charging on a stand, displaying 'Quick Battery Tips' text.

Tame Your Location Services

One of the sneakiest battery drainers is Location Services. It’s absolutely needed for apps like Maps, but countless other apps ask for your location when they have no good reason to. Really think about it—does that game you play or your social media feed really need to know where you are 24/7?

Every time an app checks your location, it uses a lot of power. You can easily take back control.

  • Go to Settings > Privacy & Security > Location Services.
  • Just go through the list and set as many apps as you can to Never or, at most, While Using the App.
  • Avoid the Always setting unless it's for something you truly need, like a weather widget that updates on your home screen.

Being a little more selective here can dramatically cut down on this background activity. It’s a simple change that saves a surprising amount of power without you even noticing a difference in your day.

Stop Unnecessary Background Refreshes

Another feature that loves to eat your battery is Background App Refresh. This lets apps pull in new content in the background so everything is up-to-date the moment you open them. It sounds great, and it is for things like messaging apps. But it's often turned on for apps that just don't need it.

For example, do you really need a news app updating itself every few minutes? It's burning through power for content you might not even look at. Some reports suggest that background refresh can be responsible for up to 15-20% of your battery drain over a single day. In one test, an iPhone with this feature fully enabled lost about 25% of its battery overnight—that number dropped to just 5-7% after it was turned off. You can discover more insights about iPhone battery drain on Vegerpower.com.

By turning off Background App Refresh for apps that aren't important, you're basically telling your iPhone to stop wasting energy on things you aren't actively looking at. This one change can solve a lot of "mystery" battery drain.

Fine-Tune Your Notifications

Every single notification you get wakes up your screen. It might only be for a few seconds, but when you're getting alerts hundreds of times a day from social media, news, and promotional emails, that screen time adds up fast.

Each buzz, chime, and screen wake-up uses a tiny bit of power. Take a minute to choose which apps are actually allowed to interrupt you.

  • Head to Settings > Notifications.
  • Scroll down your app list and just turn off notifications for anything that isn't essential.
  • For the apps you want to keep, you can get even more specific by turning off Sounds or disabling alerts on the Lock Screen.

This not only saves your battery but also helps cut down on digital noise. Making these simple, thoughtful adjustments is one of the most powerful ways to keep your iPhone's battery going when you really need it.

Better Charging Habits for a Healthier Battery

How you charge your iPhone is just as important as the settings you choose. Getting into the right habits can seriously extend your battery’s overall lifespan, keeping it healthy for years, not just a few months. It's all about working with your battery instead of fighting against it.

Let's talk about the big one: is charging your iPhone overnight really that bad? The simple answer used to be a definite yes, but Apple has built a pretty clever solution right into its software.

The Myth of Overnight Charging

The old worry about overnight charging was that leaving your phone at 100% for hours puts a lot of stress on the battery. Think of it like holding a muscle in a tense position for way too long—it’s just not healthy. That long period at a high charge is what makes the battery get older faster.

This is where Apple’s Optimized Battery Charging feature comes in.

When you turn this on, your iPhone starts learning your daily routine. It'll charge up to 80% fairly quickly and then just… wait. It cleverly pauses the charge, only adding that last 20% right before you typically wake up and grab your phone. This means your battery only sits at that stressful 100% level for a very short time. If you want to get into the details, you can learn more about how Apple's Optimized Battery Charging works in our guide. It's a real game-changer.

Embracing the 40-80% Sweet Spot

While Optimized Battery Charging is great for when you're asleep, the single best habit you can adopt for daily use is the "40-80% rule." The batteries in your phone are happiest when they’re kept in this middle zone, avoiding the extremes of a full charge or a complete drain.

Constantly pushing your battery to 100% or letting it die to 0% is what causes the most wear and tear. By keeping it within the 40-80% range as much as you can, you'll dramatically slow down how fast it ages.

This doesn't mean you have to watch your battery percentage all day. Just try to build a couple of simple habits:

  • Plug in around 40%: Instead of waiting for that low-battery warning, give your phone a quick charge during the day.
  • Unplug around 80%: If you’re charging at your desk, just try to remember to unplug it before it gets full.

It takes a little bit of awareness, but this approach pays off big time in keeping your battery healthy for longer. Small, regular top-ups are so much better for your battery than long, stressful full charges.

Use Quality Chargers and Cables

Finally, the gear you use actually matters. A lot. Not all chargers and cables are made the same, and using cheap, uncertified accessories can lead to uneven power that can quietly damage your battery over time.

You should always look for MFi (Made for iPhone) certified cables and stick to power adapters from well-known brands. These are designed to meet Apple's own safety and performance standards, giving you a stable and safe charge. If you want to keep things organized and charge multiple devices, a good multi-functional Magsafe wireless fast charging dock can be a great option. Using certified gear protects your phone and makes sure your battery gets the clean power it needs.

Why Keeping Your iPhone Cool Is Essential

If there's one villain in the story of your iPhone's battery life, it's heat. Heat is, without a doubt, the single most destructive thing for your battery.

Think of your battery as a tiny, sensitive power plant. When it gets too hot, the parts inside start to break down. And unlike a bad day you can recover from, this damage is permanent.

This isn't just about your phone feeling warm during a heavy gaming session. It's about the slow damage that builds up over time. Each time your iPhone overheats, it loses a tiny bit of its total ability to hold a charge. Over months and years, those small hits add up, leaving you with a battery that just can't make it through the day.

A smartphone charges on a white dock on a wooden nightstand in a bedroom, promoting smart charging habits.

Common Heat Traps and How to Avoid Them

The most common cause of overheating is also the most obvious: the sun. Leaving your iPhone on a car dashboard, even on a mildly warm day, can make its internal temperature shoot up into the danger zone—well past 95° F (35° C), the upper limit Apple considers safe.

But the sun isn't the only thing to watch out for. Other common heat traps include:

  • Charging with a thick case: Those heavy-duty, super-protective cases are great for drops, but they can be terrible for heat. They basically wrap your phone in a blanket, trapping the heat made during charging and slowly cooking the battery. It's a great habit to take off a bulky case before plugging in.
  • Intense tasks in direct sunlight: Trying to use GPS navigation or playing a demanding game while sitting in the sun is a perfect recipe for overheating.
  • Placing it near other heat sources: It might seem harmless, but don't leave your phone on top of a running laptop, a game console, or a cable box. That combined heat can be surprisingly damaging.

The link between heat and battery health is very important. High temperatures speed up the chemical processes inside a battery, causing it to wear out much faster than it would under normal conditions.

If you really want to get into the science, you can explore the impact of temperature on battery degradation in our detailed guide.

Don't Forget About the Cold

While heat is the main enemy, extreme cold isn't great, either.

Ever been outside on a freezing day and watched your phone suddenly die, even though it showed 30% battery just a minute ago? You've seen this happen firsthand.

Cold temperatures temporarily reduce a battery's ability to deliver power. The good news? This effect usually isn't permanent. Once your phone warms back up to a normal temperature, its battery should work normally again.

The key takeaway here is simple. Treat your iPhone like you'd treat a pet—don't leave it in a hot car, and bring it inside when it's freezing. Simply managing its temperature is a free and very effective way to protect your battery for the long run.

How to Find Which Apps Drain Your Battery

Your iPhone has a built-in detective, and it's located right inside your Settings app. This tool tells you exactly where every bit of your battery power is going, showing you which apps are behaving and which ones are secretly draining power behind your back. Learning to read this screen is the first step to taking back control.

Think of it like a detailed receipt for your battery. Instead of just seeing the final total, you get to see every single item.

To start your investigation, just head over to Settings > Battery. The first thing you'll see is a graph showing your battery level over the last 24 hours or the last 10 days.

This graph is more than just a line; it’s the story of your day. See any steep drops? Tap on that part of the graph, and the app list below will instantly update to show you exactly what was running during that time. This is how you connect a sudden battery drain to a specific activity, like that long video call or a navigation app you forgot to close.

Reading the App Usage List

Below the graph is where the real evidence is: a detailed list of every app that has used your battery. Each entry shows a percentage, which is that app's share of the total power used.

Don't panic if your most-used apps are at the top—that's totally normal. If you spend three hours on YouTube, it's going to use a lot of power. The real red flags are the apps you barely use, yet they're still showing up high on the list.

Interpreting Your Battery Usage Screen

To really make sense of this screen, you need to know what you're looking at. It's packed with useful information if you can understand it.

This table breaks down the key parts of the battery usage screen.

Metric/Graph What It Shows What to Look For
Last 24 Hours / Last 10 Days Switches the view between a short-term and long-term battery usage report. Use the 10-day view to spot sneaky, ongoing battery drainers.
Battery Level Graph A visual timeline of your battery percentage over the chosen period. Steep downward slopes, which show moments of rapid power use.
Activity Graph Bars showing when your screen was on versus when it was off. High activity when your screen was off—a clear sign of background tasks.
Battery Usage by App (%) A ranked list of apps and how much of the total battery they used. Apps with high percentages that you rarely use or that say "Background Activity" underneath.

Think of this screen as your main tool for finding battery problems before they get out of hand.

Spotting a Problem App in Action

Let’s walk through a real-world example. Imagine you check your battery stats and see that a social media app you only opened for five minutes somehow used 25% of your battery. Right under the app's name, you see the words "Background Activity." This is your proof.

This tells you the app was running constantly in the background, probably getting new content, tracking your location, or doing something else you never asked it to. This isn't normal usage; it's a problem app taking over your power.

Once you’ve found a power-hungry app, you've got a few options. You can go into its specific settings to turn off Background App Refresh or limit its access to Location Services. If that doesn't fix it, sometimes just deleting and reinstalling the app can clear up a bug that was causing the drain.

Ultimately, this simple screen gives you all the evidence you need to make smart choices and keep your iPhone's battery healthy.

Common Questions About iPhone Battery Life

Close-up of a hand touching an iPhone screen displaying battery settings and a usage graph.

Even after learning about all the best practices, you probably still have a few questions. That's totally normal. Let's answer some of the most common concerns people have about their iPhone's battery so you can feel confident you're doing the right thing.

Does Closing Apps Really Save Battery Life?

This is one of the biggest debates in the iPhone world, and the truth might surprise you. Apple's official answer is a clear no—you should only force-quit an app if it’s frozen or not working right. The apps you see when you swipe up are mostly just paused, not actively draining your battery.

Now, there is a small exception. If an app is acting up and running in the background when it shouldn't, closing it will absolutely help. You can usually find the problem app by checking your battery usage in Settings. But for most of us, constantly swiping away every app is not only pointless but can actually use more battery, since the phone has to restart them from scratch every single time.

Will Using Low Power Mode All The Time Harm My Battery?

Not at all. Think of Low Power Mode as a perfectly safe way to get more juice out of your battery whenever you need it. It won't cause any physical damage to the battery's health, whether you turn it on at 90% or 20%.

Low Power Mode just temporarily turns down a few features that aren't essential. It reduces background app updates, tones down some fancy visuals, pauses automatic downloads, and might limit 5G. The only "catch" is a slight dip in performance, but it's a fantastic tool for saving power when you need it.

What Is Optimized Battery Charging And Should I Use It?

Yes, absolutely. If you do nothing else, make sure Optimized Battery Charging is turned on. This clever little feature learns your daily routine to reduce the time your battery spends sitting at a stressful 100% charge.

For instance, if you plug your phone in overnight, it will quickly charge to 80% and then just… wait. It smartly holds off on charging that final 20% until just before you usually wake up. This simple delay makes a huge difference in slowing down battery aging over time.

This is one of the most effective ways to protect your battery without lifting a finger. You can check that it's active by heading to Settings > Battery > Battery Health & Charging. Learning how to check battery health is a great first step to understanding what's going on inside your device.

Why Does My Battery Drain So Fast After An iOS Update?

If you've noticed your battery life gets worse right after a major software update, don't panic. Your battery hasn't suddenly failed. Your iPhone is just working overtime in the background, handling a bunch of one-time tasks.

It's busy with things like:

  • Re-organizing all your files for the search feature.
  • Scanning your entire photo library for new features.
  • Re-learning how to manage the battery itself.

This intense background work can last anywhere from a few hours to a day or two, making the phone run warmer and use more power. The best thing you can do is be patient. Keep it plugged in when you can, stay on Wi-Fi, and just let it finish its job. Your battery life should return to normal within a couple of days.


If you're serious about taking your battery management to the next level and want to automatically use healthy charging habits, Chargie can help. It's a smart little device that stops charging at a level you set, protecting your battery from the stress of sitting at 100% overnight and greatly extending its lifespan. You can learn more about taking control of your charging at https://chargie.org.

chargie-logo

Chargie is a smart charging device designed to extend the lifespan of your phone's battery by limiting overnight charging.

Company
Lighty Electronics SRL
42 Viorelelor st
305500 Lugoj, Romania
EU VAT: RO35245011
Lighty Gadgets LLC
1309 Coffeen Avenue Ste 1200
82801 Sheridan WY
USA

© 2019-2024 Lighty Electronics SRL. All Rights Reserved.

Add to cart